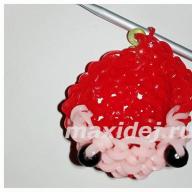
To work you will need:
- 3 skeins of Mohair Delikate Nako yarn, 100g/500m (2 main colors and 1 contrasting color for finishing),
- hook number 3.
Description of crocheting a scarf "Clouds"
The scarf consists of a main stripe and a band. We knit the base according to the pineapple pattern, slightly changing the edge.
1. We cast on a chain of 15 chain loops (CH), make 3 lifting loops and in the 15th chain loop we knit 2 double crochets 2ST/CH, 4VP and in the 7th VP of the chain we knit ST/CH+4VP+ST/CH . We make another 4 VP and in the 1st VP of the previous row we knit 2ST/CH+VP+ST/CH, then we knit according to the “pineapple” pattern until our base reaches a length of 120-140 cm (Fig. 1).
2. We finish the base with a zero row of “pineapple”, make a lifting loop and knit a row with single crochets (ST/BN) (Fig. 2).
3. Without cutting the thread, we cast on 5 VP and using a connecting post (SS) we pick up the VP of lifting the previous row (we switch to tying). We repeat the arches from 5VP along the entire perimeter of our scarf (Fig. 3). 
4. We knit the last arch from 2VP + ST/CH, closing our arch in the center (Fig. 4,5).
5. Next, we knit 9ST/CH into the first arch of the previous row, SS pick up the second arch of the previous row, cast on 5VP and SS we hook the 3rd arch of the previous row (we get a fan from 9ST/CH and an arch from 5VP), continue to knit fans and arches along the entire perimeter (Fig. 6).
6. We close the last arch of the binding (or “fan”) and continue tying, knitting our “fans” at the base of each ST/DC along ST/DC + VP, 9, ST/DC we hook to the arch of the previous row. We repeat the “fans” in a circle (Fig. 7,8). We close the last “fan” into the arch (Fig. 9). We tie the resulting “fans” from ST/CH+VP again with arches from 5VP, catching them SS to VP (Fig. 10, 11). We repeat the tying with fans (Fig. 12,13).
7. We start contrasting binding, change the thread and continue our knitting with 5VP arches along the entire perimeter of the scarf (Fig. 14).
8. This is what the edge of the scarf looks like with and without a contrasting trim, close the last arch, fasten and cut the thread (Fig. 15).
The “Clouds” scarf is ready, you can wear it both as a “jabot” scarf and as a turban (for a turban you need a small brooch to secure the edges of the scarf). 
I invite all knitting lovers to remember the kids they know and knit for them a simple, but so bright, educational and, most importantly, safe module, which I call “Rainbow”. To work, you will need yarn in a wide variety of colors and, first of all, all the colors of the rainbow: red, orange, yellow, green, blue, indigo and violet. For the star and month, you can use any color you want.
Legend:
VP - air loop
CC – connecting post
Sc – single crochet
Psbn – half crochet single crochet
Increase - you need to knit 2 single crochets in one loop.
Decrease – you need to knit 2 single crochets together.
VZZS - knit behind the back wall of the loops.
2 (3) dc in 1 loop - in one loop you need to make a double or triple increase using double crochets.
(..number..) – in brackets, at the end of each row, the final number of loops in the row is indicated.
Center (2 parts)

Knit 8 sc into a slip stitch, then knit 3 rows, 6 even increases in each. In the 5th row, continue crocheting sc, there should be 30 loops in the circle. In the 6th row, increase every 3rd stitch and finish the row with a single crochet. Embroider a smile and eyes on one piece.
Rays

Place the two pieces together, wrong sides facing each other. When knitting the rays, you will simultaneously need to connect two parts together and stuff them. Attach a thread, 1 ch, (skip a loop, 3 dc in 1 loop, 2 ch, ss in the base of the chain, 2 dc in the same loop, ss), then repeat everything written in brackets in a circle. For hanging, tie a chain of ch to the required length.

Row 1: Knit 5 sc in a slip stitch
Row 2: 2 sbn, increase, 2 sbn (6)
Row 3: 2 sc, 2 increases, 2 sc (8)
Row 4: (2 sc, increase) twice, 2 sc (10)
Row 5: sc and dc in 1 loop, dc, 3 sc, increase, 2 sc, dc, sc and dc in 1 loop (3)
Row 6: (inc, 4 sc, inc), sc, inc, 4 sc, inc (17)
Row 7: 2 increases, 5 sbn, increase, sbn, increase, 5 sbn, 2 increases (23)
Row 8: 2 inc, 8 sc, inc, sc, inc, 8 sc, 2 inc (29)
Row 9: increase, sc, increase, (5 sc, increase) four times, sc, increase (36)
Row 10: (inc, 6 sc) twice, (inc, sc) twice, sc, inc, sc, (inc, 6 sc) twice, inc (44)
Row 11: (inc, 5 sc) twice, inc, 8 sc, inc 2, 8 sc, inc, (5 sc, inc) twice (52) Fold the piece in half and stuff lightly.
Row 12: 2 ch, sc in the 2nd loop from the hook, sc in the joining place, then knit the details on both walls: sc, increase, 4 sc, increase, 16 sc, 2 increases. Embroider eyes and a smile, tie a chain for hanging.
(2 parts)

Knit 10 sc into a slip stitch and connect the first and last sc with a connecting stitch. The rays of the star are knitted at once: 5 ch, sc in the 3rd loop from the hook, 2 sc down the chain, skip the joining loop and the next loop, sc, (5 ch, sc in the 3rd loop from the hook, 2 sc in chain, skip a loop, sc) repeat 4 times, you should get 5 rays. The next row is knitted along the rays: ch, (skip a loop, 2 sc, at the top of the beam: sc, 2 ch, sc in the same loop, 2 sc in the loops of the previous row, skip a loop between the rays) repeat 4 times. Similarly, tie the second part of the star, then connect them together, lightly stuffing the star, tie a chain for hanging.

Cloud(2 parts)
Row 1: 10 sc in slip stitch (10)
Row 2: 5 increases (20)
Row 3: (2 sc, increase) repeat 6 times, 2 sc (26)
Row 4: sc around

Row 5: (2 sc, increase) repeat 8 times, increase, sc (35)
Row 6: mark the beginning of the row (pull a contrasting thread through the loop), skip 1 loop, 4 dc in 1 loop, dc, (2 dc in 1 loop) twice, hdc, (inc, 2 dc) four times, dc, 3 dc in 1 loop, 2 dc in 1 loop, dc, hdc, ss, ch, turn knitting and knit in reverse side on the 6th row (see photo): sc and hdc in hdc of the previous row, 3 dc in 1 loop, 2 increases, ss, break thread.
Row 7: attach the thread to the 4th loop from the beginning of the 6th row, focusing on the mark: 2 ch, 3 dc, 5 dc in 1 loop, skip a loop, sc, sl, 14 sc, sl, break the thread.
Row 8: Join the yarn at the beginning of the 7th row, just after two chs: ch 1, skip a loop, 5 dc in 1 loop, sl st, break yarn.
Knit the second part in the same way. Fold both parts and tie them together using a sc, without breaking the thread, tie a chain for hanging.

Purple
Tie 30 chains, connect them into a ring. Further ch in the rows do not count and do not knit in them.
Row 1: (4 sc, inc, (2 sc, inc) twice, 4 sc, ch) twice (36)
Row 2: (5 sc, increase, (3 sc, increase) twice, 4 sc, ch) twice (42)
Blue
Row 1: VZZS: (4 sc, increase, (3 sc, increase) three times, 4 sc, ch) twice (50)
Row 2: (6 sc, increase, (5 sc, increase) twice, 6 sc, ch) twice (56)
Blue
Row 1: VZZS: (5 sbn, increase, 4 sbn, increase, 6 sbn, increase, 4 sbn, increase, 5 sbn, ch) * 2 (64)
Row 2: (8 sc, increase, (6 sc, increase) twice, 9 sc, ch) twice (70)
Green
Row 1: VZZS: (13 sbn, increase, 7 sbn, increase, 13 sbn, ch) twice (74)
Row 2: 37 sc, ch, 37 sc, ch (74)
Yellow
Row 1: VZZS: (10 sc, increase, (7 sc, increase) twice, 10 sc, ch) twice (80)
Row 2: (14 sc, inc, 10 sc, inc, 14 sc, ch) twice (84)
Orange
Row 1: VZZS: (12 sc, increase, (8 sc, increase) twice, 11 sc, ch) twice (90)
Row 2: (10 sc, increase, (9 sc, increase) twice, 14 sc, ch) twice (96)
Red
Row 1: VZZS: (three times, ch) twice (102)
Row 2: (25 sc, increase, 25 sc, ch) twice (104)

Fold the resulting rainbow part in half, the air loops should fall on the folds. Using the resulting shape, cut out a frame from plastic (I used a regular plastic bottle 2 liters) and place it inside the rainbow, connect, tie the edges together using sc or connecting posts. Attach the sun, month, star and cloud to the rainbow, make a loop for hanging on the rainbow itself.
The work is quite complex and painstaking, but it is worth it.
We will need:
Threads in rainbow colors (red, orange, yellow, green, blue, indigo, violet), also black, white, lilac, dark blue. You need very little thread - a suitable way to “attach” the leftovers
- a hook that fits the size
- padding polyester for stuffing
Legend:
RLS– single crochet
ETC– 2 sc in one loop
UB– 2 loops in 1 sc
VP- air loop
PSSN– half double crochet
CCH- double crochet
S2H- double crochet stitch
SS– connecting post
Let's start knitting rainbow: Important! In each row we do not count the air loops (I highlighted them in the description) and do not knit them!
Purple color:
Having measured the tail about 15 cm, we knit a chain of 30 VPs, close it in a ring
1 r: (4 RLS, PR (2 RLS, PR)*2 times, 4 RLS, VP)* 2 times(36)
2 r: (5 RLS, PR (3 RLS, PR) * 2 times, 5 RLS, VP)* 2 times(42)
Change the color to blue
3 r: (4 RLS, PR (3 RLS, PR) * 3 times, 4 RLS, VP)* 2 times(50)
4 r: (6 RLS, PR (5 RLS, PR)*2 times, 6 RLS, VP)* 2 times(56)
Change the color to blue, knit behind the back half of the loop:
5 r: (5 RLS, PR, 4 RLS, PR, 6 RLS, PR, 4 RLS, PR, 5 RLS, VP)* 2 times(64)
6 r: (8 RLS, PR (6 RLS, PR)*2 times, 9 RLS, VP)* 2 times(70)
Change the color to green, knit behind the back half of the loop:
7 r: (13 RLS, PR, 7 RLS, PR, 13 RLS, VP)* 2 times(74)
8 r: 37 RLS, VP, 37 RLS, VP(74)
Change the color to yellow, knit behind the back half of the loop:
9 r: (10 RLS, PR (7 RLS, PR)*2 times, 10 RLS, VP)* 2 times(80)
10 r: (14 RLS, PR, 10 RLS, PR, 14 RLS, VP)* 2 times(84)
Change the color to orange, knit behind the back half of the loop:
11 r: (12 RLS, PR (8 RLS, PR) * 2 times, 11 RLS, VP)* 2 times(90)
12 r: (10 RLS, PR (9 RLS, PR)*2 times, 14 RLS, VP)* 2 times(96)
Change the color to red, knit behind the back half of the loop:
13 r: ((15 RLS, PR)* 3 times, VP)* 2 times(102)
14 r: (25 RLS, PR, 25 RLS, VP)* 2 times (104), do not cut the thread.
The photo shows a white dotted line from VP, aka the fold line.

Fold the rainbow along the fold line, sew the bottom edge with a purple tail using an over-the-edge seam.

We tie a red thread around the top edge, stuffing as we go. Rainbow ready.

For sunshine knitting yellow thread two parts:
1 r: 6 sc in the ring (6)
2 r: 6 PR (12)
3 r: (1 RLS, PR)*6 times (18)
4 r: (2 RLS, PR)*6 times (24)
5 r: (3 RLS, PR)*6 times (30)
6 r: (4 RLS, PR)*6 times (36)
7 r: (5 RLS, PR)*6 times (42)
8 r: (6 RLS, PR)*6 times (48)
9 r: (7 RLS, PR)*6 times (54)
10 r: (8 RLS, PR)*6 times (60)
11-12 r: 60 RLS, cut thread.
Fastening orange thread, knit rays, connecting both parts, stuffing during knitting.
1 r: *SC, SC, 3 C2H in 1 loop, SC, SC*, repeat from * to * to the end of the row
2 r: * 3 sc, knit at the top (sc, picot from 3 ch, sc), 3 sc *, repeat from * to * along each ray.

Nose And eyes:
Yellow thread:
1 r: 6 sc in the ring (6)
2 r: 6 PR (12)
3-4 r: 12 RLS
5 r: 6 UB, cut the thread, leaving a tail for sewing, stuff.
Black thread:
1 r: 6 sc in the ring (6), change the thread to white
2 r: 6 PR (12)
3 r: 2 sc, hdc, 2 hdc in 1 loop, hdc, 7 sc (13), cut the thread, leaving a tail for sewing.

We sew on the nose and eyes, embroider a smile. Sun ready.

For clouds knitting blue thread 4 such circles:
1 r: 6 sc in the ring (6)
2 r: 6 PR (12)
3 r: (1 RLS, PR)*6 times (18)
4 r: (2 RLS, PR)*6 times (24)
5 r: (3 RLS, PR)*6 times (30)
6 r: (4 RLS, PR) * 6 times (36), cut the thread, leaving a tail for sewing.
And 2 such circles:
1 r: 6 sc in the ring (6)
2 r: 6 PR (12)
3 r: (1 RLS, PR)*6 times (18)
4 r: (2 RLS, PR)*6 times (24)
5 r: (3 RLS, PR)*6 times (30)
6 r: (4 RLS, PR)*6 times (36)
7 r: (5 RLS, PR)*6 times (42)
8 r: (6 RLS, PR) * 6 times (48), cut the thread, leaving a tail for sewing.

Sew the clouds together based on the photo:

We attach a white thread to the corner of the junction of the middle and outer cloud, tie the edge of the middle cloud, !!without grabbing the second part!!

Next, we combine both parts with the wrong sides and knit, grabbing the edge of both:

We knit until the middle cloud, then again we knit only one piece at a time, cut the thread, leaving a tail for sewing. We stuff it loosely. This is what you should get:

Sew the cloud to the sun by inserting the bottom edge of the sun inside the cloud

Droplets, 2 pieces dark blue thread, stuffing in the process:
1 r: 6 sc in the ring (6)
2 r: 6 PR (12)
3 r: (1 RLS, PR)*6 times (18)
4 r: (2 RLS, PR)*6 times (24)
5 r: (3 RLS, PR)*6 times (30)
6 r: (4 RLS, PR)*6 times (36)
7-10 r: 36 RLS
11 r: (16 RLS, UB)* 2 times (34)
12 r: (15 RLS, UB)* 2 times (32)
13 r: (14 RLS, UB)* 2 times (30)
14 r: (13 RLS, UB)* 2 times (28)
15 r: (12 RLS, UB)* 2 times (26)
16 r: (11 RLS, UB)* 2 times (24)
17-18 r: 24 RLS
19 r: (2 RLS, UB)* 6 times (18)
20-21 r: 18 RLS
22 r: (4 RLS, UB)* 3 times (15)
23-24 r: 15 RLS
25 RUR: (3 RLS, UB)* 3 times (12)
26-30 r: 5 RLS, UB, 4 RLS, PR (12)
31 r: 12 RLS
32 r: 6 UB, pull, cut thread, hide
Embroider eyes, eyelashes and smile

Ladybug, 2 pieces:
Bottom part black thread:
1 r: 6 sc in the ring (6)
2 r: 6 PR (12)
3 r: (1 RLS, PR)*6 times (18)
4 r: (2 RLS, PR)*6 times (24)
5 r: (3 RLS, PR)*6 times (30)
6 r: (4 RLS, PR) * 6 times (36), cut the thread.
Top part red thread:
1 r: 6 sc in the ring (6)
2 r: 6 PR (12)
3 r: (1 RLS, PR)*6 times (18)
4 r: (2 RLS, PR)*6 times (24)
5 r: (3 RLS, PR)*6 times (30)
6 r: (4 RLS, PR)*6 times (36)
7-8 r: 36 RLS, do not cut the thread, connect the upper and lower parts of the RLS, stuffing in the process.
Black head thread:
1 r: 6 sc in the ring (6)
2 r: 6 PR (12)
3-4 r: 12 RLS, cut the thread, leaving a tail for sewing, stuff.
Sew the head to the body.

Embroider stripes and dots on the back

Butterflies, 2 pieces:
Begin lilac thread:
1 r: 5 VP, close into a SS ring
2 r: 3 VP, (2 VP, 2 SSN)* 7 times, 2 VP, SSN, SS
3 r: 3 VP, under the arch of 2 VP we knit - 2 Dc, 3 VP, 3 Dc; (3 dc, 3 ch, 3 dc) - in the next 7 arches, ss
We tie white a thread, lilac we don't trim
4 r: VP, knit under the arches of 3 VP: (6 Dc, VP, 6 Dc, between the fans we knit RLS)* 8 times, SS, white fasten the thread, cut it, then knit it again lilac
5 p: tie the edge of the RLS. This is the detail we got
Chic blanket from Pilipyan.
Used: Spring yarn 100% cotton, blue 450 g and white 250 g. Knitting needles No. 3.5. Size 90 cm by 90 cm.
The blanket is knitted from several skeins of yarn at once. In places where the color changes (blue to white and back), you will need to intertwine the thread and then take the thread from a new skein. I'll explain more later.
We start knitting with a set of loops. We cast on 200 sts. Then we knit with this pattern:
1 rub. : K1, P1*continue
Row 2: purl 1, knit 1* continue
So we knit a 6 cm edge. Then we continue the edge with this pattern, 18 stitches at the beginning and 18 stitches at the end of the fabric. In the rest of the blanket we begin to knit a pattern with clouds. Cloud diagrams are attached. A simple piece of paper roughly shows how we marked the clouds, one after another. You can arrange the clouds differently as you see fit. The very first clouds are knitted immediately in the first row after completing the edge.
If the cloud does not enter completely and goes to the very edge near the side border, then it must be knitted partially according to the pattern, and then the edge as described above.


Change of threads. We knit with blue thread until the beginning of the cloud according to the pattern. When you need to knit a cloud, tie a white thread to a blue knot. This needs to be done very close to the knitting needle. Here we leave the blue color and then knit only white. When the required number of white loops have been knitted, take a blue thread from a new skein, secure it again with a knot (remove the white one from the work) and now knit the blue one according to the pattern. So we knit the entire row; with each change of thread, we take the next color from the new skein. When rapport begins, we will have 5 blue and 4 white involved.
Now we knit the next row (purl). First we knit the border in blue, and when we start knitting the cloud, the thread must be taken from the white skein from which we started knitting this cloud. It is important to weave these threads correctly when changing colors, otherwise there will be a hole in this place. When performing a purl loop in the classic way White color you need to put it on top of the blue one and knit one loop, then remove the blue thread from your finger and knit only with white ones. And so always in the purl row, when changing colors, you need to put a new thread on top of the working thread and knit 1 loop. This is how we knit the entire row. We change colors in a timely manner. It is advisable to carefully monitor all the skeins so that they do not get too mixed up with each other.
Next will be the front row, where we will still knit each cloud and each blue part of the blanket from different skeins of yarn. In persons In a row, when changing colors, you need to put a new thread under the working thread, knit 1 loop and put aside the thread that was used. Knit only in a new color. When knitted in this way, the wrong side of the product looks quite beautiful.
We knitted 1 row of clouds using rapport. Now we cut the white threads. We leave the ends so long that we can hide it securely in our blanket. Excess blue threads also need to be cut off. We leave only 1 thread, which we knit between the rapports with the clouds. Next, we knit all the repeats from the clouds in the same way. When we have knitted to a height of approximately 84 cm (we need the last cloud to fit completely in height), we stop knitting the pattern and finish our product with a pearl knitting of 6 cm (described above). Don't close it tightly. We hide all the ends. Here you will have to try so that the tips are not very noticeable and at the same time are well fixed. All is ready!


I suggest crochet such cheerful sheep and clouds. They will delight your baby with a variety of textures (the sheep’s body is knitted with a pattern of elongated loops, and the legs and head are smooth). In addition, these toys can always be removed from the cradle and the baby can play with them to his heart's content.
To hang it on the crib you will need:
- Yarn "Chamomile" blue and white flowers(in two additions)
- Yarn "Lotus" blue and white colors
- Hook No. 3, No. 2.5 and No. 1
Legend:
- V.p. - air loop
- Art. b.n. – single crochet
Description of Crochet Cloud
Using a blue thread we cast on 6 vp.
1st – 4th row – knit st. b.n., add 1 tbsp to the last loop. b.n.
Row 5 – knit st. b.n., at the end of the row we decrease 6 loops
6th row - knit st. b.n., at the end of the row we decrease 5 loops
7-8 row - knit st. b.n., add 1 tbsp to the last loop. b.n.
9-10 row - knit st. b.n.
11th row - knit st. b.n., at the end of the row add 1 loop and 4 v.p.
Row 12 - knit st. b.n., at the end of the row we do not tie 1 loop
Row 13 – we do not knit the first loop, then we knit st. b.n., add 1 tbsp to the last loop. b.n.
Row 14 - knit st. b.n., at the end of the row we do not tie 1 loop
15-16 row - knit st. b.n., add 1 tbsp to the last loop. b.n.
Row 17 - knit st. b.n., at the end of the row we do not tie 1 loop
Row 18 - we do not knit the first loop, then we knit st. b.n.
Row 19 - we do not knit the first loop, then we knit st. b.n., tie the last 3 loops
Row 20 - knit st. b.n., at the end of the row we do not tie 1 loop
21st row - we do not knit the first loop, then we knit st. b.n.
Row 22 - do not knit the first loop and do not knit the last 3 loops
Row 23-24 - do not knit the first loop and the last loop
For one cloud, we crochet two parts and tie them with white thread.
For the loop for the cloud pendant - knit 10 ch. and close them in a ring
For the second cloud, take the main color white, and make the trim blue.
Description of crochet sheep.
Sheep head.
Using a blue thread, crochet No. 1, cast on 3 chain stitches and connect them into a ring.
1st row – knit 7 tbsp. b.n. in the center of the ring
2-3 row – add 7 loops
4-5 row – knit st. b.n.
Rows 6-8 – decrease 3 stitches
Row 9 – change the thread to white and knit st. b.n., knitting 2 tbsp into each loop. b.n.
Row 10 – knit the entire row with elongated loops
11th row - knit st. b.n.
Row 12 - knit the entire row with elongated loops
Row 13 - knit st. b.n.
Row 14 - knit the entire row with elongated loops
Row 15 - knit st. b.n., decreasing 7 loops
Row 16 - knit the entire row with elongated loops
Row 17 - knit st. b.n., decreasing 7 loops
We stuff the sheep's head and tighten the remaining loops.
Sheep body.
Using white thread, crochet number 1, cast on 3 ch. and connect them into a ring
1st row – knit 7 tbsp. b.n. to the center of the ring
2nd row - add 7 loops
3rd row - knit the entire row with elongated loops
Row 4 - knit st. b.n., adding 7 loops
Row 5 - knit the entire row with elongated loops
6th row - knit st. b.n., adding 7 loops
Row 7 - knit the entire row with elongated loops
Row 8 - knit st. b.n.
Repeat rows 7 and 8 five times
Row 19 - knit st. b.n., decreasing 7 loops
Row 20 - knit the entire row with elongated loops
Repeat rows 19 and 20 two more times
We stuff the body of the sheep and tighten the remaining loops.
Sheep feet
Using blue thread, crochet number 2.5, cast on 3 ch. and connect to the ring
1st row – knit 7 tbsp. b.n. in the center of the ring
2nd row – knit st. b.n. adding 7 loops
3-6 row - knit st. b.n.
Row 7 - knit st. b.n. decreasing 7 loops
Stuffing your leg
8-20 row - knit st. b.n.
Stuff to the end and pull off the remaining loops.
We knit 3 more legs.
Sheep ears.
Using blue thread, crochet number 2.5, cast on 7 ch.
Row 1-2 - knit around the chain, adding 3 loops at turns.
Assembling a knitted sheep
We sew the ears to the head, sew on the eyes - beads, sew 4 knitted legs to the body and connect the body to the head.
For the pendant we cast on 10 ch. and collect them into a ring, sew the pendant to the neck of the knitted toy
Such a mobile helps develop fixation of gaze on moving objects. The toy develops visual, auditory and tactile abilities in children.
To develop the baby’s tactile sensations, toys can be filled not only with padding polyester, but also with cereal.