There are many master classes on this topic, but I will show you how I do it and share some secrets (although this secret was spotted on the Internet, but I modernized it for myself). Yesterday I sewed a longsleeve for my youngest daughter (Ottobre 4/2012, model 16, size 116) and photographed the main moments of the process.
So, we will need:
- scraps of fabric from which the applique will be made, in my case it is knitwear;
- glue web;
- baking paper (you can buy it in any supermarket, it is sold in rolls and also in sheets, it comes in white and brown);
- a sketch of a drawing (magazine or found on the Internet and printed in a mirror image);
- fabric stabilizer (non-woven tear-away non-woven fabric, whatever you have on hand);
- felt-tip pen, self-disappearing or washable with water;
- pencil for transferring the design onto fabric (I have Prim);
- sewing machine;
- threads to match our project;
- grosgrain ribbons or ribbons (for my project);
- and of course, the product itself (in front of) our future product
We need it to prevent the cobwebs from sticking to the iron. Considering that German fleece-fix for appliqués is very expensive, I had to invent my own fleece-fix.
I'll tell you about two manufacturing methods:
1-way
- B heretical glue web, which goes to the meter (wide 90cm), cut off approximately A-4 formats, also cut off the baking paper - two sheets, and make such a “sandwich” - a baking sheet, then a web and again a baking sheet, iron it all (the temperature of the iron should be low, somewhere around value 2).


And, voila, you get fleecefix (double-sided paper for appliques).
- Find the drawing, print it out (don’t forget the drawing must be a mirror image), I took it from a magazine:

- Redraw with a simple pencil (you can’t use a pen, it might smudge the fabric) onto this paper. A big plus of this paper is that it can be placed on a drawing and redrawn.

- Remove the bottom layer of paper - there should be a sticky web on the top layer of paper (with a design) (if you maintained the temperature of the iron correctly). And with a heated iron, glue this sheet (with the pattern) onto the scraps of fabric needed for the applique:

In this case - on pink interlock (knitwear).
 2-way
2-way- You can use another way to make an applique - take a piece of fabric, cut the web and baking paper to the size of the fabric, and transfer the design onto paper. And again you make a “sandwich”: glue the fabric on the wrong side, the web and baking paper with a pattern and iron it on (here you don’t need to maintain the temperature). Cut along the contour and tear off the protective paper from the fabric

My project requires a ribbon for the horse's mane. I took three colors of grosgrain ribbon

Now we mark the location of the appliqué on the shelf (the horse, for this we need the outline of the horse) - we apply it to the fabric and outline it with a special felt-tip pen.

On the wrong side we glue or baste the stabilizing material.

Now we sew ribbons of different colors along the intended line.

Then we glue our horse. And here we need a pencil for transferring onto the fabric - you can do without it and draw the necessary lines by hand, but it’s convenient with it. I can tell you how to use it, if you have it - on the same outline of the horse that we removed from the fabric, we apply it again to our drawing and draw the necessary lines (thickly) with this pencil. Then we heat the iron (value 3), put our outline with the drawn lines on our horse, and press the iron on top and press it well with the iron and the lines should be imprinted, like this

Now we grind our applique along the contour.
Some nuances: I used a transparent foot and a knitting needle to sew the appliqués:

I also have a knee lift in my car, I tried to take a photo, it turned out to be a bad photo, but you can see it

It is needed, there is one on industrial machines to lift the foot without hands. I can't live without him anymore. You quickly get used to good things. But of course you can do it without it, but more skill is required.


According to my project, I now need to make a bridle - I used a decorative stitch and a triple stitch.

I glued and stitched along the contour the necessary details - diamonds and a feather.
In terms of applique, that’s probably it!
But I photographed the whole process, so I’ll tell you a little and show you about some of the sewing processes.
For example, about silicone tape - it turns out that it can be used not only to strengthen the shoulder seams from stretching, but also used for assembly (in my case, sleeves)

When stitching the tape, you need to pull it a little by hand to get an even gather.
I’ll tell you a little about the settings and use of the tri-fold edging on a cover machine when sewing this long sleeve and more.
Did you know that when sewing thin and medium weight knitwear, you also need to adjust the presser foot pressure, usually in the standard it is 10-12 mm, but you need to set it like this
Motifs for appliques can be bought in a store, created on your own, or cut out part of the pattern from fabric.
How to make a motive
Draw the motif directly on the wrong side of the fabric in mirror image using a fabric marker (). Place a line along the outline of the motif.Or draw the motif on paper and transfer its outline and internal details directly to the front using a disappearing marker.
Tip: to teach your child to sew, start with appliqué. Let him draw it with his own hands, and then practice making stitches, you can use it as a basis.

How to stitch an applique
To prevent the applique fabric from fraying, iron a spacer to it from the wrong side, for example, interlining H 180. Baste the applique fabric to the product from the front side to a pre-marked place. Place a fine zigzag stitch along the outline of the motif. From the right side, cut the fabric with sharp scissors () applique close to the zigzag stitch.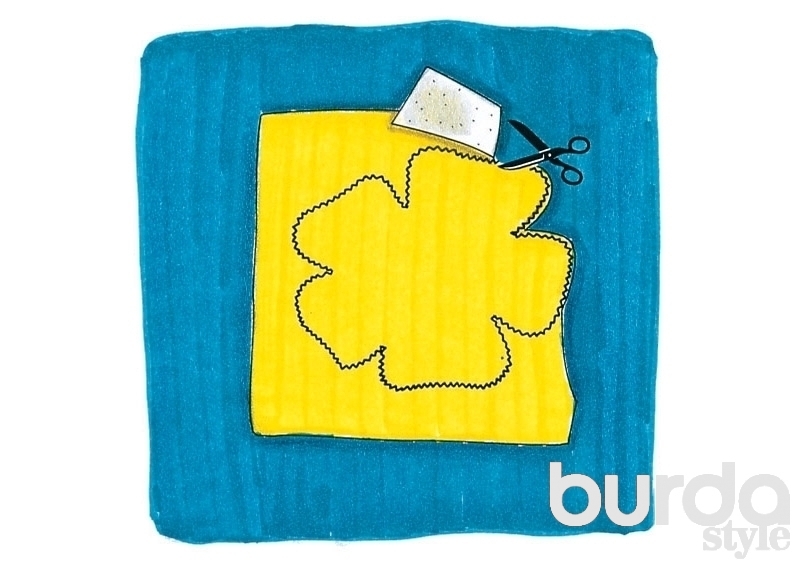
Then stitch the edge of the motif again with a dense zigzag stitch. If you want the edge of the motif to look fuller, pass the thread through the finishing stitch.

If you do not want to stitch off the edge of the motif, you can outline it with a special outline paint for silk-screen printing. This will not only give relief to the edge of the motif, but will also protect it from falling off.
Important: if several motifs are sewn on top of each other, then you need to start from the bottom, as, for example, in.

Online motives
Drawings for appliqué motifs are easy to find on the Internet and can also be downloaded from our website. And these are not only hearts and stars, but also lovely butterflies in a variety of wardrobe details - skirts, short overalls, scarves. Moreover, such appliqués do not have to be sewn along the outer contour; you can sew only the body, and grab the wings in several places with hidden stitches by hand. The combination of flat and volumetric large flowers looks avant-garde and non-standard - you can make them following the description in. Picturesque and bright applications maple leaves and other floral motifs in the Art Nouveau style can be found in the master class on organza appliqués. They will decorate not only clothes, but also many home accessories.
For children's clothing on our website there is an applique of a cunning fox and a funny crab.

Applique as part of a fabric pattern
If you want to use part of a pattern of some fabric as a motif for appliqué, cut out the motif with a large brim and iron a non-woven interfacing to it from the wrong side. Baste the motif to the selected location on your product or sew it with a zigzag seam. Cut the fabric that extends beyond the edge of the motif close to the zigzag stitch. Then stitch the edge of the motif again using a zigzag stitch, optionally passing a thread through the seam.Advice: if the fabric does not fray, then you can do without stitching along the edges, as in.

Tulle appliques
Graceful translucent appliques are obtained using tulle. For a tulle applique, draw the motif on the front side of the piece and baste the tulle on the back side. Sew the contours of the motif on the front side using a dense zigzag stitch, while laying a thread along the edge of the motif so that it acquires volume. Cut the fabric inside the motif close to the zigzag stitch. Do not cut through the tulle.
Appliqués are made from other transparent fabrics in a similar way, for example, as in.

Lace applique
It is done quite simply. Sew the motif cut from lace fabric onto the fabric from the front side using a dense zigzag stitch. Cut the fabric underneath the motif close to the stitching.
A lace applique can also be sewn on manually with hidden stitches, for example, as was done by , who used woolen lace-braid to trim a coat: on the sleeves, back, and lower part of the skirt. Zlata cut out 2 different lace motifs and arranged them on the finished coat.

Applications with unusual effects
If you like interesting, unique design, then use non-trivial materials for appliques: fur, fabrics with a mirror coating, metallic fabrics, with embroidery on mesh, crocheted, as well as leather and suede.In a master class on sewing a rectangular floor pillow, soft brown suede appliqués are sewn in the shape of a zebra skin pattern. Such a floor pillow will immediately give the interior a noble, exotic touch. And ovals cut from the remains of leather are sewn onto the fabric not along the contour, as described, but in the middle, imitating the vein of a leaf. From the outside, this ottoman appears to be strewn with fallen autumn leaves.

Appliqué on fabric is the creation of original ornaments, patterns and designs that are attached by sewing to various items of clothing. Today we’ll look at how to make applique on fabric with your own hands.
There are two methods that are used when attaching parts to make an appliqué:
- Sewing;
- Gluing.
If you are making a painting from fabric, then in this case the second method is used. And if they are used as various decorations on clothes, then the first method. You can sew either manually or by machine. When making the applique itself, craftswomen use several color schemes and also use various techniques. Today we will give as an example several master classes on making applique for children.
Necessary materials
- Regardless of how complex your applique is, the materials in this skill are the same. You can use both natural and synthetic fabrics. You can combine smooth and shiny.
- Appliqués made from such noble fabrics as velvet or corduroy will also look beautiful.
- Of course, in this case you should not forget about convenience. The most comfortable material Felt is considered.
- If you are making a picture, then in this case the background should be much denser, and of course you should not forget that the background and the figures themselves must be in complete harmony with each other. It is also recommended to starch the fabric, because it will crumble less during processing. This applies only to natural types of fabrics. Synthetics do not need to be starched.
- If you use very thin material in the application, for example, silk, then it must be treated with edible gelatin and dried before work.
Cute sheep
- Non-woven fabric;
- Sintepon;
- Pieces of white fleece and beige colour;
- Sewing threads in white and beige;
- Beads;
- White satin ribbon;
- Scissors;
- Sewing pins;
- Sewing machine.
How to properly complete the application? Let's look at the step-by-step instructions.
Based on the template presented below, we draw our sheep on non-woven fabric. We cut it out.


After that, we place the cut piece on the padding polyester and cut it out, it is advisable to do this by leaving a little extra space on the padding polyester.

On the wrong side of the fleece white lay out the padding polyester and non-woven fabric, as shown in the photo.

Using sewing pins we fasten all the components together. And we stitch it on a typewriter.


We cut out the sheep, almost at the very line.

Now we are working with beige fleece. We pin and sew on the head and legs using a typewriter. The excess must be cut off.


Then we make a hat for the sheep out of white. Here's what happened:


Now let's do it machine stitching curl on the fur. Along the edge of the finished pattern, cut off the excess fabric.

Using a beige thread, machine stitch the mouth and folds on the legs. We make eyes from beads, and embroider the nose with black thread.

This concludes the master class.
Paper drawing
For work you will need the following tools and materials:
- Printed clown template;
- Various pieces of fabric (you can use various pieces and scraps of fabric);
- PVA glue;
- Glue stick;
- Crepe paper;
- Markers;
- Red wool thread;
- Scissors.
So, let's get to work.
First, let's prepare everything you need for work and put it on your desktop.

Cut out a clown from the printed sketch.

Glue it to the background. The background color can be any at your discretion.

We cut the red thread into small pieces and attach them to the place where the clown’s hair is located.

Deciding on the fabric for the hat. We outline it on the fabric and cut it out.


Glue the nose and hat to the clown.

Now we cut out the eyes, eyebrows, mouth and cheeks.

Let's attach them. Use felt-tip pens to draw on the eyes, you can add freckles, it will be more original and beautiful.

Take green crepe paper and cut out a 2.5 cm wide strip from it. Stretch it as shown in the photo. This will be the collar.

We attach it to our picture.

That's all, our clown is almost ready. It remains to make a small touch. We take wire and crepe paper in pink and green. We cut out a strip 1 cm wide from green paper and wrap it around a wire, and from pink shade make a flower. We attach it to the almost finished picture.

That's all, the application is completely ready.
We present to your attention templates for further work:


Video on the topic of the article
Fabric appliqués, which are made with your own hands from various scraps of fabric, can turn into a chic decoration for a rug, sofa pillow or baby blanket. But the question arises: how to properly make appliqués from fabric? Let's try to figure this out on our own.
In the photo of fabric appliqués you can see that the process of creating fabric appliques is quite simple, but at the same time an exciting activity.

The process of creating an applique from fabric
Let's present a master class on how to make an applique with your own hands, where we will try to create a bird ourselves from different scraps of fabric.

To make an applique from fabric, you need to use scraps of different fabrics. color range, as well as sewing threads that would match the colors of the patches. In addition, you will need a chalk, scissors and small beads.


The applique can be based on two main pieces of fabric. The main requirement is that they be tight. In this regard, many needlewomen recommend using felt. This will help make the application not only pleasant in appearance, but also to the touch.

Exist different ideas fabric appliques. We will choose the image of a bird sitting on a branch. This applique will be depicted on a sofa cushion.

According to the instructions, you need to take a large piece of fabric. It is important that it is face up. In turn, we turn the other scraps upside down and use chalk to mark the details of the future applique on it.

Details are obtained by cutting out shapes from thick sheets of paper. In our case, it will be a small bird on a branch. Next, we carefully cut out the shapes from the fabric along the contour that was marked earlier.

Collection of applications
So, let's proceed to the most important stage of creating an application - collecting the components of the future bird. First of all, a bright scarlet breast is sewn to the body of the fabric craft. The best way to do this is to use sewing machine, which places a chain stitch on the fabric.


The advantage of this type is the high strength of the craft, giving visual beauty to the creation. It is advisable to find the same threads for stitching.

If there is no machine, the seams are applied manually. To make the applique more expressive, experts recommend using a thicker thread than we are used to before.


Using a triangle ruler and other measuring instruments, we determine the place where it is advisable to place the central figure of the application. This is done against the overall background of the piece of fabric so that it looks symmetrical. Placing a bird on a single piece of fabric involves adding a fabric element in the form of a twig.

Adding volume to the figure
On the wrong side, a seam is formed in the form of an outline of a figure in the form of a bird and the branch on which it sits. We cut the seam with special care and fill the bird with cotton wool or other special soft filler. Then we carefully sew up the resulting cut with a hidden seam.


As a result of these actions, our bird significantly increased in size and became very soft. We again resort to using the iron, stroking the fabric appliqué.

We still need to sew on the beak and eye of the bird. If you have free time, you can embroider small branches next to big branch with a bird sitting on it. To do this, you can use braid or thick knitting yarn. The most important thing is that they match the tone of the main branch.


The beginner's guide requires us to add small beads or small branches. The result is bunches of rowan berries.


Thus, the fabric applique in the form of a bird on a rowan branch is completely ready. A pillow with this image will become a real decoration of the interior and give it a special touch. Existing templates and patterns for manufacturing will significantly simplify the work associated with creating such applications.
Photos of fabric appliques


Applique is a decorative process that is made by sewing or gluing an image onto fabric or paper. With the help of various motifs you can not only decorate things, but also hide small defects. In fact, the applique plays a decorative function, decorating a particular product. Some needlewomen try not to complicate their work and buy ready-made motifs in the store, but most craftswomen make the patterns themselves, cutting them out of fabric. After all, in this way you can bring your ideas to life.
Let's look at an example of how to make applique from fabric.
rainbow tree
If you don’t know what material is best to use for your work, then we recommend felt. It does not crumble, however, it is not suitable for summer clothes. Now we will tell you how applique is done on fabric; diagrams for the “Rainbow Tree” work are attached.
So, prepare the following materials:
- pieces of fabric of different colors;
- cardboard;
- pencil;
- scissors;
- needles and threads;
- web material.
Step 1. Any application begins with a blank cut out of cardboard.

Step 2. Place the blanks on the fabric and cut them out taking into account the hemming allowance. Sew the elements with a simple seam around the entire perimeter of the parts.

Step 3. Iron the details of the future composition together with the cardboard.


Step 4. As a result, you will get well-smoothed blanks like this.

Step 5. Place the details in the desired order on the item where the motif will be created.

Step 6. Glue the parts with web. This material allows you to glue fabric parts together. It is sold in any haberdashery store.

Step 7. Cut out similar applique parts from the web, but smaller in size.

Step 8. Iron all the parts together with the web, and it will quickly fix the composition.

Step 9. Since the elements have become motionless, they can be easily stitched.

Step 10. The result is a very beautiful rainbow tree.

A dog is performed in a similar way.

Check out another appliqué method.
Fabric applications. Schemes for work
We offer designs for applications. Print them out and use them in your work.


House made of scraps
Conscientious needlewomen do not throw away scraps of fabric, but create real masterpieces from them. For such craftswomen, an ordinary hobby turns into a source of income. They use scraps to make paintings that they frame. Using the example of a master class, we will tell you how to create a colorful painting depicting a house.

The following materials are required for work:
- linen fabric;
- wooden hoop;
- felt scraps;
- threads with a needle;
- pins;
- scissors;
- glue.
Step 2. Draw a template for the future painting on cardboard. It is advisable to use geometric shapes.
Step 3. Attach the blanks to the prepared felt and cut out the parts separately: a trapezoid for the roof, a large rectangle for the facade, two small rectangles for the windows, two cone-shaped parts for the window in the attic.
Step 4. Secure the main piece in the center of the fabric with a pin and sew it with a simple seam.
Step 5. Do a similar manipulation with other parts. See the proposed pictures for the order and arrangement of elements. Choose colors according to your taste.
Now you need to make flowers and petals. They are performed as follows:
Step 1. Cut out small circles from different pieces of felt.
Step 2. Combine two colors with each other.
Step 3. Cut out petals from green felt.
Step 4. Place the pieces on the fabric as shown in the picture. But you can experiment and arrange it as you wish. In other words, create your own composition.
Step 5. Sew all the elements with a small, neat stitch in the same way as you sewed on the house. The color of the threads should match the color of the fabric.
Step 6. Trim the edges of the fabric, leaving a small overlap to wrap inside the hoop and glue them.
Step 7. After the glue has dried, cut the fabric as close to the hoop as possible using zigzag scissors.