It is no secret that with little children you need to constantly do not only with grammar, writing, reading, but also to give a load on your fingers as much as possible. This load is not only well developing the motility of small fingers, but also acts favorably on the whole body's body. For example, such a lesson as a modeling ... I somehow traditionally be associated with plasticine. But the plasticine can be replaced with salty dough. The advantages are obvious. No matter how urged us manufacturers of plasticine products in safety applications, whatever quality certificates, salt dough today is the safest for children with material for modeling. Yes, and remove the remains of salt dough is much easier than plasticine.
Walking recently on shopping and in one of them saw a very beautiful and bright plate-stand under the eggs. I looked, I looked at it and I had an idea to try to make such a plate of the salt dough itself. I decided to connect a child to this case: she also wants to flew something too.
Crafts for Easter with children: Plate for Easter eggs from salted dough
First you need to cook salt dough. Recipes of this test a lot, we did this:
- 1 cup flour,
- 0.5 glasses of shallow salt,
- water,
- pVA glue.
The glue was added a bit, literally a teaspoon, but you can do without it. If you are not going to sculpt a lot, it is not necessary to measure all the glasses. We, for example, measured the ingredients with a coffee cup.

First you need to mix with a salt and flour, then add water gradually and knead the dough. It should be soft and elastic and should not stick to the hands. Before sculpt, it is desirable to put the dough into the refrigerator for a couple of hours, wrapping it into a plastic bag.

It is better to do on foil so that then you could immediately crawl together with the foil to shift into the container in which you will bake.
To start, take a piece of dough and roll it into the circle of the rolling pin on the foil. It is not necessary to do fine, you still have to do in it. The thickness should be at least 1 cm, but also very thickly do not need to dry for a long time. Naturally, the rolled circle you got not quite round and not quite even, so with the help of a plate, give it the desired appearance. Unnecessary edges Cut the stack or knife.

Now with the help of eggs, make a deepening in a plate. The number of recesses depends on the size of the plate and on your desire.

Now you can decorate the free places of the plate with details, also made from salt dough. And it is possible and then, after drying, somehow it is beautiful to paint it.

Getting dried. I dry like this: I turn on the oven for a minimum, I put a form with a product and leave for 15-20 minutes. Then I turn off, I do not take it out, leave it in the oven until its full cooling. Then turn on the 15-20 minutes again, etc. For the night I leave to dry in the room.
My daughter and I have turned on the oven and safely forgotten about everything. Therefore, the dough we rose a little, swept, with only some places. But we still did not throw the idea and decided to finish everything to the end.
We painted all acrylic paints. First, small details, then the background. That's what we did:

My daughter really liked this process. Children usually love to sculpt. In addition, the modeling is a very useful lesson for children. And with such a plate of salt dough made with your own hands, they will probably be happy to eat boiled eggs for breakfast!
This kind of folk art has become popular not so long ago, although the origins lie in the most ancient layers of Slavic culture. If you doubt, then remember the same kolobok: what is not an artistic product from the dough? It is not only easy to work with such a test, but also available to everyone. First, in which house there is no horsewing of flour, and secondly, this material is much more supportive than the same plaster, and much more durable than the familiar plasticine. therefore salt dough crafts So we all loved.
Such wonderful lambs can decorate the Christmas tree.
If you add paint in the dough, then multicolored products will turn out. It is best to use food paints, for example, for staining eggs.
With the help of stamps and paints, you can draw pictures on salt dough cookies.
For some rumors, the cutter from the dough came up with cooking, which was boring just cooking. So they were entertained, along the way, decorating their baking. But not only they appreciated the convenience of this material, his pleasitude to the touch and compliance with the attachment to him from different forms. Like most materials for needlework, the dough is not very expensive. As from the same plasticine, everything is soul from the dough. Both paintings and salty dough figures can be placed on walls and racks or apply as toys. A picture with flowers from such a dough will be a great gift for friends. Today, like crafts from a plastic bottle, the products from salt test are becoming increasingly popular, and therefore this direction of creativity needs a detailed study and summing up the theoretical foundation under it.
For decoration, not only beads will be suitable, then natural materials: cereals and seeds.
Crafts from salt dough are durable, and therefore can decorate the interior not one month.
Recently, this art (and the model of the dough is, without a doubt, it is art) even gave a separate name - testoplasty. But, despite the novelty of the name, no one will doubt that sculpt figures from the dough people began from those ancient pores when they just learned to make flour. The history of each civilization mentions the modeling of the test, as an important part of religious rituals, folk visual creativity, as well as sacrifices. After all, both flour and water, and the bread, obtained from them, are an important part of human culture in general. Working with the test, many people manage to come up with their names of this technique: mucasol, biocheramics and, of course, testoplasty. But no matter how they were called it, the result often exceeds all possible expectations! When a masterpiece from a salty test is born, it becomes a real event, because the soul embedded in the cradle returns to the stock edge of a greater return in the form of a living toy - salted dough figurines. Perhaps that is why salty dough has become so popular material for creativity of children of different ages. Like the plasticine, the products made of salt dough allow the smearing of any complexity.
With due skill, you can make such a summi.
For the color of the Soviet, you can use the gouache, and it is possible to secure it with a manicure gelet.
How many of the centuries there are testoplasty, no one can say today. But during this time, the order of working with the salted test was absolutely not changed. All the same water and flour. And to preserve crafts from different pests, salt is added.
About the features of working with a salt test can be found from many sites. But if you yourself have already been keen from salt dough for a long time, then you have also accumulated experience with this material, there are examples of work, photos of products that can be placed on such online pages. You can also create your own blogs and even sites dedicated to this art. Believe that with the current popularity of testoplastic, your developments will interest many like-minded people. At a minimum on thematic sites, a personalized author's gallery will be created under you. And even if your photographs are not a sample of perfection, professionals will bring them to mind and will be presented in the best light.
For the Christmas decor you can make toys from salt dough.
Fortunately, the times have long passed, when the dough figures used only as sacral objects. The era of hunger and wars passed. People's "Mukosol" gradually turned into a new-fashioned "biocheramics". The oldest decorative fishery began to revive as an independent applied art. Today, testoplasty conquers more and more popularity in handicraft schools and circles. All those who have come to this art, rated salted dough as a plastic and warm material, as well as as a source of great pleasure from working with it. A big plus in its favor is the availability of material for home use.
Salted dough is a very plastic material. From it it is possible flowers, and little men to loose.
These are such beautiful hearts can be looked by Valentine's Day.
Angels and hearts will be by the way for Easter.
To alone make crafts from salt dough, You can preview a few master classes on the Internet. You can read step-by-step instructions, and also get acquainted with the photocolties from salt dough offered on different sites. This will help gain additional inspiration for follow-up.
Make crafts from salt dough best with children.
For salt dough, water, flour and, actually, salt will be required.
As for the recipe for the test itself, it is standard for conventional volumetric figures:
- Flour - 200 grams or 1 cup,
- Salt - 200 grams or half a cup,
- Water - 125 milligrams.
It should be noted that the salt is much heavier than the same flour volume. And therefore, with the same weight, they differ in volume: the salts are approximately twice as much as the mass than flour.
* And for the embossed thin figures, you can add 15 grams of PVA (one tablespoon), one tablespoon of starch or glue for wallpaper, which must be pre-stirred with water.
* There are separate recipes and a strong test for large products: one glasses of flour and salt (respectively, 200 and 400 grams) and 125 milliliters of water.
* Specialists offer and a dough recipe for thin works: flour - 300 grams, salts - 200 grams, glycerin - 4 tablespoons (it can be bought in a pharmacy), glue for light wallpaper - 2 tablespoons and water - 125 milliliters (it is necessary Stir with glue).
To facilitate the process of kneading the test, the mixer is better to use that not only will significantly simplify the task, but will make the dough much better.
For the manufacture of color dough, it is possible to apply both food dyes and aniline, but the simplest and affordable - watercolor and gouache. The shared color of chocolate will succeed when adding cocoa to the dough. Selecting the shade, it should be noted that in the process of drying, the tone will not be so saturated, but when the craft is made, the color will return to the former brightness.
Salted dough for crafts is done in the same way as on dumplings, with the difference that the components are distinguished by op content.
The dough must be tight and elastic.
Tip: Give the test "Stop" for a few minutes.
Form cookies with stencils.
Fight stamps for cookie decor.
Wet a slightly stamp and jump out the sparkles.
Now transfer the decor to cookies.
Do not forget to use beads, cereals and rhinestones for decoration.
Now is the time to send cookies in the oven.
But here's another important detail: do the hole in the cookie to insert the ribbon and attach to the Christmas tree.
But now - in the oven.
You can decorate the cookie with multi-colored powder and brilliant varnish.
By the way, many masters recommend adding a little vegetable oil or hand cream to the dough (approximately 1 tablespoon), which can give the test of additional plasticity. And the water is recommended to replace on Kissel, cooked from starch - potato or corn (one tablespoon of starch to dissolve in half a glass of cool water; then in starch it is poured with a constant stirring glass of boiling water; after Kissel thickened and became transparent, the ledger received Remove from the stove.) From the Claystair will win the dough, because it will become more plastic. But it should not be overdoing, and if the dough it turned out to be too soft, you will have to mix it with a minor additional amount of salt and flour. Salted test need to give greater density. There are also advice to place the salt dough in a plastic coil for 2 hours in the refrigerator. There it can be stored for later use.
From salt dough you can make a great decoration for the kitchen.
For crafts, go to gouache or colored varnish.
Fine souvenirs are obtained from salt dough.
Make crafts from salt dough
You can start working with this material. autumnal crafts from salt dough. After all, it is autumn that is extremely rich not only with forms to imitate in the form of matured fruits, but also by different natural materials that can be included in the product as a full-fledged element, as well as a rethinking symbolic image of some part of nature or a certain image. You can make a kind of still life in the form of a picture or bas-relief with the same apples, pears, pumpkins and other vegetables fruit. And you can make it possible to make volumetric crafts and place them on a plate or a special stand. You can make a whole installation of the "Autumn Garden and Garden" with the same fruits, and you can beat the topic of the autumn forest. In this case, along with a salted test, natural elements can be used - cones, acorns, spruce and pine needles. In the same technique you can make a staging of a fabulous or fantastic plot. Any autumn topic is a rowan branch, a carpet of fallen leaves flying to the south of birds - can be embodied with a salt dough.
Be sure to attract children's modeling.
From the master class you will see how to make Christmas garland and beautiful Santa Claus.
After cookies are ready, proceed to his mural. Do not forget to do holes.
How to perform correctly crafts from salt dough, phased Presented in step-by-step instructions, which on the Internet a huge amount. What do you need for such creativity? It may come in handy literally all that without fails to dust around the house.
- For a start - the most important items: stack or knife, rolling pin and comb, which can be useful, for example, for the manufacture of a basket. It also takes an ordinary handle, especially its rod, which is convenient to make different holes and points in patterns, cheese holes, eyes and a lot of other.
- When applying for crafts, and for exciting games with children can use curly knives for cutting cookies or ready-made sets of curly excavation for plasticine.
- Next, it is necessary to pick up in the house everything is possible to make prints, for example:
volumetric butt, hairpings, pieces of burlap, embossed lace, beads, rings, children's small toy, stands from candles for cake, forks and spoons, whose handles are decorated with relief patterns, sole of children's shoes (also give interesting patterns), Mixer details too Other inconspicuous little things.
- For the preparation of a salt dough, flour and salt mixed, water is added to them, the dough is mixed. The degree of its readiness is determined only by the feeling of hands. If it crumble, you should add water. If, on the contrary, it stretches too gently and sticks to the hands, then it has a lot of water, and, accordingly, you need to plug a little flour. A ball is rolled for sample, there are several small recesses in it. The dough that does not blurry and will keep the shape can be considered ready. When mixing, it is recommended to add oil, for example - vegetable. Thanks to this, the dough will not only not stick to the hands, too fast to dry, but does not cover with a crust during work. True, you need to remember that too good - also it is not good: if you add a lot of oil, then the dough will start to get dough, and its final drying will delay too long. Yes, and paints will be with difficulty.
- Well, the dough is ready, now you can move directly to the process of modeling salted dough. It is better to produce on a blackboard or Protvin: it will immediately be a good place to dry the dough.
- In order to make salted dough colored, it can be painted at the stage of the very mixing, applying food paint or gouishew, which will be safe while working with young children. You can paint and already ready dried product. And in order to prepare the right color, you can use the scheme:
blue color will turn out when mixing blue and white,
pink color is obtained when mixed white and red,
purple color we get when mixing blue and pink,
green color will come from mixing blue and yellow,
orange color will be released when mixing yellow and red,
brown is obtained by mixing green and red,
emerald color is obtained from mixing green and blue,
for corporal color it is necessary to mix light pink with a drop of yellow color,
and the gold and silver color will turn out if you add the appropriate gouache or acrylic to it, you can also make dough with glitter, adding a gel gel to it for Guashi.
- Drying is carried out either in the fresh air in natural conditions, which is too long, or in the oven, subject to some rules:
- the temperature in the oven must be minimal;
- the cover of the oven must be ajar;
- the product cannot be placed immediately in the hot oven, its heating should pass gradually. It is impossible to remove the craft from the oven, it is better to wait until it gradually cools together with the temperature of the oven itself;
- ideal will be a drying in several main stages: after an hour of drying on one side, the craft must be turned over and give it to dry out the inside. You can also take breaks in the drying process: the hour is dried in the oven, and then the day in the air, and again an hour in the oven, but already on the back side, and then - the day in the air;
- the drying time of the product largely depends on the size of the craft itself.
- Require final finishes. After drying, the cracker can be slightly shutting in the oven, which will give it a natural shade. To decorate the product is painted with paints and is covered with varnish. Paints when working with the test uses any: acrylic, watercolor, gouache - that is, those with which you like to work. The varnish is used acrylic or artistic. You can also apply the ordinary construction, but with a water basis, which can be used on breathable surfaces - parquet or wood. For greater expressiveness of some small parts in the cradle, they can be painted even with nail polish, which usually gives a bright glossy color.
Finishing children's crafts from salt doughParents are often faced with the receipt of defective poor-quality results. This may happen due to the assumptions of typical errors that should be avoided at the preparation stage. For instance:
- flour pancake or with some additives can not be used to make crafts from salt dough, as the figures from it will begin to rise like yeast dough on the pies and handicraft cracks;
- salted iodized, too, can not be used, since large inclusions will not dissolve it, and subsequently the texture of the test will be inhomogeneous, as if into a grain;
- water should be used very cold and added with parts, fifty milliliters for each addition, after which a thorough mixing should be carried out, which is associated with the likelihood of the use of different varieties of flour, which requires different volume of water;
- salt first should be mixed with flour and only then in the ready mass to pour water;
- salted dough can be stored in a polyethylene coile or in a tightly closed container. It is the dough from the package to get better with small slices, because they can very quickly be covered with a crust, and when rolling or smearing these crusts can spoil the whole type of product;
- if it takes cracking or swelling of a salt test, then this can be explained incorrectly selected flour: what it will be easier and without additives, the better for the test and the future craft;
- you can add to the dough and rye flour: although the color will be more gray and warm, but the cracklers should not be obtained. A simple recipe is a glass of ordinary flour and a glass of rye flour, 50 grams of starch, which will also give the test of elasticity and will not let it crack. You can also add a spoon with a spoon of an ordinary glue of PVA, which gives plasticity and does not give the test to climb;
- cracked crafts from salt dough can and with incorrect drying. As mentioned earlier, it is better to dry the product in the air, alone, although for a long time, but I want to get the result to quickly. Therefore, the drying is carried out in three stages: first in the oven at the most minimal temperature and an open cover approximately one hour later, then a break is made for two hours, and it is possible for the night when the exercise dries itself, then the oven is turned on at the minimum temperature when open lid;
- when the crackling appeared after painting, this means that the exercise is not fully bored. The product continued to dry, and the air did not have to go, therefore, the surface of the varnish or paint passed. No need to hurry to paint or cover the craft of varnish, otherwise you will later have to regret or even redo;
- if the figure is thick, more than 7 millimeters, then at the first stage it is necessary to remove excess dough on the reverse side;
- during drying, the handwriting should be rotated at all stages: the hour will dry on the front side, rests, then it is necessary to turn the crawl and dry on the reverse side;
- wrinkled parts can be perfect and imperceptibly attached with the help of PVA glue.
In order for the dough to be elastic, add PVA glue into it.
Like the real starfish.
Very beautiful spring birds.
These New Year's decorations are no worse than plastic.
This type of decorative art allows you to very realistically perform volumetric crafts. Salted Test Flowers - Favorite products, especially for women, and for girls-schoolgirls too. It is very easy to do, for example, the same chamomile, ahead of the dough and recesses by hanging out the same petals. You can make them and rolling the same "sausages" and already from them, slightly flattering, form a lot of petals for the flower. Mains are made from a flattened dough ball. Twigs and leaves can be replaced by natural thuly sprigs similar to real chamomile leaves. And you can place flowers in a basket woven from "sausages" from the same salt dough. Painting flowers and a basket is needed by simple technology given above.
Such a cat is a bright embodiment of Halloween.
From salt dough you can make funny figures of animals. For example, such a pretty tiger.
Fish and cats.
For worst lovers crafts - Salted Test Cats. This is generally a graceful topic in any form of creativity - both in visual arts, and in the literature, and even in music. After all, this graceful wayward pet can not do not admire and not inspire, especially the people creative. To make it possible to go from the dough of your favorite rhyma, you can go through decorative primitivism, and you can try to make a more believable cat. True, its sizes will be small, because the possibility of manufacturing products from salt dough is limited to the need to adhere to due thickness allowed for uniform drying of the crafts. Well, all the rest is a matter of technology!
From the test it is interesting to sculpt owls, hares and baskets.
Self light crafts from salted dough It can be done by rolling the sheet and cut out from it with the help of the recesses of different flat forms. The advantage of this method in the speed of manufacturing a large number of different items, as well as in its minimum thickness, which will accelerate the drying process and will protect against subsequent deformations. This technique allows you to use different press and prints. By a similar principle, you can make a children's mosaic. To do this, it is necessary to roll a lot of "sausages" and leave them to dry at night. In the morning, chips are cut from "sausages" and again left overnight. A reservoir of the test rolls back in the morning, it is given the correct form (circle or rectangle). Then the chips are inserted in the freshest dough so that the depressions remain from them, and immediately removed. The chips are painted in different colors, after which the reservoir, and the chips are left to push.
Salted dough figures can be decorated with rhinestones and beads.
This is not only a simple fun, but also a serious corrective occupation, which allows to develop a small motility of kids, their perishability, observation, creative imagination and educate their aesthetic tastes. And for adults, this is an excellent way to gain peace and recover from constant fuss, even a highly meaningful. And believe me: There is only one time to try - and you will probably grow to this art with all the soul. And let your work be in joy!
Crafts from salt dough photo
From the test you can even make a pendant.
These decorations are obtained from the test. who would have thought…
The best decoration on the Christmas tree.
From the test you can make letters and ride them into the bracelet.
From the test you can do not only New Year's, but also autumn decor.
With the help of paint and harness from the dough it is easy to lose such a gold and silver heart.
Want a new ring? Make it out of salt dough!
Cover the workpiece with brilliant varnish and everything is ready!
Charming Owl from the dough.
On an asterisk you can draw a penguin.
This is how the dough looks like a baking, in the oven it is a little "shut down".
Shiny hearts on the Christmas tree.
Autumn crafts from the dough.
Crafts decorated with buttons.
And this is Easter crafts.
Flowers made of salted dough.
From the test you can make a memorable thing - the imprint of your baby's palm.
From the dough you can make balls and decorate from the croups.
Rose from salt dough.
Christmas wreath of dough.
Candlestick
From the dough you can make vegetables and fruits.
Easter crafts made of salt dough are capable of beautifying the best feast of Easter, make it warm and joyful. Easter egg made of salted dough on the stand will best help transfer the mood of this wonderful holiday. Divisions from the test do not require a lot of time for their manufacture, and the pleasure of modeling and painting is simply not conveyed. Children are delighted, and parents too!
Salt dough crafts: Easter eggs do it yourself
The master class of this craft is to cope with the task of easily.
You can, of course, roll the egg entirely from the dough. Only it will be for a very long time to dry, pretty heavy and can crack and swell when drying. Salted dough gives a high result, if its thickness in the product does not exceed 7 cm.
Therefore, it is best to make Easter eggs - doubt on the frame. In this case, the optimal option is an empty egg shell. For her cooking, you need to make two small holes in the cheese, two small holes are a sharp needle - you can steal needle, you can knife tip. The interior of the eggs blow on a plate in order to use in the food.

Now you should cook the masses for modeling. A cup of ordinary flour (without impurities), half a cup of salt of fine grinding is poured into the dishes, mixed. We are gradually added to the water mixture, and everything is mixed immediately. Then the dough is warm on the table. It must have a dumplings consistency.

An empty shell is stacked on the rolled pancake.

Then the dough turns around the entire frame, the seams are smoothed with their fingers moistened in water, the surface is aligned with riding eggs on the table. From one end, it is necessary to make a puncture in the shell of the test in a place where the shell has a hole, otherwise, when baking, the air has increased in volume from heating the air will give an ugly bloody. 
From a thinly rolled piece for mass for modeling, letters, flowers, berries, leaves - all that will tell the wizard fantasy is cut out with a sharp knife. Maminating the other side of the future bas-relief, which it will attach to the main part, the sculptor gently imposes an applique in the right place. My fingers, moistened in water, carefully smoothes the seams so that there are no cracks.
You can emphasize the border of the bas-relief, taking advantage of the knife. Applying the edge should be flat side - the sharp part should be directed directly to the drawing, where the bas-relief rises above the plane.

You can bake the egg in a regular oven, but preferably do it in the "microwave". The mode should be put on the "defrost", time is 1 minute. It will be a trial "firing". So that the egg is not deformed, it is best to put in a cup with flour. Then, in the place of contact with the plane on the egg, dents are not formed.
After checking, it is possible to make a putty: slices of wet dough to shut out the resulting irregularities, cracks. If the blink was still formed, they can still be cut off with a knife or scissors so that the place of "repair" to smell the wet mass.
Now you can "burn" an egg into a microwave oven by the usual mode, but it is better to do this in several techniques for 2 minutes, checking the result each time.
After the "baking", the egg is painted with watercolor, acrylic paints or gouache. You can cover the product after drying a conventional colorless wood varnish or sprinkle with hair varnish.
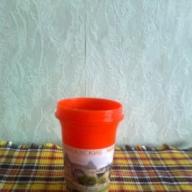
The modeling on the topic "Easter" involves the execution of the stand under the egg. The stand is more convenient to perform in three stages. First you should form a cup. For her, the master can take a plastic cap from air freshener or dichlorophos. First, it is necessary to lubricate it with oil: Vaseline, sunflower, margarine. Then you need to carefully climb a thin layer of rolled dough, to block the connection points. 
Having distributed the dough to the smooth layer, you need to cut off the excess scissors. The lid must slightly perform over the test. On the edge of the "glass" is allowed to make a "roller", you can decorate the bas-relief stand.
"Cup" can now be put in the oven bottom up. After 1 minute of "baking" in the "defrost" mode, the part is removed from the locker, and the layout cover is easily removed. 
The leg is rolled out of a small piece of dough, attached by a moistened end to the bottom of the cup, the place of attachment is smoothed with wet fingers. The item is again placed in the oven included on the "defrost". Put the part follows the leg up, "bake" a minute. 
For resistance to the leg of the stand, a metal cover should be attached to the rolled dough. The place of attachments should not be forgotten to wet, and the seams gently smooth out! Sew the product for the first time better upside down. 
After the last baking (at normal temperature), the layer is painted with watercolor, gouache or acrylic paints and varnished.
This decoration can stand out how long: year, two and longer. But it must be remembered that this is fragile, it should not be dropped. And wash the egg with a stand is not recommended.
Easter is a great and bright holiday, personifying the celebration of the spirit of Christian, repentance of conjugate with hope and faith. In anticipation of a bright day of Sunday Christ, everyone thoroughly prepare his abode for a meeting, removing and decorating everything around. I want the soul and body clean and updated. And the house pleased the eye with his freshness.
Current decorations
Every year more and more jewelry appears in stores on the eve of a bright holiday. The hostess gladly decorate their "family nests", but there is nothing more valuable than handicrafts. In the most common decor element, the inhabitants of the house invest their special mood, a certain message and energy.
The joint creation of jewelry for Easter is especially valuable where there are small kids. For example, crafts for Easter from salt dough with their own hands will be for them a funny adventure and new knowledge of the approaching holiday. This moment unites the family, helps to rally and create a cute family tradition.
Particularly loved by the people's craftsmen and lovers of Hend-Maid Easter crafts from salt dough with their own hands. A similar type of creativity is just beginning to conquer its unsurpassed style and interesting equipment, but it has appeared for a long time. This is an invalid Slavic custom, which can be noticed even in folk fairy tales. To remember, for example, a kolobka, whom the grandmother created, without thinking that the fate of this stucco would be so hard. This fabulous hero can be remembered in a conversation with the most small family members. Easter crafts made of salted dough for children will become an unusual experience and immersion in a fairy tale.

A similar type of creativity attracts with its technological simplicity in combination with limitless opportunities for the incarnation of its fantasies. It is difficult to submit a more budget option for crafts. In order to acquire a material for creativity, you need not so much.
Several recipes for high-quality puff pastry
Recipe number 1:
- Flour (preferably wheat) - 1.5 glasses;
- Salt - 0.5 glasses;
- Water - 0, 5 glasses
- Vegetable oil (preferably olive, to give a special elasticity test) - 1 tsp.
Recipe number 2:
- Wheat flour - 2 glasses;
- Glue (you can use any, which is in the farm) - 1.5 tbsp.;
- Salt - 3 glasses;
- Water is a little less than 2 glasses.
Recipe number 3:
- Flour - 2 glasses;
- Water is about 1 cup;
- Starch (give a special texture to the future material) - 1 - 2 tbsp. l.;
- Extra salt (pre-grind on a coffee grinder or any other convenient way) - 1 cup;
- Gouache (can be added immediately, and then the finished product is refreed to refresh the new paint).

What can be made of salted dough on Easter
Pleasant to the touch, malleable and affordable material allows you to implement any idea. Easter theme is extremely extensive. Time, inspiration, material and idea of \u200b\u200bthe future craft: That's all you need.
You can create a whole picture with your surround plot, decorate it with bright colors or leave in minimalist pastels. Various thematic figures (angels, cute little animals, futuristic flowers, etc.) will decorate and a festive table, and a shelf in the house. On the eve of Easter, the creation of unusual eggs with a bulk pattern, stands for traditional crashes, Christian characters will be particularly relevant.

Easter crafts made of salt dough for children must be thematic and available performed. They allow you to play fantasy with a special force. Parents can afford their choices to come up with their own image and independently embody it in the test. Helping the child is in the case when he wants to get help. Such classes will stimulate the development of creative abilities, enrich the tactile sensations of the child, improve the shallow motility of the fingers.
What to start
Perhaps it is best to start from the easiest crafts in order to get used to work with a salt dough. And this applies not only to children but also adults. The simplest handicraft from a salt dough for Easter, which does not require skills at all - these are Easter eggs that can be issued both in the form of a long garland and each separately.
Example №1 Garland from Easter eggs
Preparing salty dough, and roll over a large form. Next, cut out of the cardboard stencil in the shape of an egg - we apply it to a rolled test, and cut the molds you need already from the test. At the top of each egg, we make a hole using a pen or pencil. We send the dough to dry.

After the dough dried - deactivate it, and we have done a ribbon into the hole. You can tie a beautiful bow and leave the product so, but you can associate several eggs into a long garland.

Example №2: Simple Product - Basket
You can also try to make a simple basket with eggs. Ideal for acquaintance with the pushing of children.
Supported basket size 15 by 15 cm. Work algorithm is as follows:
- Take about 100 grams. Test and form a box of future basket at their discretion.
- To give the texture of weaving, you can use an ordinary fork. The ornament will not only revive the product, but also give an optimal form;
- From two pieces of 50 gr. Two thin long sausages roll. Approximate length 14 - 16 cm.
- You need to cross the workpiece between yourself and attach the shaped handle to the basket case. Connection location moisten with water.
- To make testicles, just rolling smooth balls similar in size.
- With pieces of 5 to 2 cm It is convenient to cut the leaves and flowers. The texture can be given a stupid side of the knife or fork, depending on the estimated type of leaves.
- In the basket we put eggs and add other elements of the decor.
- Attaching each design element, it is important to moisten the surface of the dough with water for a better connection.

Example number 3: Angel with an egg in his hands
- Pre-create a special stencil for the future angel.
- With the help of the stencil, cut out the basis of the angel. Test thickness is about 5 mm. All torn or sharp edges that are formed, you need to smooth your hands.
- To be confident in the strength of the future figurines, you can create a reinforcement effect with toothpicks. To do this, it is enough to arrange several toothpicks along the housing of the angel, in the direction of the wing and future legs.
- Create legs that will look out with a mantle. Stack you can make your fingers.
- Now you can start the decor of the wings. From individual pieces of dough form segments of wings and fasten them to the base. Patterns can be formed using a fork, rod from the handle and any other accessories.
- Hem of mantle can be made more realistic and volumetric. To do this, with a piece of dough form a tape and curly attach it to the base.
- The body of an angel must also be volumetric. This effect can be achieved by applying several test balls by creating a robe of the figure;
- With two pieces of stucco forming the sleeves. Where the palms should seem, we make a little deepening;
- For plausible brushes, we form two "drops" and the stack of fingers, sculpt to the grooves in the sleeves.
- Pellet for the collar roll over, create a pattern and fastened to the overall design.
- We form a small Easter egg and "hand" his angel in hand.
- Head and face Create absolutely symbolic. Must be appropriate and neat. Reliability to go to the background.
- Hair can be created quite believable. To do this, we use a garlic catcher.
- We ship on drying. You can on the battery. Enough for 3 hours;
- To emphasize the relief, the finished figure is treated with a solution with coffee. Special attention should be paid to the braid, places with intense ornament. The finished figurine can be placed as a decor on the shelf or on the table.

The more attractive is the craft, so it is the lack of any strict technological rules and conventions. The recipe for which will be formed, salty dough, crafts for Easter, their size, specificity, decor - all this can be created at its discretion, without adhering to highly strict technology or requirements.
- stack or small knife;
- comb for giving specific patterns on the test;
- rolling
- pen or pencil (in fact any object with a rod);
- curly devices (for cutting cookies, for example);
- any stencils where you can make prints (lace, beads, children's toys, already ready-made figures of something and other).
It is possible to experiment with the composition of the dough, tools, colorful materials, shades and method of processing stucco. Create Easter crafts from a salt dough with children is an excellent alternative to computer games or mindless TV viewing. The occupation can be an excellent hobby for the whole family, rally around the family members.
From various materials.
You can use napkins, cotton disks and even dough.
You can safely attract children to such creative work for which it will not only be interesting, but also useful.
Here are some very interesting crafts for Easter, which can be made from different materials:
Crafts from the Easter test: Easter eggs-medallions
You will need:
Salty dough
Rule
Dough cutting form
Shopper
Tube (for small holes)
Aluminium foil
Paints (acrylic or aerosol)
The twine or ribbon.
1. Prepare salt dough. There are many ways to do it.
* If you do not want to do the dough, you can replace it with a polymer clay.
Here is one of the ways of cooking a salt dough:
2 cups of flour
1 tbsp. Spoon with small salt
1 tbsp. Wallpaper Spoon
* Mix flour and salt. Add some water to adhesive (several spoons) and wait until it flashes.
* Stir the flour, salt and glue - knead the dough. If you wish, you can add some water. It should turn out the dough that lipates to the hands.

2. Rolling the dough to the desired thickness. In this example, the thickness of the test is 6 mm.
3. Cut out the shape of chicken eggs from the dough.

4. Put these forms on a baking sheet covering aluminum foil or baking paper. Make small holes using a tube to later crafts could be hung.

5. Bake first at a low temperature - about 100 s. After that, pull the aluminum foil and put the baking sheet in the oven for 125 s. Try not to burn. You can use parchment paper instead of foil and bake at 120 degrees 2 hours.

After that, put the blanks from the salt dough on the grille.
You can turn off the oven and wait until the dough gets up.
6. Start painting your blanks, and after the paint dry, tie a tape and hang.

Crafts for Easter from Macaron: Big Easter Egg

You will need:
Macaroni of different shapes
Feltolsters (markers)
PVA glue
Paint (aerosol)
Large balloon
Hot glue.
1. Inflate the ball.
2. Marker designated a place on the ball for cutting.
3. Apply PVA glue to the entire ball, besides the designated place.


4. Start sticking pasta to the ball so that it turns out the pattern.
5. When everything dries, you need to remove the ball - push it with a needle.

6. It's time to decorate the craft. It all depends only on your imagination.
7. You can make a craft to the stand and paint an aerosol paint - in this example of gold color.


Crafts for easter do it yourself from macaroni


You will need:
Chicken eggs
Small pasta
PVA glue
Aerosol paints (if desired).
1. Get rid of the contents of the egg.

2. Apply PVA glue on the shell.
3. Stick to the shell small pasta (you can stick each macaronin, sprinkle or dip in the bowl).
4. Can use lentil or peas except macaroni.
5. When the glue dries, paint the egg. To begin with, color one side, and then the second half.


Paper crafts for Easter
Easter chicken. Option 1.
To make such a cradle for a start, you need to draw a template.


Easter chicken. Option 2.
Paper chicken can be made of paper plates or cardboard, from which you need to cut a circle. Just bend a paper plate in half, cut out the wings, eyes, beak and scallop and stick them to a plate.


3-D chicken


Crafts from napkins for Easter: Stand

1. Prepare a paper napkin and fold it in half diagonally.


2. Bend the angles of the resulting triangle up so that they are connected to the upper angle. You have to get a square.

3. Twist the bottom edge of the roller square obtained to the middle.

4. Now turn your design and connect the bottom corners that are under the roller. These corners should be consolidated with a clip.

5. Turn over the workpiece back so that the clip is from behind. The ends of the workpiece straightened into different directions, and you will have a beautiful stand for an Easter egg.
Mobile eggs with napkins do it yourself

1. Pulk the paper napkin into vinegar, press the egg too much and wrap it with it.

2. Put the egg on a plate or baking sheet and gently start adding drops of multi-colored food dyes.

3. When the whole egg was painted, remove the paper towel and place the painted egg in the cardboard packaging.

Eggs from eggs for Easter: Decoupage

You will need:
White eggs
Napkins with beautiful drawings and patterns
Scissors
PVA glue.

1. From the paper napkin to separate the top of the top layer, you will not need the rest.
2. Cut beautiful drawings and patterns. You can cut with white edges and not necessarily neat.
3. Prepare the egg and lubricate it with glue or egg protein.
4. Stick to the egg cut out pattern, and apply a layer of glue on top of the tassel.
When everything dries, you will get a beautiful Easter egg.
Crafts from cotton disks to Easter: chicken


You will need:
Cotton woven disks
Yellow paint for eggs
Colored paper
Scissors
Silent wire
1. Divide the yellow paint with water. Pulk the solution of 2 cotton disks and color them. After that, leave the discs to dry.
2. Use a cigal wire to make chicken legs.
3. From the colored paper cut off the scallop, wings and beaks.
4. Spread all the details between two cotton disks.
5. Stick toy eyes and chicken ready.
Easter wreath do it yourself

You will need:
Yves wreath (you can make a wreath with your own hands)
Monophonic paper napkins
Corrugated paper
Color and ordinary cardboard
Scissors
Simple pencil
Hot glue
1. We make decorations for a wreath. From the paper cut out several circles of different diameters: a circle for the torso has a diameter of 5 cm, for the head 4.5 cm. The more circles, the volume of the part.

2. Cut 2 more circles from cardboard, each with a diameter of 2-3 cm. It will be the basis of chicken.
3. Now glue all the blanks. To begin with, apply some glue into the center of the first circle and stick the next one. Thus, glue all the circles.

4. Detail of cardboard stick to one of the circles.
5. Such a way you need to glue another stack of circles.
6. Make small cuts on the circles, and then flip circles.

7. From color cardboard Cut the beak of chicken, paws and wing. In order to clean the chicken torso, cut out the strip from the cardboard and glue all the parts to it - the wing on one side, and everything else on the other.
8. Make eye. You can use plasticine, buttons or other suitable parts and fittings.
* If you wish, you can make another chicken of another color.

9. We make decorative flowers and eggs. Take the napkins for dust. You can use felt, but it is more expensive. Cut out ovals that will play the role of Easter eggs, and various patterns for them.