How to make a real papier-mâché balloon with your own hands so that it can then fly? What is required for such a craft, how complicated is the process? In reality, most products of this kind do not require a long time and special knowledge.
Thanks to a detailed master class, any beginner can handle it. But the finished craft will amaze everyone around you. You can make bright, multi-colored balls, equip them with baskets or paint them to make laughing faces. Anything, you are limited only by your imagination.
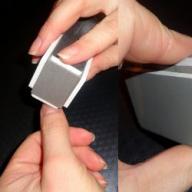
To make a papier-mâché ball on an inflatable ball, you will need the following materials:
- a stack of unnecessary newspapers;
- liquid paste;
- regular rubber ball;
- several brushes.
Detailed instructions:
- Prepare the paste by spreading it in some unnecessary container of decent size.
- Tear the newspaper sheets into strips of 1 inch (2.5 cm) each.
- Inflate the balloon, making sure that it does not exceed the dimensions of the finished craft.
- Gently glue the finished ball with paper strips previously soaked in paste.
- Important: after wetting the paper, immediately remove any excess liquid by swiping your fingers. This should be done in advance, before gluing.
- When gluing the strips, carefully smooth out the folds with your fingertips. It is more convenient to do this with a brush. Proceed in stages, then the toy ball will turn out beautiful and smooth.
- When finished, leave the product to dry. Now carefully pierce the ball inside the newspaper strips and take it out through the small remaining hole at the bottom (you must leave it in advance, even before gluing the newspaper).


If you need a white ball, just paint the dried blank with paint of the required color.
Papier-mâché globe or moon
How to make a papier-mâché balloon? I want to create something special. For example, the planet Earth or the Moon. Here, the basic principle of making the ball will remain unchanged.

Step-by-step instruction:
- Make a newspaper ball, trying to make it as smooth as possible (no wrinkles) and medium in size. Inflate a regular rubber ball, then gradually glue it over with strips of newspaper dipped in glue. Wait until the product is dry, then deflate the ball. The preparatory part is over.
- Now you need a real globe as an example. It is more convenient than flat pictures. To make the globe look as believable as possible, it is necessary to redraw the outlines of the continents, individual islands and oceans of the Earth onto a finished paper ball. To do this, arm yourself with acrylic paints.
- Is it convenient to paint a newspaper or is it worth it to additionally glue the balloon on top with white paper? You can paint it first with white paint and then apply the outline of the Earth on it. Or glue it with A4 paper, cutting it also into strips. The technology seems more complicated, but in practice everyone can handle it, even beginners.


Thus, you can create any planet from the solar system and then hang them together, creating a composition. It is important to keep the dimensions, remembering that Jupiter is large, Mars is small, and Earth is medium.
Balloon with basket - master class
Here you can choose the manufacturing technique.
Option number 1. A beautiful ball. If you need to create a craft quickly, then look at a beautiful colored small ball. Preferably round in shape. Weave to it from dense thread or take a ready-made mesh. Make sure that the ball fits comfortably inside, and the edges of the net remain free. Trim gently if necessary.
Shopping cart creation. You can cut it out of a regular plastic cup and glue it on the outside. Or glue from a sheet of cardboard. If you have a ready-made basket even better. Tie it using the loose ends of the thread to the ball. Done.

Option number 2. Volumetric balloon with a fabric basket. A great New Year's surprise that a child can make if prompted.
Required:
- unnecessary newspapers;
- regular rubber ball;
- diluted paste;
- brush;
- pieces of multi-colored fabric (preferably one type);
- cardboard;
- a skein of rope or braid.
Step-by-step instructions:


Such a papier-mâché balloon will turn out beautiful, large and can then be hung from the ceiling.
- Making a paper (newspaper) ball. Following the instructions described above, inflate the balloon, then sequentially paste over it with thin newspaper strips, dipping them in paste. Do not tape the space below, around the ponytail. Leave a hole.
- While the workpiece is drying, you can make a basket. To do this, take a cardboard and glue a small basket step by step, focusing on the ball.
- Carefully poke 4 small, equal holes at the top of the finished basket. See that they are symmetrical.
- Decoupage of the ball. It has dried, now deflate and remove the rubber base (inflated balloon). Cover it with strips of fabric / colored paper (which is preferable). Carefully make 2 holes on top, placing them close. The papier-mâché ball is ready.
- Measure out 2 pieces of rope. Take one, thread the tip through one of those holes at the top of the ball, then pull it through the other. Center so that two equal ends hang down. Tie them by securing in two opposite holes in the basket. Do the same with the second remaining rope. Tie the ends alternately to two of the four holes (see picture).
- An additional loop can be made at the top of the children's toy, through which it can then be hung from the ceiling.
A small doll or a man with Lego, ready to fly, will complete the work.
Balloon - papier mache smesharik
Easy to do. To create a cute smesharik you will need:
- paint;
- several brushes;
- sheet of cardboard;
- scissors;
- finished picture.

The first step is to make an ordinary paper ball, pasting over with newspaper strips. Then, as it dries, decorate the product by painting it like a smesharika. Draw a smiling face in front, and attach the missing parts like ears, arms and legs separately.
Cut them out of a sheet of cardboard or "mold" them using a napkin soaked in glue. Some take plasticine. The paper ball is quite dense, so you can fasten various parts without fear of its destruction.
Today we will show you how to make a colored paper balloon with your own hands. With such balls, you can creatively decorate the interior of a children's room by attaching them to the ceiling using threads or thin fishing line. You can also make a children's mobile from them. You can attach paper balls to the frame using ordinary threads, thin satin ribbons or decorative strings. If you use ordinary thread or fishing line, then for a more decorative look, string on them several bright beads of different sizes and shades.
So, to create a ball, let's prepare some materials:
- colored paper in two combined shades, we chose brown and blue;
- cardboard of any color;
- glue stick;
- scissors;
- paper clips;
- pencil.

How to make a paper balloon
Step 1. First, you need to create a template according to which we will cut out the main details of the ball. To do this, apply this contour to the back of the cardboard. Then, side by side, we will draw another small circle. We carefully cut out both templates. 


Step 2. Now their outline needs to be transferred to colored paper. 
We outline the template with a pencil, and then we cut out the first part of the ball. Create 11 more such blanks. We also create a circle from colored paper to fix thin details. 

Step 3. Next, prepare the second shade of the paper, draw the outline of the details on its back side and carefully cut them out. Make the same amount of brown parts as blue ones - 12 pieces. 
Step 4. Create the basket of the ball out of brown paper. We cut out such blanks from it. 
Step 5. Fold the brown turns as follows. 
We put glue on a small circle and glue it to the base of the workpiece. 

Do the same manipulations with the blue loops.
Step 6. Combine the two pieces together and start weaving the ball. 
We start the turns of a blue shade under brown. Here's what you should get. 

Step 7. Next, we start the brown stripes under the blue ones, and fix their suppression with a small paper clip. 

The top of the ball began to emerge. 
Step 8. Now we bring up the brown turns, then the blue ones again, and so on. All intersections of the strips must be fixed with paper clips! 

The ball will gradually take on the desired shape. 
Step 9. Glue the last row of strips, and remove the paper clips. Now we bend the ends of the stripes into the inside of the ball. 

We made such a balloon with children recently and in hot pursuit made MK for those who like it.
The time for its manufacture (with cut out parts) is about an hour and a half, it all depends on skills and age. I had children 7-8 years old, they need the help of an adult.
You will need glue (good PVA, stationary glue, "Crystal" Moment and a hot glue gun very helpful in some moments), 20 pieces of paper, a few strips of paper for the basket \u003d 4 x the length of the side of the basket (I have 5 cm) + 1 cm for gluing and 1 cm wide, the base for the basket (I have a square of paper 13x13), ribbons, braid, at the end of the production any decor - flowers, beads, rhinestones. Schemes for drawing circles and a basket are given at the end of the MK.

We start making a basket. We braid the edges of the basket with a paper strip in a checkerboard pattern. In order not to fly off, I secured at the beginning with a paper clip, after braiding all sides, glue the tip of the strip (1 cm) to the wall of the basket and then in several places on each wall glue the walls to this strip. Then we repeat with the second strip.

We finish with the third strip, glue all the protruding ends of the walls to the paper strip.

Any braid, lace or ribbon can be glued to the edge. We take 4 wooden sticks for barbecue, wrap them with a ribbon, fixing with glue at the edges.

Let's start gluing the ball. We put glue on the bent edge, fold two circles, combining the bent edges and fix. Thus, we glue five circles so that the sharp tops converge at one point. It turns out a hemisphere. We make another hemisphere. Then we glue a strip of 10 circles, directing the sharp tops of the triangles alternately up and down.

We close the strip into a ring, gluing the outer circles, and then glue the top and bottom of the hemisphere, folding the 5 remaining free edges of the hemisphere with 5 edges of the strip.

This is how the ball looks after gluing one hemisphere (photo above), then we apply the upper hemisphere, glue it. We get the ball.
Now assembly. We glue the skewers to the basket, fixing them with Moment or hot glue in the corners of the basket. The quickest way to glue the ball to the skewers is with a hot gun, we determine the gluing points by eye, leaving one of the vertices at the top.

Then we start decorating - to close the places where the skewers are glued to the ball and the remaining holes in the places where the tops of the triangles are glued with bows or flowers or rhinestones, at the top I glued a bead. Add an inscription and flowers to the basket. The ball is ready. You can use it as a gift basket - put a small present, candy or chocolate inside.

How to prepare circles for the ball. It is very important here to make the correct markings for a neat appearance of the ball. Remember geometry and inscribe an equilateral triangle in a circle. How to do it: Draw a circle with a compass centered at point O, take an arbitrary point D on the circle, measure the DO segment (radius of the circle), set the length of the radius from point D to both sides along the ruler so that the end of the segment lies on the circle (these will be points A and C) or draw a circle from point D with the same compass (that is, with the same radius), put points of intersection with the circle in both directions (we get points A and C). This will be one side of the triangle. Now, from point C, draw a circle with a compass with a radius equal to the side of the AC triangle, until it intersects with the circle (or lay a line segment from point C equal to the AC side with a ruler, so that the end of the segment lies on the circle). This will be the vertex B. We connect points A and B. I have a side of the triangle 2.8 cm. We bend up along the sides of the triangle. To speed up the marking process, draw a triangle on one circle made of thick paper, cut it out, then apply it to the circles (you can take one at a time or several at once, if not thick paper) and bend the edges of the circles, holding the triangle in the middle. Or we attach a triangle to each circle, circle it with a pencil and then bend it. Or we take several circles, fold it in an even pile, put a circle with an inscribed triangle on top and make small cuts at the vertices of the triangle with scissors at once along the entire stack, and then bend the edges, focusing on these cuts. This stage is the longest and most boring.
I like to buy paper lanterns instead of pretentious chandeliers. Why? First, they are inexpensive. Secondly, when they get dusty or torn, they can be changed. Thirdly, they are easy to transform, there would be paints, napkins and free time. I have long wanted to make a balloon, but then I found a suitable basket and the idea immediately ripened.
For a balloon-plafond, we need the simplest things:
paper lantern,
4 napkins with sunflowers,
broken basket without a handle,
flower stickers,
scissors,
brushes,
paints,
PVA glue,
5-6 meters of cord,
balloon passengers and fantasy.
When I came across napkins with sunflowers in the store, I thought that they very much resemble the tongues of flame that burst from the burner and inflate the balloon. The flashlight was lying for a long time, it remains to bring together all the elements. Cut out pieces of flowers to the desired size.

Now you need to remove three white paper layers from the napkin so that only the stained one remains.

We carefully put it on the bottom of the lamp and coat it with PVA glue. I dilute the adhesive 1: 1 with water to make it easier to apply. You can use it undiluted, but then there is a great risk of tearing the napkin when smearing it over the surface. A brush for this process must be taken with soft bristles.

From pieces of napkin, we gradually form our flame below.

We do this until we fill the circle completely. We try to distribute the napkins so that there are no ugly gaps.

Above, I decided to duplicate the same drawing for symmetry. Let it be sunshine.


To make the sunflower fire look brighter and more complete, I painted the flames with red and yellow gouache.

Now we tie a cord to the basket, distributing its segments at equal distances inside the circle. Try to keep all the knots inside the basket. Each suspension takes about a meter of cord. You can additionally duplicate with a cord around the lamp. It is very important to center the basket, this is one of the most difficult parts of the job. Check it, it should hang exactly under the balloon. To facilitate this process, you can look through the hole below. Through it you can clearly see where the center of the basket is. A real basket of twigs is quite expensive, you can weave it from newspapers. Newspaper weaving workshops can be easily found on the net.

In the final, I decided to decorate the center of the paper shade with yellow-green gouache stripes and flower stickers. Try to find stickers on thin paper so that they do not come off the tissue paper that is pasted over the shade. Luminous stickers with a phosphor coating look very nice on such lamps. It turned out to be a real waltz of flowers.
Children's creativity craft - do-it-yourself balloon
Games are an integral part of a child's normal development. It is not necessary to buy a ball or dolls, because children consider it a game even to spend time with their parents. They are just at the age when fantasies and dreams are an integral part of their lives. Try to do something with your child. In this article, you will learn how to make balloon papier-mâché. The child will receive a lot of emotions and impressions from this process, and then he will be able to play on his own with the finished craft.
For children's crafts you will need:
- Balloon;
- hand cream;
- a box of tea bags;
- colored paper;
- scissors;
- PVA glue;
- newspapers;
- a brush for glue;
- a container with water;
- gouache paints;
- paint brush;
- wire or thread.
Stages of work on the craft balloon:
1. We take a newspaper or any paper, just not thick. We tear it into pieces, which we then moisten in a container of water.
2. We take a balloon of any color. Inflate it and lubricate it with hand cream.

3. Put our soaked pieces of newspaper on a layer of cream. We do this without glue and over the entire surface of the ball so that there are no gaps. We leave not pasted over only a small area at the tail of the ball.
4. Now cover the whole ball with glue and lay out the next layer of paper. So repeat this process 3 or 4 times.
5. Let the ball dry, preferably at a heat source. This will take approximately two hours.
6. While the drying process is in progress, let's make a balloon basket. To do this, take a box of tea, cut off its lid and glue it over the entire surface with colored paper. If desired, the inside of the box can also be glued or painted over with paints.

7. When our ball is completely dry (all layers of paper should be dense), prime it with a mixture of gouache and glue. Let the child choose for himself what color the ball will be.
8. After that, carefully pierce the ball. From the inside, he himself will unstick from the newspapers.
9. The balloon can be painted like a real balloon - with colored stripes or left in a solid color.
10. Now we attach the basket to the ball.

Such a creative craft can be hung from a chandelier or on the cornice in the nursery, and if it is warm and trees grow in the yard, then you can make a whole parade of balloons of all kinds of colors and sizes. Believe me, even the neighbors will not remain indifferent.