A funny turtle figurine made from beads is easy to make in a short period of time. The figurine itself is small and, despite the fact that it is woven using a three-dimensional weaving technique, it is not complex.
Materials
To make your own beaded turtle, prepare:
- thin wire, 0.2 mm;
- beads of brown, green, blue, black, yellow and blue;
- fishing line
Step 1. Each row of turtle weaving consists of two tiers: upper and lower. Take a 100 cm long wire and string a yellow bead on it for the top tier and 3 brown ones for the bottom.


Step 2. In the second row, for the top tier you will need 3 brown beads, and for the bottom 6 beads of the same color.


Step 3. For the top tier of the third row you will need to string beads in the following sequence: brown, blue, 2 browns, blue and brown. Send 6 brown beads to the bottom tier.

Step 4. In the fourth row, 6 brown beads will be needed for the top tier, and 4 for the bottom tier.

Step 5. The fifth and sixth rows are woven the same way. You will need to send 3 brown beads to the upper and lower tiers.

Step 6. To weave the seventh row, take green beads. Send 6 beads to the upper tier, and 5 beads to the lower tier.

Step 7. In the eighth row in the top tier, the beads need to be alternated three times with green and 2 blue beads and close the chain with green beads. For the bottom tier you will need 7 green beads.
Pass a piece of wire 15 cm long through the lower tier. Do not touch the wire at this stage.


Step 8. In the ninth row to the top tier, send beads by color in the same sequence, but replacing 2 blue beads with three copies.
Send 9 green beads to the bottom tier. Pass another piece of wire 15 cm long through all the beads.

Step 9. For the tenth row you will need green beads. Send 15 pieces to the upper tier, 11 to the lower tier.

Step 10. In the eleventh and twelfth rows for the top tier, cast on a green bead and 4 blue beads three times and close the chain with a green bead. Send 11 green beads to the bottom tier.

Step 11. In the thirteenth row, send 15 green beads to the top tier and 9 to the bottom. Pass an additional 15 cm long wire through the latter.

Step 12. In the fourteenth row for the top tier, string three green and 3 blue beads onto the wire, closing the chain with a green bead, and place 7 green beads in the bottom row. Pass additional wire through the bottom tier.

Step 13. In the fifteenth row for the top tier, replace 3 blue beads with two beads, and send 5 green beads to the bottom tier.

Step 14. For the top tier, string 6 green beads, and for the bottom - 3 brown.

Step 15. In the seventeenth and eighteenth rows, using the counter weaving technique, string 2 and 1 brown beads onto the wire.

Step 16. Secure the wire by passing it through the previous row. Twist the ends and cut off any excess.

Step 17. To weave paws, two rows should be formed using the three-dimensional weaving technique, stringing two brown beads into tiers. After this, string beads onto the wire in the sequence: 1 black, 1 brown and 1 more black. The wire should be passed through the row again, twisted and cut.


Step 18. Weave three more legs in the same way.

Step 19. To keep the turtle in shape, sew it with fishing line. The craft is ready!

Have you always dreamed of a cute little turtle? Then we suggest you make a turtle from beads!
To work you need to prepare:
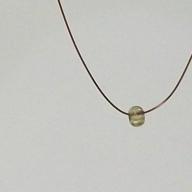
One large bead;
- beads of two colors. Choose the colors of the beads to suit your taste.
- two black beads for the turtle's eyes.
All is ready? Then let's start weaving a turtle from beads!
Take a bead and wrap it twice with threads as shown in the photo.

To these threads, using the brick weaving method, we will weave a tortoise shell from beads.

We weave the first row of the tortoise shell with beads according to the pattern: one bead, one bead and so on in a circle.
We weave the second row of the shell according to the pattern: two, one, two, one and so on.

We weave the third row in the same way as the first.

In the fourth row we repeat the weaving pattern of the first row.
Now the bead looks like the one shown in the photo below.

We made a turtle shell from beads.
Now let's make the head. Let's take another line and start weaving rows of the head.
First row: consists of three beads. We weave in one at a time.
Second row: also consists of three beads (black, white, black).
Third row - two white beads.
It will turn out as shown in the photo.

The beaded turtle head is ready.
Now we will make the legs and tail of the turtle from beads.
Turtle made of beads
This turtle belongs to the category of “fast” bead toys- It takes a maximum of half an hour to make it. Maybe that’s why it’s completely impossible to stop at just one - you want to weave more and more until all the beads run out...
To make this turtle you will need:
4 beads diameter 8 mm;
4 beads diameter 5 mm;
beads 3 mm in diameter (indicated in green in the diagram);
beads 2 mm in diameter in two colors (indicated in the diagram as yellow and brown).
In addition, you need two more beads with a diameter of 3 mm in black for the eyes.
The weaving method is shown in scheme. First, four large beads are collected into a ring (step 1). First, smaller beads are woven between them (point 2), and then large beads (point 3). The beads lie on top of smaller beads. After this, the upper part of the shell is performed according to steps 4-6. The resulting cross in the middle can be further tightened by going over it once, but this is not necessary.

We braid the lower part of the shell according to steps 7-8. Finally, we stretch out another additional string of five beads - this is where the head will be attached. Walking along the perimeter of the shell, we weave in the paws and tail (steps 9-10).

To weave the head, we draw the needle to the place where we made the double bead, take out the lower bead from the first bead and, following points 11-13 of the diagram, weave a mosaic in a circle. There will be 6 beads in the first and second rows, four in the fourth, fifth and sixth rows, and three in the seventh and eighth rows. Finally, go through the beads of the last row with a needle, pulling them together, and secure the thread. 
Turtles

Two figures - smaller and larger. A small one makes a cute keychain; a large turtle can become a refrigerator magnet.
The figures are woven from 10/0 or 11/0 beads. The work uses four primary colors, plus some white and black beads for the eyes. 
The weaving method is standard, there are no difficulties in making this figurine. Therefore, it makes no sense to give a detailed description. You can start weaving from any of the wide rows, whichever is more convenient for you. First move from the middle down, then, having finished weaving the lower part, return to the first row and move up from it. 
Striped pendant
 For a fun colorful striped pendant you will need:
beads 10/0 four colors (turquoise transparent, light blue, orange and peach opaque);
piece of gold wire with memory (approximately 10 centimeters);
two beautiful gold ones fasteners"carbine" type;
all kinds beads suitable colors, different sizes;
a little cellophane for stuffing.
The unstitched pendant is a square woven using a combination of mosaic and Ndebele techniques. The colors in it are distributed as follows: the first three rows are blue beads, the next three are turquoise, then (all three rows each) orange, turquoise, peach, turquoise. The last one and a half rows of the square are woven from blue beads. Weaving starts from the center.
Collect eight blue beads, close them in a ring - you will get the first row (Fig. 1). In this case, the needle will come out of the first bead. Cast on two more beads, pass the needle through beads of the ring number 2 and 3 (Fig. 2). Cast on two beads, go to ring beads number 4 and 5. Cast on two beads again, go to beads 6 and 7. And finally, having cast on two more beads, go to beads 8 and 1, and then go up to the first of the cast on beads of the second row by passing a needle through it (Fig. 3). The second row is finished.

On the third row, pick up two beads, go through the second bead of the second row from top to bottom. Pick up one bead (in the diagram it is marked in gray for clarity, but in fact you need to take a blue one) and go through the third bead of the second row from the bottom up (Fig. 4). Repeat this three more times, and then bring the needle into the first bead of the second row and into the first bead of the third (Fig. 5).

For the fourth row, take turquoise beads. Cast on two beads, bring the needle into the second bead of the previous row from bottom to top. Pick up one bead. Pass through the single bead placed on the third row. Cast on another one, bring the needle to the third white bead of the third row from bottom to top (Fig. 6). Repeat the same three more times until you return to the first bead of the fourth row (Fig. 7).

Weave the fifth row in the same way. In the fourth row on each side of the square you had two beads - now weave one bead before, one between and one after them - you will get three beads on each side (Fig. 8). With each row this number will increase. Weave, alternating colors, until you have 17 beads on each side of the square. By this point, you should have one row of blue along the edge of the square.
The last row (for 18 beads) will run along just two sides of the square. Before it starts, the needle should come out of the “corner” as usual. Instead of two beads, as was done until now, collect only one (Fig. 9). Weave 18 beads on the first side. At the second “corner”, sew only one bead again. Weave 18 beads on the second side. Hem one bead at the third “corner”.

Fold the square in half. (To be honest, by this point it will no longer look very much like a square, which is why you will get such a unique pendant shape). In front you should have sides with 18 beads, in the back - sides with 17 beads. Sew them through the beads of the outer rows. Before finally sewing up the pendant, stuff it tightly with cellophane.
Take a piece of memory wire and bend it into a ring. Place two clasp rings on the wire. From both ends, string beads onto the ring in the following sequence: two blue, turquoise, peach, orange, turquoise, two blue. Pass the ends of the wire through the outermost beads of the upper corners of the pendant. Place several matching beads on the ring, hiding the ends of the wire in them. For reliability, drop a little Moment glue into the central bead and tuck the ends of the wire into it so that the ring does not bend.
Weave the cord using any technique you like, using beads of the same colors as for the pendant. Leave a piece of fishing line about thirty centimeters at both ends of the cord. String beads of different sizes onto this fishing line, matching the color of the pendant. Attach two fasteners at the ends. Hook them onto the rings on the wire ring. If the cord is long enough, then these clasps can be left unfastened, putting the pendant directly over your head.

Hexagon bead
 In small ones (about one and a half centimeters) beads cylindrical in shape with a simple ornament there is something oriental. Maybe that’s why I prefer to weave them from beads in traditionally “oriental” colors - blue, light blue, green, gold. For each bead, use at least three colors of beads; it's even better to use four or five to make the bead look brighter and richer. Try using different combinations of transparent, glossy and shiny beads.
For each bead you will need:
6 glass beads diameter 5 mm;
beads 10/0 or 11/0 in different colors.
To make the beads sufficiently rigid, weave them on a fishing line. If you are working with 11/0 beads, you will need the thinnest needle possible - one that can go through the bead three to four times.
Weave two identical hexagons using the technique brick stitch using one of the diagrams shown in the figure. Since one of the sides of the braid will be inside the bead, you don’t have to bother with securing the ends of the fishing line. Bring both “tails” to one side and carefully melt them with a match - this will save time. 
When the top and bottom of the bead are ready, start working on the sides. Place six glass beads on the fishing line, tie it in a knot and hide the tip by pulling it through the beads (Fig. 1). 
Pull the needle out of the nearest bead so that the knot is inside it. Collect three beads (for side ties it is best to use beads of catchy colors, glossy, metallic or “sparkle”). Place one of the hexagons on top, making sure that the reverse side with the knots is facing the beads. Pass the needle through the corner bead of the hexagon. Pick up three more beads. Pass through the bead from which the needle came out at the beginning of the work, and through the next one (Fig. 2).
Cast on three beads again and pick up the next corner with the needle. Collect two beads, and then pass the line through the first bead of the adjacent string, as shown in the diagram. Return to the bead. Pull the needle out of the next one (Fig. 3) and in the same way pull all the corners of the hexagon to the beads (Fig. 4). Coming out of the last bead, pick up the first bead of the lowest bead and pick up the two missing ones, connecting the braid, and do the second low as usual.
Turn the bead over to the other side and weave the second hexagon in the same way. Make sure the pattern on both sides is oriented the same way.
All that remains is to pull the symmetrical pairs of lows together. The diagram (Fig. 5) shows a side view of the bead. The line should come out of the bead. Pass it through the connecting bead low towards the center. Select one bead in a contrasting color. Pull the needle through the connecting bead of the other bead, away from the center. After this, bring the needle into the next bead (Fig. 6). Pull the rest of the lows together. Tie the fishing line in two knots, pull it through several beads and cut.
You need to assemble the finished beads together using two threads, passing them towards each other into the central bead or into one of the side beads, then pulling them inside the bead and again through the bead or bead on the opposite side. Between the hexagonal beads, place one glass bead at a time or make beads of different sizes.

Michael Jackson, "Billie Jean"

I honestly admit that I am very proud of this scheme. Drawing patterns for brick stitch- actually not my profile, I rarely do this and use the simplest pictures. But there is a first time for everything. One sleepless night I suddenly wanted to do bead keychain based on a black and white picture, which is often used in symbolism of Michael Jackson- that famous moment from “Billie Jean” with the freezing on your toes.
I had no confidence in success, but why not try? I made the base of the pattern in PatternMaker, and then spent half a day finalizing it by hand. Field tests on volunteers confirmed that I did manage to achieve a certain similarity, so I am posting the diagram for public use. Moreover, it seems that I have become a pioneer - there are plenty of patterns for embroidery with Michael Jackson on the Internet, but I haven’t found anything for weaving. 
I’ll say right away: this is my only scheme that I have no objection to distributing online. However, there is a difficult moment in it, so you may have difficulties with weaving from a picture without a master class, especially if you have not mastered the brick stitch technique well enough. If you have difficulties during weaving with the master class, pay attention to the “Classical techniques” section in Beading lessons- there you will find basic recommendations. 
Weaving starts from the widest part. In the diagram, an arrow marks the row, which we will conventionally call the first, and the direction of weaving. It is more convenient to weave the top part first, then the bottom. It takes about 3 meters of fishing line to weave. The work uses beads of two colors - white and black.
The tricky part I mentioned is the strand of hair hanging down the front. The beads that make it up are partially added to the edge of the row, and then partially hemmed between them. The beads that will be hemmed later, in the second stage, are indicated in the figure with a red asterisk. 
Let's look at the weaving in more detail. The 11th row is woven from right to left (this is shown by the arrow). Once you've finished it, go to the bottom side of this row and add two beads, then go back to the top.
The 12th row goes from left to right. The 13th is again from right to left, and it is elongated with beads, which are additionally woven into it.
The 14th and 15th rows are woven without much difficulty. On the 15th row there is also a strand of hair, but it is shorter and easy to do - the beads are simply woven to the beginning of the row, as on the first row of weaving. At the end, the needle comes out of the outer bead downwards. Place another bead on it and return to the outermost bead up, and then back along the row until you return to the point from where you can continue weaving.
On the 16th row, an additional bead is also made at the beginning, after which the row is woven to the end. The 17th row is woven as usual. When it is finished, bring the needle down into the additional bead of the 16th row. It is indicated by a red arrow in the diagram. Collect two beads (they are marked with asterisks in the diagram). Pass the needle through the additional bead of the 13th row. Pick up two more beads. Go back to the first of them - the second will stand vertically. Pass through all the collected beads to the top, to the end of the 17th row, and continue weaving.
The finished figurine can be turned into a magnet or keychain. If you are making a keychain, pay attention to the place where the ring is attached (in the photo) - strictly along the central axis. Then the silhouette will be positioned vertically, as in the original picture.
Those who are looking diagram and description volumetric
toys woven from beads with your own hands on a fishing line,
will find a lot of interesting things in this article about volumetric
beaded turtle.
like this turtle, woven made from beads with your own hands, can be used
just like toy, you can make it out of it suspension(if to
attach a chain to the front legs), brooch or keychain.
This toy is made using circular weaving using the “canvas” method. Weaving
she is on fishing line, beads You need at least three colors, if you wish, you can
use four or five. For the turtle's head and paws I took brown
beads for the shell - red as the main one and bronze to indicate

For further work you will need description,
weave which you can refer to weaving pattern.
So, weave DIY beaded turtle
we start from the underside of the shell.
 1. We collect 4 bronze beads on the fishing line,
we tie and secure the ends - it turns out “ cross».
2. Insert the needle into the nearest bead. We dial 2 red on it
beads and again pass through the same bronze beads,
and then through the next one. Again we collect two red beads, and so
In this way we go through the entire “cross”. We got a “cross”
more. To close the gaps between couples beads,
we weave in the spaces of the future abdomen turtles,
woven from beads with your own hands, one more red
bead. To do this, we put one on the needle
bead, insert the needle into the nearest pair of red beads, dial again
one bead, etc. In total in the second row there should be 12 beads.
3. Third row turtles trudges
do it yourself from beads bronze color.
We weave one bead to each odd numbered bead in this row, and two to each even numbered bead.
We alternate the entire row, weaving in one or two beads.
So this row will have 18 beads.
4. This row turtles again
red, it is woven in the same way as the previous one - beads are added to
each even number, and in the end there are 27 of them.
5. The fifth row is bronze in color, beads are added in the same way.
The number of beads in the previous row was odd, so you will have to
first weave one bead twice in a row, and then
move as before scheme. Must
you will get 40 beads.
6. There is no need to add anything in this row, it also has 40 beads.
We braid four red ones and one bronze one, and so on eight times.
Bronze beads will share the shell
turtles into 8 segments.
7. We begin to tighten the shell turtles.
If in the previous row there were 4 red ones in each segment beads,
then in this there will be 3 of them. To do this, to the first of them we weave one
bead, after which we pass the needle through the second and third beads
previous row. We weave one bead to them, and then to the fourth
bead segment - one more. We perform the same operation in each
segment. The pattern of bronze beads remains unchanged - above each
we braid one bronze one at a time. Thus, the beads of the seventh row
go in sequence: three red - bronze - three red, and
etc. There are 32 beads in total.
8. Eighth row beaded turtles duplicates
seventh: above each beaded- one by one
the same color.
9. Continue to reduce the number beads
the same way as they did it in the seventh row: above the first red bead
segment we weave one, above the second and third - another. So
Thus, two beads remain in the segments, and one bead remains between them
bronze. There will be a total of 24 beads in this row.
At this stage, the turtle is stuffed with some kind of filler.
You can use paper, cotton wool or cellophane. The needle then passes through
all the beads of the last row, pulling them together.
10. In the tenth row turtles at
there will be 16 of us bronze beads. For this
we weave one bead over two red ones and over each
bronze beads from the previous row.
11. Above each two beads of the previous row we collect
one red - you get 8 red beads.
12. And finally, over two red ones we weave one at a time
bronze beads (4 in total) and tighten them with fishing line. Carapace turtles
13. Let's start doing head.
We draw the line inside the shell to the beginning of any segment of the 6th row. TO
We braid four red beads with one brown one, then
we go down to the fifth row and there too to the four beads located
under the desired segment, we weave four brown ones.
14. Without changing anything, we again collect four brown beads
below and four above.
15. We collect a purple bead - this will be the eye turtles.
Then we add the second and third beads on the previous row with one
brown, we braid the second “eye” to the fourth. Below we also bring
number of beads up to three.
16. In the last row of the head beads
only two. Place one bead over the first, then over the second and third
– one more, repeat the procedure on the bottom side and stitch again
the whole row of fishing line for beauty.
first, then the paws should be on the second, fourth, sixth and eighth.
We bring out the fishing line in the area of the second segment and on the fifth row we weave three
brown beads, then on them in the second row - two more,
Additionally, we pass both rows with fishing line for rigidity. In the same way
we do the rest paws, moving clockwise
arrow. On the fifth segment we weave the tail in the same way, picking up
two beads in the first row and one in the second. We fix the fishing line and
hide the end inside.
Now all that's left to do is hang it turtle, And
the work is done. At least until you want to weave for her
Three-dimensional figures occupy a special place in beadwork. They are made more for the soul and for home decoration, since such toys have no practical use. In fact, you can do anything. The beaded tortoise is no exception, the pattern of which uses the technique of volumetric weaving. Knowing the basics, you can easily make more than one figure. The master class below shows this well.


To make a turtle from beads with your own hands, you will need:
- beads No. 11 in different colors;
- wire 0.2 mm thick;
- thin fishing line;
- beading needle.
To make the legs and head, 8 grams of brown beads are used, for the belly and shell - 5 grams of green and 2 grams of blue. Also 8 more pieces of black, 2 pieces of blue and 1 piece of yellow.
Weaving order
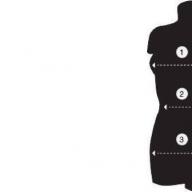
Before you start beading a turtle, you should carefully read the diagram. Usually in such cases, 2 parts are proposed for the top and bottom. This diagram is different: here the stomach and back of the turtle are immediately depicted in the same plane. Odd rows should be assigned to the top, and even rows to the bottom. Now you can look in more detail at how to make a turtle from beads.
Take a piece of wire 100 cm long, pick up 1 yellow bead and place it in the middle. Place 3 pieces of brown beads under it as the bottom tier. In the next row, also cast on 3 pieces of brown beads from the top, and 6 from the bottom. Then cast on the following bead sequence: brown, blue, 2 brown, blue and brown, and on the reverse side – 6 brown. Further, the weaving pattern looks like this: 4th row - 6 pieces on top and 5 on the bottom, 5th and 6th rows - 3 brown beads each.


Starting from the 7th row, the shell and belly will be woven from green and blue beads. Place 6 green beads on top and 5 below. Next, for the upper tier, alternate between green and 3 blue, for a total of 13 beads, and for the lower tier, 9 green. Then thread an additional wire 15 cm long from below for the legs and place the collected beads exactly in the center. In row 9, repeat the same set.


Continue beading according to the following pattern:
- tenth row: shell – 15 green and belly – 11 of the same beads;
- eleventh row: collect 16 beads from above, alternating green and 4 blue, from below – 11 green;
- twelfth row: repeat the previous row;
- thirteenth row: 15 and 9 green beads, respectively.


Fourteenth row: for the shell, collect 13 beads, changing one green and 3 blue beads, and for the belly - only 7 pieces; At this stage, as shown in the bead pattern, the turtle's hind legs need to be made. To do this, add another 15 cm long wire to the lower tier.
- fifteenth row: cast on a shell consisting of 9 pieces alternating green and 2 blue and a belly of 5 green;
- sixteenth row: 6 green and 3 brown, respectively;
- seventeenth row: two brown beads;
- eighteenth row: another similar bead.
The last two rows are made using the parallel weaving technique. This is the turtle's tail.


Next, to make the figure look like it’s alive, you need to weave the paws. They are all made the same way. Therefore, a master class will be shown using the example of one leg. It consists of only 3 rows. In the first and second, 2 brown beads are woven on top and bottom, and in the third, black, brown and again black beads alternate.