Useful tips
In the summer, most children relax at home, in the village, in the country or in some resort town.
To give them something to do, you can come up with various crafts, which not only will be, but which will also remind you of summer in the future.
In addition, you can make crafts that children can play with and have fun with. Here are a few very interesting crafts for summer for children:
Crafts for summer. Paper fruits.

You will need:
Paper plates
Acrylic paint or gouache (red, orange, green, lemon, yellow, white)
Colored cardboard (yellow, orange, green, pink, white)
Markers (brown, yellow, orange)
Scissors
Glue stick.
1. Take paper plates and start coloring them - one red, the other orange, and so on. Choose any colors that match the fruit you have chosen.

You may need to apply a second coat - to do this, leave the plates to dry and then add a second coat.

If you want to color a paper plate like a kiwi, then you will need a mixture of green and white.
2. Place a paper plate on a piece of construction paper and trace it to create a circle. Follow the instructions below for each fruit:
Apple:
Cut out a circle from white paper, the diameter of which is 1 - 1.5 cm less than the diameter paper plate.


Using a glue stick, glue the white circle to the red plate.
Cut the plate in half and use a black or brown felt-tip pen to add seeds.
Orange:
Cut a circle out of orange cardboard with a diameter slightly smaller than the diameter of the plate.
Fold the circle in half and in half again, and then in half a third time.


Unfold once and use scissors to cut out the center sections of each triangle (see image).

Unfold your piece completely and glue it to the orange plate.
You can finish drawing the seeds with an orange felt-tip pen.
Lemon:
Repeat all steps for the orange, using yellow paper and a marker.

Kiwi:
Cut out a circle from green paper, the diameter of which is slightly smaller than the diameter of the paper plate.
Fold the circle in half and cut an oval in the center of the fold.
Lay out the paper and draw seeds with a brown felt-tip pen.
Glue the blank to a light green plate.
Watermelon:

Cut a circle out of pink paper, making it slightly smaller than the paper plate.
Glue the circle to the green plate.
Cut the plate in half.
Use a brown marker to draw the seeds.
Here's something else you can do from paper plates:


DIY summer crafts. Sun.

You will need:
Several branches
Twine
Fabrics in yellow, red and orange shades
Scissors
Thread and needle (if desired).
1. Collect 8 branches, about 1 meter long (less possible).
2. Lay all the branches on a flat surface so that they form a star.

3. Connect the branches together using twine. First, connect 2 branches in the shape of a cross, and then add two more branches in the shape of the letter X.
Here is one way to connect sticks using rope:
4. Using scissors, cut the fabric into strips of any width. In this example, the width of the strips is 5-6 cm. You can tie the strips together to get one long strip.
5. Start “knitting” your sun by wrapping fabric around the connected branches. First, tie one end of the fabric to the center part of your twig star, and begin to wind the strip in a spiral pattern.

When you have tied the sun, simply tie the end of a fabric strip to any branch.

Crafts for kindergarten for the summer. Aquarium.

You will need:
Cardboard box
Colored cardboard
Buttons
Pencil (to draw fish)
Scissors (to cut out fish)
Fishing line or strong thread (to attach one end to the button and the other to the fish)
A utility knife or sharp-edged scissors (to make cuts on the box)
Scotch tape (to secure weak areas on the box)
Double-sided tape (to attach the craft to the wall).


Summer craft for children

You will need:
Cardboard sleeves from toilet paper
Beads
Straw (cocktail)
Popsicle sticks and tape to hold the sticks together.

DIY crafts for children 10 years and older. Stained glass.

You will need:
Paper plates
Scissors
Self-adhesive film or wide tape
Plants.
1. Cut a circle out of a paper plate.

2. Cut a circle from the self-adhesive film slightly larger than the plate.
3. Turn the plate over and carefully glue the film to it so that it does not touch anything except the plate itself.

Instead of oilcloth, you can use wide tape - cut several strips from it, and carefully and evenly glue them to the plate so that the strips almost do not touch each other.
4. Turn the plate over and start attaching various leaves, flowers and other plants to the tape or oilcloth.
Summer. DIY crafts. Multi-colored wind toy.
You will need:
Set of sticks for children's handicrafts(in this example there are 200 of them)
Fishing line or other strong thread
thick needle
An awl, screwdriver or drill with a thin drill bit
Large beads (in this example there are 5 pieces).

1. Make a small hole in the center of each stick so that you can thread a needle and thread through it.
2. Thread a needle and thread through a large bead and make sure that the bead is in the middle of the entire thread.

3. Connect the ends of the thread and pull the double thread through the holes in the sticks. You can first stretch through 10 sticks of the same color, then 10 sticks of a different color, and so on.
4. Once you've threaded the string through all the sticks, it's time to add 4 more beads (you can use as many beads as you like).
5. Tie the ends of the thread into a knot and make a loop so that the craft can be hung.
6. Adjust the sticks so that they resemble a spiral staircase.
Enjoy your craft as a gentle breeze blows and it begins to spin and colors sparkle.
Children's crafts on the theme "Summer". Toy jellyfish.

You will need:
Plastic bag
Plastic bottle
Scissors
Blue food coloring.

Below the instructions for creating a jellyfish you will find a video also with a detailed explanation.
1. Place the bag on the table and cut off the bottom (bottom) or, if the bag has handles, the top to make a square.

2. Cut the bag into two equal parts.

3. Take one piece so that a small ball forms in the middle. Wrap thread around this ball at the base.

4. Cut the bottom part (everything under the “ball”) into fringe to create tongs for your jellyfish.

5. Fill the bottle with water and color it with blue food coloring.


6. Pour some water into the “head” of the jellyfish and put the craft in the bottle. Close the lid.
What requirements can be made for ideas? crafts for children 4 years old? They, of course, should be bright, beautiful, made from familiar materials that are easy to process. But they shouldn't be very simple. At just 4 years old, the young artist and creator can already do a lot, knows a lot, has his own taste and vision for his future craft. He just needs a little help from you and a little useful advice on implementation, and he will be happy to fantasize the rest himself.
Crafts for children 4 years old photo
All examples of crafts for 4-year-old children, photos of which we will see in this article, can, of course, only conditionally be attributed to any age category. The presented crafts will be complex for some four-year-olds, while for others they will be simpler than a steamed turnip. Children's creative abilities are very individual, they are interested in different types crafts and it is the parents who should best know which ones their kids will like and will attract their attention.
Now you need to make buds; to do this, apply glue to the tip of each twig and thoroughly dip the tip in the grain so that as many grains as possible stick to it. When the cereal cones are dry, dip them in a jar of gouache or paint them with a brush. It's time to assemble the bouquet - we take the leaves, glue our white and pink flowers on them, attach the twigs and connect everything together using a small satin ribbon. The entire composition can be presented as such, or can be pasted onto a postcard or gift box.
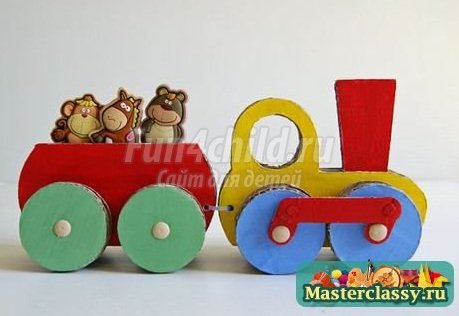
Volumetric and moving toys can be made from different materials. But the simplest among them are . Especially packaging cardboard, which can be taken from waste cardboard box- it is quite dense and voluminous. You can cover it with colored paper on top and make toys out of it. You can connect parts using glue or a needle and thread; cardboard, unlike paper, will not tear if connected in this way.
Crafts for 4 year olds ideas
Let's look at some new options crafts for children 4 years old. Ideas can be funny, and with elements of learning, and with elements of development. Cotton pads were chosen as the material for the next application.

You can place this composition on a sheet of green cardboard, which will look very similar to a green lawn with yellow chickens running around. we will paint separately so as not to spoil the background.
Using a brush, apply yellow paint to the surface of each disk. Cotton wool quickly absorbs the material, but try not to use too much paint and only soak the first layer of discs. Apply glue to a clean surface and glue the disk to the green background. Now we take plasticine and turn cotton circles into chickens.
To do this, we form small scallops from red circles, eyes from blue circles, and chicken legs and beaks from black plasticine. Let's not forget to leave tasty food for our chickens by gluing a few seeds with black plasticine.

Toilet paper rolls can become bright butterflies with the help of your imagination and colored paper, preferably printed. At the first stage, cut out a rectangle from paper, apply PVA glue to the cardboard sleeve and glue the paper, smoothing it over the entire surface so that there are no folds or creases. At the second stage, we decorate the butterfly with antennae made from two satin ribbons.
We glue them on the inside and tie small knots at the ends. And on last stage We cut out the wings from colored cardboard, decorate them with flower applique and glue them onto the roll. All that remains is to add eyes and a mouth to our butterfly.
How to make crafts for 4 year olds
It happens that all the usual materials get boring, but you need to captivate the baby with something in order to direct his ebullient energy into a peaceful direction. We present advice on how to make crafts for children 4 years old from this simple material, like potatoes. Select several clean and even small nodules for the craft.

Also for the craft you will need plasticine and twigs on which you will attach the potato heads. Using plasticine you depict the faces of people. Look with your child, maybe in your basket there are potatoes of an unusual shape that can become the heads of animals or fairy-tale creatures. Having made such a potato puppet theater, you can together stage a simple fairy tale, for example, about the Turnip or Teremok.

If you have insulating tape or adhesive tape on your household different colors, you can invite your child to try making an applique with them. The theme of such work can be anything; you need to create various lines and shapes with pieces of tape.
In this case, a mighty tree is made from black tape. To form branches, small pieces are cut from a roll of tape, glued, and then twisted with your fingers to give them such an unusual shape. The rays of the sun are made from straight pieces of tape, just like the trunk and the dark earth in the picture.

Fabric crafts can not only be cut and sewn (which, of course, is quite difficult for 4-year-old children). They can be made from unnecessary socks, T-shirts, knitwear. When knitted fabric If you cut it, it won't crumble. Its edge curls, creating interesting stripes. It is by using this property that you can twist such a funny octopus with your own hands.
To do this, cut out a square of fabric, place a thick ball of cotton wool in the middle, wrap it in fabric and fix it. Now we cut the fabric in a circle into strips, weave these strips together in three pieces into braids. We color the octopus's face with markers or colored pens.
Beautiful crafts for children 4 years old
It’s just that you can’t surprise kids with plasticine applications anymore. But if you suggest combining for beautiful crafts for children 4 years old plasticine work with, then you will surely please them. After all, from the sea we often bring whole packages of the “most beautiful” shells in the world, which we then need to put somewhere (if, of course, not in the trash can). A couple of small shells will be useful for the applique about the life of an ant in our next example.

The applique itself is made of plasticine, but keep in mind that the elements that will be decorated with shells must match them in size.

Other news
Greetings, dear parents!
If your baby is one year old, or already one and a half, or maybe already two, then it’s time to interest your little one in creative works. First crafts with 2-year-old children, what could be more touching and exciting?
We will introduce the children to new materials, such as colored paper, cardboard and of course glue.
But many parents are interested in the question: at what age should one start creating?
There is no definite answer here, since each baby is unique and can begin to engage in creativity even at 1.5 years old. Another kid won’t even want to at two.
In any case, over the age of one year, the task of the parents is to offer the child this type classes and do not expect great results from it.
Someone says that their child sat down the first time and was interested, but another needs to be taught in small steps every day so that he can at least stay in the chair.
In any case, do not force the baby, but interest him in otherwise You will discourage him from engaging in this type of creativity altogether.
I suggest simple types crafts with templates that you can play with your little one.
1 point:
Of course, in order to fully engage with the child, the mother needs to prepare materials for classes in advance. Why in advance?
If you sit your baby next to you and cut out pictures that need to be glued, then your baby will either interfere with you, or will drag and tear everything from your hands, or will completely leave workplace.
You know that children at such a young age cannot stay at the table for a long time, they need to run, run!
And if you have everything prepared in advance: they sat the child down and started playing with him, we take out the ready-made paraphernalia and tell us what should be and where. This course of events would be more suitable for the baby.
Although, if your baby can sit quietly next to you and watch you cut something out, then of course so be it. In general, look at your child.
2nd point:
Then you can complicate the task: you need to place the elements only where they should be:
We need to dress Masha. Mom cuts out clothes for Mashenka: a hat, overalls, mittens and boots separately. The baby must glue everything. 
From torn scraps of colored paper
Here the mother does not need to prepare elements for work; it is recommended to tear up the pieces of paper together with the child.
After I cut out various shapes from colored paper, I don’t throw away the scraps. They can also be glued to the applique.
Like these ones:
From torn pieces of colored paper we make the following craft plan:
House. Here we use pre-prepared rectangles.
Pyramid. Here we studied geometric figures, pronounced the name and colors. 
Crafts made from paper and plasticine
Here we have a background and complement it with plasticine elements. To make the plasticine softer, you can leave it in the sun in the summer and on a radiator in the winter, but not for long!
Fairytale house. The house is cut out of cardboard and a window is made with a razor. Everything else is decorated with plasticine balls. Teach your child to flatten them. 
Sunflower

DIY crafts from various materials and completely different topics presented in this section. Author's works, collective, master classes with step by step photos, children's, joint with parents or a teacher and entire thematic exhibitions. The age of the craftsmen: from very young children who are just learning to use glue, to teachers and educators.
Crafts. MAAM Workshop
Includes sections:- Master classes. Making DIY crafts with step-by-step photographs
- Teamwork. Collaborative work, collective creativity
- Sun, sunshine. Crafts and drawings on a “sunny” theme
- Crafts and bouquets of sweets. Candy gifts, suite design, flowers
- Wreath. DIY wreaths for the holidays, seasonal, New Year's
Showing publications 1-10 of 60546.
All sections | Crafts, master classes. Making crafts with children
 Multi-colored lids are a universal material for creativity. It is enough to have a lot of colorful lids, glue, colored paper and, armed with imagination, begin making various fakes. Software content: - introduce children to the art of appliqué; - continue...
 On the eve of the Day of Family, Love and Fidelity, we read from children's poems about daisies. Had a conversation with children about that, that the symbol of the Day of Family, Love and Fidelity, which is celebrated on July 8, is the chamomile. This is a very common flower in Russia, which has an unusual...
Crafts, master classes. Making crafts with children - Collective work on applique for the holiday of May 9
Publication “Collective work on applications for the holiday 9...”  Victory Day is celebrated annually on May 9 in honor of Russia's victory over Germany in the Great Patriotic War. Patriotic War, which lasted from 1941 to 1945. On this day, we congratulate veterans who fought at the front and behind enemy lines and those who created tanks and aircraft, shells and...
 Image library "MAAM-pictures"
 Purpose: interior decoration, Christmas tree, an attribute for the game. Goal: to make a ball from Triskele paper. Objectives: - to consolidate the ability to work with paper, to teach how to make a ball from Triskele paper; - develop Creative skills, imagination, fantasy, fine motor skills; -...
 To make musical mushrooms we will need: pieces of fabric or artificial leather red and white, padding polyester, foam rubber, double-sided tape and bells. Cut 2 circles of red and white from the fabric, fold in half and sew along the edge, then turn out....
Crafts, master classes. Making crafts with children - Board game - “walking” according to traffic rules with your own hands
 Board game according to traffic rules "walker with road signs" Objectives: - to create a desire to make board game with your own hands; - introduce children to road signs; - develop thinking and fine motor skills; - develop creative imagination and competitive spirit; - bring up...
Happy parents of a two-year-old child know firsthand that a child at this age is unusually active and inquisitive. If you turn away from him for a few minutes, the fidget will immediately find something to do, which, by the way, is not always liked by adults. The child is drawn like a magnet to do some kind of “skoda”, exposing himself to all sorts of troubles and dangers.
“What to do with a little naughty boy to direct his energy in the right direction?” - many parents ask. We will try to help in this difficult but pressing issue.
To begin with, I would like to draw your attention to the fact that at the age of 2 years, children actively absorb any information coming from you or the people around them. Therefore, I strongly recommend not only playing games with your child, but also involving him in handicrafts and creativity. This great way strengthen friendly relations with your baby, develop his creative potential, as well as develop fine motor skills of his fingers.
In this article I offer you many ideas: what to do with a two-year-old toddler in his free time. I’ll say right away that at first the baby will be distracted, and also not very attentive and assiduous. Therefore, you will be faced with a difficult task - to teach your child to maintain attention on one lesson during the entire process of making a craft, depicting a drawing, etc.
What crafts can you do with a 2 year old child?!
Finger drawing
One of the most favorite activities of little people is painting with their fingers and palms. The main task of parents is to choose the right paint so that it is of high quality, environmentally friendly, approved by dermatologists and does not cause allergies to the child’s skin. You can buy ready-made finger painting paints or make your own.
How to make finger paint with your own hands.
You will need the following materials: starch, salt, sugar, food coloring and some glycerin.
Manufacturing process: mix all ingredients except glycerin and boil a little until it becomes glue-like. Add a little glycerin to the cooled mixture to make the paint noticeably shine.
Be sure to prepare your work area for drawing. To do this, cover the work surface with oilcloth or waste paper, place objects for drawing (paints and paper), place a container of water so that the young artist can periodically rinse his hands, and place a towel nearby. By the way, to prevent your child from getting dirty, put an apron on him. The choice of the theme of the drawings is up to you and, of course, up to the baby.
We draw on cereals, sand, salt...
Drawings from various fillings or salt. To create these designs, pour the cereal onto a tray and smooth it with your hand so that it covers the entire surface. Show your child how to draw: run your finger over the cereal, drawing a circle, stick, flower, etc. Then level the surface and ask your little one to do the same! Perhaps the child wants to draw some hooks, incomprehensible “doodles”, broken lines, etc., then do not stop him, do not interrupt the flight of fantasy and the inspiration that has washed over him.
Modeling from plasticine and salt dough.
Crafts from egg cartons.
Crafts using an egg tray. A striking example of such a creative solution can be the whole flower meadow. To do this, cut out the shape of an egg and make cuts along the edges. These will be the petals. Give your child the opportunity to straighten flower petals and then paint them with colorful paints. Attach a stem - a toothpick or a twig - to the flower with plasticine.
Houses and huts! Tell me, who didn’t love them as a child?!
A little more experimentation!!!
Bouquet of natural material. In the autumn season, while walking, collect golden, red and green leaves with your baby, beautiful flowers and dry them between the pages of an old magazine or unwanted book. From such natural material you can build a wonderful composition on a sheet of paper or make a bouquet and place it in a vase.
Pictures or refrigerator magnets made of plaster. You won't believe it, but along with two year old child You can make figures from plaster. You will need to dilute the plaster with water to the consistency of thick sour cream, and then pour it into the molds. So that the product can be hung, a wire, string or magnet is immediately applied to it. When the plaster hardens, ask your child to paint the crafts with paints.
How to promote the development of creative talent in a child!? Recommendations.
- I strongly recommend that all the crafts that the child has made should not be hidden in a closet, but put on shelves, hung on the walls of the children’s room so that the child can see the fruits of his creativity and, upon the arrival of guests, can proudly show off his own masterpieces.
- And further! If your favorite two-year-old craftsman’s work is not going well or he doesn’t do the craft the way you want, then under no circumstances should you yell at him or insult him, but simply calmly tell him how to do it correctly.
- Creative activities should take place in a calm, friendly atmosphere.
- Don’t forget to praise your child so that he feels your support in a difficult task.
Read more:
10 ideas for original bird feeders
10 ideas for homemade children's houses and play areas