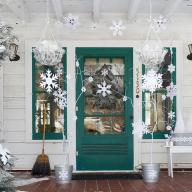
I welcome everyone on the pages of the diary) Today I want to suggest to gradually begin to inspire ideas for the holiday Light Easter. Can anyone want to sew such wonderful bags in the form of rabbits for easter eggs, sweets and other gifts kids? Photo Master class Below will help you easily and quickly cope with the work. Good luck!
And I also add ideas for Easter so that you don't miss me) Below you are waiting for a pattern of textile birds, a template for sewing baskets for Easter eggs and an Easter napkin pattern with an applique and embroidery


Small useful retreat for all businessmen. Do not want to buy a finished company for your business? Regadvisor offers ready-made firms in Moscow, with a current account. You can buy a company in one click, for example, construction, with a license and proceed to making money tomorrow) All details read on the company REGAdvisor.ru company.
So, how to sew a bag of rabbit from the fabric to Easter holidays. To work, we will need:
- linen monochrome fabric for face side pouch,
- cotton stuffing fabric for lining bag,
- threads for stitching parts and for embroidery frost,
- needles
- sewing machine,
- scissors,
- braid or rope.
Getting to work. Print on the printer or transfer directly from the monitor screen. Page bag and rabbit ears. Before printing, the pattern should be enlarged to the size of the bag you need.


We sew the details of the ears, connect the linen fabric from the printed. We do not forget to make scissors on the round edge with scissors, when the parts are turned out, we will get neat, well twisted, ears. 
Soak ears and flash from the front side along the edge, like this:

Stitching the bag details

Send ears:

Here are from these two processed parts we will sew our bag:

On one of the details of the bag, which without ears, lay the line at a distance of 1 cm from the edge and do the ribbon or rope.

Textile bird

Picture pattern: 
Easter basket For YIITS

Template for sewing baskets:

Easter napkin with applique and embroidery


Spring is very fresh, bright and by us by all the long-awaited time of the year. She, probably, have many of the most beloved time of the year, because around all green, smells, blooms, sings and flies. Spring freshness, cheerful trills of birds that flew from distant warm edges, which may be better and nursing. Spring brings us another wonderful, although sometimes a little sad holiday of light Easter. This holiday is not in vain be called light, because on this day there was a resurrection of our Lord God of Jesus Christ. It is on this day among the mouths that we all have been hearing "Christ", for which, in response, we hear "truly risen." People bake Easter couplings, paint eggs and exchange each other by Easter attributes. And now it is generally very fashionable and prestigious to give each other to each other small souvenirs made with your own hands. For example, you can make soft bunnies in the form of Easter eggs as souvenirs, only with ears. It will be very cool to look and will be funny gifts for loved ones.
So, consider the master class on the sewing of such hooks and for the master class we take:
- Fabric cotton 100% quality of Polish and Korean production, take purple, blue and turquoise in fine white peas;
- Pattern;
- Holofiber filler;
- Threads are white and black;
- Needle;
- Salad Salad ribbon in peas 5 mm width;
- White cotton lace in the shape of a flower;
- Black eye straticles;
- Knitted flowers of mint, pink and beige colors;
- Semi-graysins of different colors;
- Scissors, pencil;
- Lighter;
- Sewing machine.

Take the pattern. Every bunny consists of two egg eggs and 4 billets for the Ear. Cut out one egg blank and one ear.


Now we take a tissue and we apply our patterns.


We supply a simple pencil.


It turns out from each tissue, we need to cut 4 ears and two tales. Cut out and now we all elements from the fabric are needed well.


Now in pairs, the front side we put the billets of the ears and billets of the Taurus. We cross the machine all the workpieces among themselves, having a 2 cm for 2 cm so that you can unsubscribe all parts, fill the filler and then sew manually.


First, they cross the sidewalls on the calves, and then in a circle itself the workpiece. We make sidewalls inserts so that then our bunnies acquire the shape of eggs.


Now we are squeezed by our fabric blanks with fillers and at the bottom we have done by hand with a precipitant seam.


The ears with the help of a secret seam are sewn to the very tank at the very top. Around the ears we bind ribbons and tie bows. Black threads sew spouts and mouths.
Approaching any holiday kids perceive with enthusiastic waiting. For holidays, gifts are always given, congratulate each other, decorate at home, prepare an exquisite meal. All this creates the atmosphere of happiness 🙂 Especially for the holiday light Sunday Christ!
One of best ideas How to attract children to the cause - instruct them the preparation of crafts and decorations with their own hands. Older children who can already use needles with threads, can do crafts from the fabric. Children of kindergarten and younger school age There will be products from paper with great pleasure (I know not on the height, but from practice - while I write, he with a grandmother on our schemes makes a bunny!) 🙂 By the way, only recently published.
And today we will deal with the most popular cradle for Easter - a bunny with pockets for eggs. We will do it out of paper and from the fabric. Ready? Then read and proceed to the fascinating process of needlework!
Origami technology really like kids. Easter bunny make this way will not be difficult, especially when step-by-step scheme At hand and details are described all the steps of manufacture. Below I give a detailed scheme that you can print yourself and put before your eyes for convenience.

And now in detail in pictures with a description we will analyze this craft. I do with my son together and shoot in the photo so that you can easily repeat the process 🙂
So, hare for Easter egg - step-by-step master Class.
First prepare the following:
- two sheets of color paper A4;
- white paper sheet;
- scissors;
- glue (pencil or PVA);
- black marker or marker.
To start from the first sheet of color paper A4 format, make a square. To do this, one of the corners of the rectangle we fold exactly, as a result of which we obtain an equifiable triangle, as this is shown in the photo below. Superior cut off with scissors.

Similarly, we make the second square of colored paper. As a result, we obtain two identical squares.

Then we take one of the squares and on the already existing split on the diagonal fold, and we get an already familiar to us is a chaired triangle


The same makes the same with the second sharp angle. A small square should be turned out, turned up, divided into two halves with small inaccessible triangles.

Then we take over the upper sharp corner one of the triangles and take it down to the corner, while doing the triangle exactly in half.

We also do the same with the second angle and we get this workpiece as in the photo below.

Now you need to turn the blank to the other side, so that the two bend angle from the bottom side turned out to be up.
After that, a little byten by the upper corner of the square, as this is shown in the photo below.

Here we have already begins to raise the face of the bunny. On the bent down the triangle, undermine the lower angle, you should have another little triangle.
Important! Very carefully smooth each bend so that the bunny turns out a dense and symmetrical, so it will be steady on the surface of the table.

Then turn the workpiece with a helicopter and gently start to the center two side angle of the square, as shown in the photo.

The top of the hare is ready.

We proceed to the bottom - stand.
We take the second square of colored paper, bend it diagonally to the opposite corners from the existing bend,

thus, you must have a square center at the intersection point.

After that, every angle of great need to be bandaged to the center, as a result you will get such a small square converter.

The resulting square rotate in any angle up and remove the upper angle to the center, as shown in the photo below.

The exact same procedure is done with the lower corner of the square.

Then you need to bend the blank of the stand in half. It will then need to be twisted with a ring.


The top of the hare is glued into the inside of the stand, as it is shown in the photo below.

Then bend the bottom of the stand:

Collect a stand, inserting one of the corners into another angles into another, and if necessary, covering it with glue.

It remains to paint the muzzle and draw the legs and everything. Easter hare for eggs ready!

Can be inserted into the stand and decorate easter table Made independently at home with children 🙂
Master Classes and Ideas for Children with Paper Hare Making Templates and Schemes
In fact, you can do a bunny from paper in different ways, and they all suit the light Easter holiday. And to give the fantasy to children to give will, I prepared for you some ideas with templates and without them. Look along with the children, fantasize, cut out in templates and make crafts at Easter.

Here this template can print and give the child to cut:

We here turned out, as in the photo below.

The egg is quite placed 🙂
I hope the ideas came up.)
Ideas and patterns of a bunny of fabric with pockets for eggs
For craftsmen Croy and sewing a few ideas and templates, how to make a hare from fabric.
To begin with, this idea is a bunny with a basket for eggs from burlap. Very nice it turns out.

We make it in two stages. Download and print yourself A4 format pattern for convenience:

Then prepare tools and materials. You will need:
- Cotton socks one pair
- Singry procession for packing
- Thicks
- Needles and pins
- Scissors
- Red-colored felt
- Food plastic for teeth
- Pink knitwear flasks for spout
- Satin bow
- Burlap measuring 26x13
- 26x13 Bag Fabric
See the detailed video instructions below:
You can make this bunny of felt, it can be put on my finger for kids and fun to spend a festive time for role-playing games)

Detailed instructions in the video below:
And you can still make such a bunny from the pomponchik:

A very cute bunny will succeed, isn't it?
For this craft, we will need:
- thicks
- cardboard
- gray and white felt
- scissors
- eyes
- wire
How to make a bunny of a pomponchik, see step-by-step video:
Options can be a lot, here is flying your fantasy. Happy Celebration of Sunday of Christ!
Natalia Melkova
Easter bunny - One of the symbols of the bright holiday Easter. Even at the beginning of the twentieth century in tsarist Russia Bright were popular easter postcards With the image of a fluffy rabbit with a basket of multicolored eggs. And the first mentions of the hare as the Easter symbol are dated to the end of the XVII century. It is believed that the Easter bunny comes from Germany, because the first written mentions of him were found there. Bunny / rabbit was a regular companion of the Anglo-Saxon Goddess Estra (Ostara) - the patroness of spring and fertility. Spring offensive, namely day spring equinoxShe was her holiday, and a rabbit symbol was a rabbit, symbolizing fertility. Rabbits are famous for their fertility, and it is these as its quality a devotee of a friend of the goddess symbolized the continuation and updating of life.
In the same place in Germany, in Munich, there is the only Museum of Easter Zaitsev in the world, who fell into the Guinness Book of Records. The museum has over 1000 most different exhibits that arrived there from around the world.
There are many beautiful legends of appearance. easter rabbit. One of them says that during the Great Flood, when the Ark sailed over the waves, he came across the top of the mountain, and the bottom was formed in the bottom. The ark was supposed to sink if not a bunny that shouted to bandage his tail. And in memory of the brave haze, a beautiful tradition about the magic animal, carrying bright, painted eggs, was born.
Today, Easter hare enjoys great love and is one of the main elements of the Easter decor. Zaitsev at Easter bake - cookies or sdobu, make chocolate, mastic, etc. Souvenir hares from ceramics, plastics, glasses, fabrics, wood, wax or children's crafts with comfort "are arranged" on the fireplace shelves, windowsill, festive tables And together with us take part in Easter celebrations. In many Catholic countries there is such a popular game like "Hunting for easter hare", Which successfully carries and with us - adults hide eggs around the house and the garden, and the kids are delighted, trying to find deserted bright eggs, as well as their chocolate imitation.
I bring to your attention two options master - class of Easter bunnies, which will decorate any interior and make a bright Easter holiday more colorful.

Option number 1.

To work, we will need:
* Cotton Cotton fabric (a small flap of 10 x 18cm is leaving for one bunny);
* Reinforced threads or x / b - to crosslink details;
* Threads Muline - for embroidery;
* Plastic eyes for toys or boosen;
* Kapron tape (1 cm wide and 50 cm long) - for skirt and bow;
* Bunny pattern.

Progress:
We fold the fabric in half, the front side inside and outlines the contour of our pattern.


Cut, taking into account the allowance.

We estimate the details, retreating a little from the edge (for, subsequently, we could easily turn the product on the front side, and stitch on the machine.


We descend and sew the wrappers.

We cut off the excess fabric, leaving a small battery on the wrappers. Soak.

Put our bunny with a holofiber or cotton tight enough to pleasant elasticity. It is more convenient to do this with a long tweezers or pencil.


Carefully sew the hole with secret stitches.


We plan nose and mouth and embroider with threads Moulin.


Binding of the ears we bring inward and pre-jokes with pins, gently sew the secret stitches.


For a skirt, I used a bitter tape with a length of 50 cm (37 cm - directly for the skirt itself and 13 cm for a bow). Ribbon sew among themselves, to form a single ring, and we collect on the assembly, beautifully and evenly distributing Foldda. We put the skirt on the bunny and sew it with secret stitches.


We look at the eyes, we glue or draw them acrylic paint.

From the remaining tape we make a bow and sew.


Bunny is ready!


This is such a pretty bunny company will help you decorate the interior of the group for the holiday.

Option number 2.
These felt Easter bunnies are not difficult in execution, as they do not consist of more details and actions.
To work, we will need:
* Multicolored hard felt;
* Holofiber filler (syntputs or wool);
* Marker self-describing for fabric and felt or pencil;
* Threads Moulin - to cross the details;
* Various accessories for decoration (rhinestones, flowers, ribbons - ribbons, bows, etc.);
* Wooden skewers;
* Pattern of bunnies.


Progress:
We fold the felt in half, the front side inside and outlines the circuit of our pattern. It is more convenient to do with the help of a self-describing marker. The circuit of the pattern at the same time is indicated bright and easily disappears with water, without leaving traces on felt / fabric.


Cut.

We stitches, leaving a small gap through which is slightly filled with a holofiber bunny or cotton to give it a light and pleasant volume.

Cut from a contrast felt of flowers, decorated with rhinestones, butt and ribbons.

Gently sew the decoration with secret stitches or glue with a tissue glue.


Similarly, you can make felt easter eggs.

Using wooden spanks, Easter bunnies can become one of the elements of the decor of the composition. Here are some options for example:


Such compositions can be easily done using firm materials.
For this we need:
Flower pot. (For Easter decor, I always use a mini-pot capacity of 150 ml, which in a festive interior combined with green grass and flowers - look very spectaciously and colorful).

Grass Seeds (a special mixture of cereals can be bought in any flower shop or seed store, such as such seeds as in the photo).


On the bottom of the flower pots put a porous drainage.

I smell the land on a 2/3 pot and plant seeds.

I fall asleep the earth and water. We are waiting for shoots.

After a week, the grass looks like this.

For additional decoration of the composition, made of salt dough, damp decorative flowers.

Decorating.


Fill the pot with decorative pebbles, lay the sisal on top.

Decorating the braid.

For decoration, we use plastic uniforms of Easter eggs and, of course, our creation - Easter bunnies on the skewers. Additionally, the composition can be decorated with ward twigs or flowers.

I would be very glad if my master class was useful and interesting. Pleasant creativity!
Spring, warm days, bird singing, smiles, good mood And of course the eve of the Easter's bright holiday. Please make your friends and close to such a nice souvenir.
To work, we will need:
- Cotton Cotton Fabric (mainly pastel tones)
- Hollofiber filler (syntipeuch)
- Muline threads - for embroidering
- Acrylic paint on fabric and skewer - for eye drawing

The patterns of a large and small bunny are valid on a sheet of A4 format. And the photo of bunnies, what they will result from these patterns.


So. We fold the fabric in half and outlined the circuit of our pattern.

We spend the outline on the typewriter as shown in the photo. Cut.

We fold and spend the wrappers.

Cut the excess fabric on the wrappers. Soak.


Put our egg enough density to pleasant elasticity.

We sew a hill of the secret seam.

Then you need to make an army to our egg above and on the bottom, why do it?
First, the bunny's face will not be flat, but relief.

Secondly, making a deepening on the bottom, the egg will acquire stability and will not fall.

Embroide the nose with threads Moulin.

Now we take over the ears ... I make out of two colors: the inner ear will be pink, external in the color of the bunny itself. We plan the contour of the ears.

We pass, cut out, turn.

Ears to the bunny sew the secret seam, pre-jokes pins.

It turned out a nose-eared germ. But quite cute.
Now, with confident movement of the hand, we put the points with a shrinkage, dipped in acrylic paint.
Like this...

Oh yes ... And the rosy cheeks is already an egg-hare. I am rumbling them oil colors. You can also use acrylic paints for tissue or pastel chalk. I do not advise you to make cosmetic blush, they are not resistant and very quickly erased. And we do not need it!
And after the holiday, the bunnies will decorate the interior of any room, show some examples of decoration.
Decorating the windowsill.

And you can settle the hooks on the open shelf with glasses. Glasses will play with new paints and eyes.

Or, the same eared company to move into a wide vase. Fun and original.

Under the lamp in the bedroom lives a couple of bunnies in love.

Bunnies are not very whimsally and will feel great in any corner of your home.