Autumn is so fast that you want to remember it in all bright colors! And considering the fact that Halloween is still on the nose, then I suggest you have fun with a child and make one of the most important attributes of this time of the year - Pumpkin in the Papier Masha technique!
!
Materials and tools for master class "Interior handicraft" Pumpkin ""
In order for us to have such an interior pumpkin, we will need:
- Napkins (dessert) - 1 pack of white and 10 pieces of green;
- cardboard, scissors, PVA glue and "moment", threads;
- balloon;
-Hofit paper (orange color)
I inflate the air ball and firmly tie it with a thread. The creation process will take about 2 days, so the ball should not pass the air, otherwise the pumpkin will change shape.

We make the composition for impregnation of napkins - mix 3 st. Composition of PVA glue by 70 grams of water. Since I make a pumpkin from dessert napkins, and not from the newspapers, then this solution is quite enough.

I will say honestly - I doubled the pumpkin from newspapers and ordinary office paper. As a result, the pumpkin was cooled and a bit of toporny. It is the napkins more elastic, well take the form we need, and when dried up, then become similar to "plastic".

We rot on white napkins on 4 parts, apply to the ball and lubricate the solution. The first layer will dry 3-4 hours. Next - faster) 3 layers of napkins are needed.

While the third layer is free, we will make a leaf. Cut on the contour sheet of white cardboard.

This time we already take green napkins and put them on a small piece on a leaf, lubricating with mortar. The joints will not be visible, they are connected 1-in-1.

When the third layer is dry, we apply a wire to one of the sides (for 3D effect).

Gently "hide" wire under several layers of green napkins. After drying, we will be able to bend our leaf as we want.

All plants of this kind have a mustache and curls. We do this. Watch a green napkin a piece of wire and lubricate with a solution.

The third layer is oxid, we prepare pumpkin to the decor.

In order for the pumpkin, it turned out a saturated orange color, I blocked it on the same method, like napkins, orange corrugated paper. Such paper is very conveniently applied and dries quickly.

Time to burst and remove the ball!
The base of the pumpkin is light, but very strong. You can knock on her fist, it will not deteriorate)

Near the hole where we took out the ball, do shorts, so that we can form a pumpkin shape.

We make a tube from cardboard and insert it into the hole, slightly pressed all the sides inside.

We apply a piece of green napkins on the layer on the layer, the most gluing it and hiding cuts. The tip of the tube should be shy.

For greater realism, the places where our pumpkins will have folds, we glue the napkins.

When the stem will dry, glue a leaf and curl to it. In the same way, by overlapping several layers of napkins. To keep everything will be very firmly after graze.
Halloween celebration occurs on the eve of all saints in English-speaking countries. The history of this cheerful celebration has ancient Celtic roots. Approximately from the XVI century began walking on the houses in order to raise sweets.
This interesting tradition has been preserved to the present day. On the night of October 31, children and adults put on the costumes of different characters, the horns look at the houses, walking around the houses, knock on the door and give up candy and other sweets, as well as money, and instead they promise not to stitch. Previously, it was necessary to fulfill some number.
Halloween symbol
The main symbol of this holiday is the "Jack lamp". Previously, he was made from the turnip, but the pumpkin was cheaper, and the poor switched to the manufacture of vessels for a pumpkin candle. People believed that if you cut a terrible rubble face of the pumpkin, and put it on the windowsill, then all the evil spirits would be a house to bypass.
Now many make such a papier-mache pumpkin. With this technique, you can come up with any shape, give it individual features, fantasize. It became an interesting hobby of many hand-made masters.
What is Papier Masha?
At the celebration of Halloween, the pumpkin from Papier Masha is easy to make. It is necessary to prepare unnecessary paper, it can be old newspapers or written unnecessary notebooks.
You also need to pre-boil the hubble. Make it as follows: A tablespoon of wheat flour is taken, one glass of cold water is slowly added with a thin weaving, while you need to constantly stir. Then they put on a slow fire and, continuing to stir, bring to thickening. It should be borne in mind that when a cooling is cooled, the Clauster hards even more.
What can be used for the base?
To create a pumpkin from papier-mache, you need to have a basis. This is a form that is subsequently punctured strips and pieces of paper. Many craftsmen use inflated balloon. In order for the pumpkin's figure to be ribbed shape and looked at the real, the ball tie up a tight rope, creating such sectors as in the photo from below.

After the end of work and complete drying, the ball simply makes itself a needle, and its remnants along with the rope are pulled out through the hole.
How to stick a ball?
When the base for pumpkin from papier-mache is ready, proceed to the salary. By making any crawl, you need to know one condition for successful removal from the base. The first layer is not flashed with glue. The basis or pieces of paper are wetted with water, and wet leaves stick to the figure themselves. If you are made, for example, a cup, it is better to deceive it with vegetable oil, then the dried papier-mache is easier to remove from the base.
The second layer of paper should be applied already on the hubble. It is cooked a piece of the ball (not all right away, as the hubby dries quickly) and plates pieces of paper. Work needs to be done carefully so that there are no neo-beached places.

To understand exactly what you missed anything, there is one tricky way. You need to pick up different types of paper for salabing. For example, the first layer of Papier Masha Pumpkin on Halloween is made from the newspaper, and the second layer is from the notebook to the cell. Then - again the newspaper. So immediately when salary is clear, all places are covered or there are skipping. Thus, no less than 5 layers are applied. If the figure should be rigid, then the layers are added.
1. Remember that a multi-layer wet model of papier-mâhe makes you for Halloween with your own hands will dry at least a week. Make the craft better in advance to celebrate everything to do.
2. Many for walking around the homes for the collection of sweets are manufactured for children baskets. For this, in the resulting pumpkin pierce the sides of the hole. You can make the handle from the matter or use the wire, and for convenience, wrap it with something soft in the middle.

3. When the papier-mache is completely dry, you can start cutting a funny or terrible face. To do this, it is pre-painted with a simple pencil or marker. These are eyes, holes for the nose and the most important detail of all "Jack's lamps" - grind sharp teeth. Then, along the contour with a knife or sharp scissors, all this is cut.
4. If the pumpkin figure is designed as a lamp on the windowsill, then cut the round hole at the bottom for the candle. If this is a bag for sweets, then the figure is cut out the opposite. A hole with handles from above, and further the funny grimace.
5. You can still wear such a mask on the head of the child. It will only have to make a cape from black atlas, and a costume for the celebration of Halloween is ready.
Now you know how to make a pumpkin (Paper-Masha) with your own hands, it remains to paint the figure.
Coloring pumpkins
After the form is completely dry, the bulb is blown away and pulls into the hole done. Next, the blank turns over with a hole down or up, depending on the purpose of pumpkin. For dyeing, gouache paints will be suitable, also need a brush.
First painted with orange all pumpkin. Then you can draw a green skeleton and even a leaf.

The main details and cut places are painted in black for a frightening effect. The finished figure can be coated with acrylic varnish.
But the paper pumpkin is better not to put a candle, as it is fire hazardous. Such a decorative product can serve only decoration of the interior of the room, a mask or bag. The lamp is still preferably made from the real pumpkin. It will not light up from the candle and will not lead to tragic consequences.
Now you know how to make a pumpkin from papier-mache. It is easy and exciting. And a fantasy will help you to make a product. Good luck!
It turned out that we are largely similar, which allowed to get close in the future. But we start with the classic options for handling the main symbol of Halloween, which is also called the head or lamp of Jack.
According to the legend, Jack was a lover of drinking and as a result of his risky disputes with Satan was forced to wander in the light. He was not allowed to paradise him and in hell did not come to the place. Therefore, with you, he carries a lamp of pumpkin with glowing coal. Since then, such a composition has become a beacon symbol that helps stubborn souls.
Every year on October 31, in many corners of the world, the beautiful night of floating apples is celebrated in many corners of the world. Of course, such a festival is more characteristic of countries like Mexico, but also in Russia and the CIS countries, the tradition of cut pumpkins in the end of October is gaining momentum. And it's great! Agree, in our traditions, there is nothing even closely similar.
Let's start with the most classic method of creating a festive accessory - cutting pumpkins.
How to make a pumpkin on Halloween: detailed instructions with photos
Cut from pumpkin a beautiful addition to Halloween is not so difficult. It is enough to prepare the following tools and materials:
- pumpkin
- scotch,
- sharp knife
- spoon (size choose depending on the size of the pumpkin),
- scissors,
- something long and sharp (wooden spanch, awl or needles),
- marker (best of all food),
- stencil (if you cope, then you can draw face or drawing on the pumpkin itself),
- one or more candles (you can use a small lamp on batteries).
Progress
- First of all, cut the pumpkin cover. To do this, draw the outline with a marker and cut this element with a knife. Efforts will have to make a lot, especially if the pumpkin is big. The juice standing can be wiped with a cloth. If you pinched a knife deep enough, then without problems you can withdraw the lid.
- From the tops, cut the seeds and get them from the inside of pumpkin. If the fruit is big, it will be much easier to make it with your hands. Otherwise, use a spoon.
- Do not forget to pull the flesh. To do this, inside the vegetable, make the needles with a knife and a spoon, use the soft content. From the lid cut pieces of meat, leaving a solid layer.
- Now attach a pre-prepared pattern with the image you like (there will also be several photos of options). Stick it with scotch, so that the image does not slip.
- Now the image must be translated to the pumpkin. To do this, make a small holes with a seboard along the template.
- After that, connect all the dots with a sharp knife, cutting out the drawing. The harder the chosen composition, the more time it goes on this stage.
So everything remains only to put inside the candles or a small lamp. For greater preservation, you can degrease the pumpkin with alcohol.
For anyone who wants to see all actions in detail, I advise you to watch the video:
Stencils and Pumpkin Head Templates
For carving on pumpkin, you will use the following templates:


By the way, these ideas can be used in make-up.
Other pumpkin processing methods
If you want to do something less traditional, then for this you will use the following ideas.
Scary and Torch Pumpkin-Head
Ideal way for small pumpkins. For him you will need a pumpkin, a small sharp knife, a vampire plastic teeth and a pair of pins with round tips. Cut holes are necessary such a size so that plastic teeth stood there. After that, they must be placed in the opening and stick the pins.

Cut the drawings ... Drill
An alternative way to create patterns (if you prefer them, and not the face) can be implemented if you use a drill with drills of different diameters. In this case, at the stage of creating a picture, take the place where the pattern should be located and drill the holes.

Small candle pumpkins
Usually pumpkins are used as lamps. But why not make an original candle from a small fetal? To do this, you will need to cut over the top (you can use a metal mold for baking). Having done all the other steps, you will need to insert wick and pour it to molten wax. While the wax is not frozen, secure the wick in a vertical position.
Use the wax contrasting with the pumpkin colors to get bright colors. Vegetable itself can additionally decorate rhinestones or paint.
Decorative pumpkins: For those who do not like to cut
To decorate the house to Halloween, it is not necessary to suffer from cutting and removing the pulp. You can leave the fruit of the whole. At the same time, it will be kept much longer.
Multicolored pumpkins
In this collection collected several options. First, you can simply paint the vegetables at your discretion (for example, acrylic paints). You can also stick rhinestones or use markers.
Decorating garland
If you have some glue and a solid piece of garlands with balls, then you can stick it to the pumpkin. To do this, wake the vegetable with glue and attach garlands to it with layers.
Confetti
Take a little confetti or create it yourself using holes and bright paper. Mix the pumpkin with glue and sprinkle with the resulting circles. From above, you can make an additional layer of glue, so that the confetti does not fly away.

Pumpkin unicorns
From all the ideas presented, this most interesting and unusual (especially if you create a surprise for a girl). For him, you will need a pumpkin, Foamyran for ears, acrylic paints (you can take a balloon), polymer clay, glue and wooden spanks.
To start, color the pumpkin and cut the twig. After that, glue the ears made from the Foamiran. Twist a horn and stick a skewer into it, bake the design (if the clay is prohibitive). After this, we stick the design in the "forehead" of the unicorn. Make the mane from several sausages of polymer clay and also attach it to the health of the creature. Collect the muzzle.
Pumpkins in a variety of interpretations
Halloween does not necessarily use only living vegetables. You can use them in a variety of options for decorating yourself and premises.
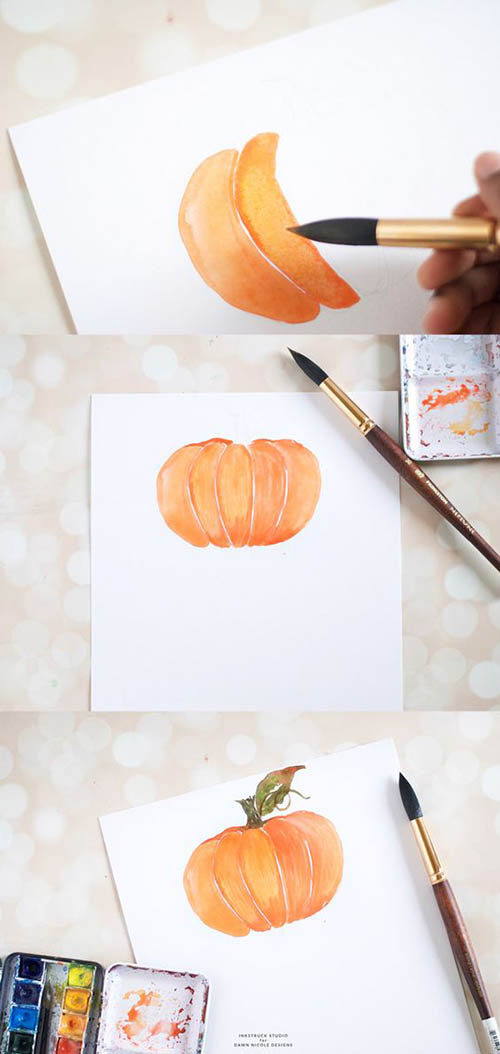
Draw a pumpkin
Do you think it's hard? In fact, it is enough to have watercolor paints at hand and this simple master class. Agree, such slices will draw everyone?
Halloween costume
Charming pumpkin you can appear or your child. In the first presented version you will need only a large number of orange grid, which can be collected by the type of skirt, make a green kaym and sew a terrible face.

A similar way was accepted for the second variation.

But the next costume is easy to turn into a male. For this you only need to replace the pack on red or green pants.

More options for festive costumes, see this article.
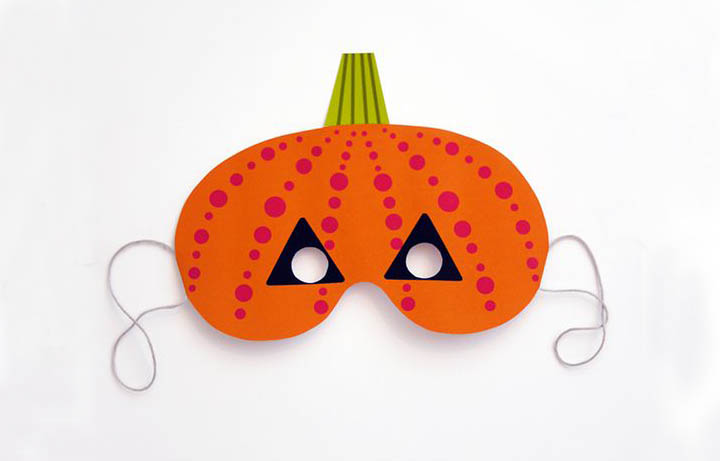
Pumpkin mask
To create such a color cardboard, colored paper or paint and a thin rubber. Cut the mask using the template below. The remaining details cut out of colored paper or paint the paints. Side Make holes, thread rubber.
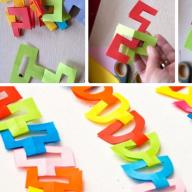
Pumpkins from paper
To create such a paper pumpkin you will need a template (there is a master class), dense decorative paper, glue gun and scissors. Here it will be enough to cut the base, glue it along the top pieces and attach all other elements.

Papier mache
Also paper, but the result is much more realistic. For such a pumpkin, you will need a ball, threads, many newspaper strips, primer and acrylic paints.
To begin with, inflate the ball (not very tight), tie the tail and tie a thread to it (better than the twine) so that the ball can be broken into several sections. Tightly tie the ends of the thread from the opposite base. After that, start sticking the strips to the base (more about this). After applying all the layers and their drying, boil the product and leave to dry, then paint.

Nietary garland
There is nothing easier, how to make a garland from a plurality of pumpkins from the threads. To do this, you will need only a pair of thread colors and "fluffy" wire for the leg. Each fruit - thread motility, fastened by fluffy wire.
Cinnamon and rings from sticks from covers
Take metal rings for covers in the amount of 22 pieces, the twine and several cinnamon sticks. Connect rings like a beam on a bundle and inside place cinnamon sticks.
Pumpkin of fabric
For her, take the bag of fabric and climb it tightly. Then secure the nodes with threads at one end and pull in the opposite. Distribute the threads as in the Papier-Masha master class. As a tail, you can use a wand.


Pipes in the move
A piece of corrugated pipe will be easy to turn into a festive fruit, if it is connected to each other, paint and make a tail-tail.

What about acorns?
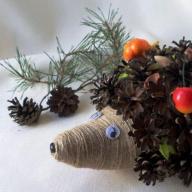
It never seemed to you that acorns are like small pumpkins? If they are painted accordingly, they will get a bright similarity of the pumpkin.

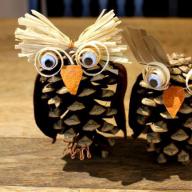
Kavaila Pumpkin Felt on Halloween
And here is the guest post from Nastya. Anastasia is a very creative and versatile well-developed man - needlewoman, a masterpiece, caring mom. And in each direction it brings part of itself, creating something new and magnificent. What wonderful toys she does from wool and felt! How optimizes sites (and at the same time creating designs)! I'm talking about the role of a young mother and the combination of all this, I am generally silent.
So, I convey the word of Anastasia itself, which will tell us how to make a pumpkin on Halloween with your own hands from felt - a wonderful cute souvenir native and close to the night of floating apples ^^ After all, who said that pumpkin must necessarily be solid?
My name is Calashnikov Anastasia, and I present to you today this small master class. Halloween soon soon, so I suggest sewing his symbol from felt - a cute pumpkin. The toy consists of simple details, so perfectly suitable for creativity with children.
You will need:

- Orange, white and black felt;
- Orange and white Moulin;
- Needle;
- Scissors;
- A bit of syntheps;
- Black eye beads;
- Ribbon or magnet at will
Download the pattern you can HEREThat's how it looks like:

The process of creating Tykkovka
First do it cut out all the necessary parts from felt. According to the above pattern, the toy will turn out somewhere 5 * 5 centimeters.
With the ending or simple pencil, draw curved lines denoting pumpkin segments. Switch their seam "Back Neck", I used two threads of light orange moulin.

The first line is ready

And from the reverse side:

Now came the turn of the eyes. Place them in accordance with the pattern, slightly above the line of the center of the pumpkin. Then, enter the gripping seam or the neck "forward needle".


Sew cuttings with face.

My favorite moment: Choosing the expression of the face toys. See how much changes, when only I change the location of the enemy-beads))


The muzzle is almost finished!)

Mouth can you embroider with black moulin or cut out of felt. My toys are designed for children, so I do not use glue in their manufacture.

Well, the muzzle pumpkin is ready. From the reverse side of the toy, I sew pockets with a magnet, you can, if you wish, can replace it with a ribbon.
Then sew both parts of the pumpkin favorite seam. Do not forget to leave a hole for packing.

Click a small amount of syntheps to give a toy volume.


Sewing a hole and voila! Cute Pumpkin is completely ready!

If you wish, you can sew the second half of the cutting on the reverse side:


Stock Foto Pumpkins and her girlfriends owl ^^


If you like my small master class, you can get acquainted with the other Halloween toys in the article "Crafts from felt for children on Halloween. Patterns and master classes ".
Creative inspiration to you!
I want to add from myself that I hope to meet Anastasia on my blog more than once. On this we finish the post about Halloween pumpkins and hope to see you here more than once.
Sincerely, Anastasia Speakeev and Anastasia Kalashnikova
Withcluded no halloween? Of course, without an ominous lantern of Jack. It can be. Well, if there are no pumpkins or it is difficult to cut it, you can make a lantern from papier-mache.
Such a tank will get easy. You can put candy in it, hang under the ceiling or make a mask on your head. But it is impossible to put a candle in it - the paper will immediately light up. The candle will replace the usual LED flashlight.
Materials
- pVA glue
- office paper orange
- black paper
- slice of sisal green
INSTRUMENTS
- scissors
- brush
- air balloon
- marker black
- flat LED Lantern
Step 1
Orange paper spoil on small pieces, approximately 3x3 cm. Inflate the ball to the desired size. Puck the ball with pieces of paper in 3-4 layers. Do not spare glue !!!
Step 2.
Last paper layer stick without using glue. Use the one that is on the surface. Suspend the bulb for a string: Let the glue dry completely. This will take about 10 hours.
Step 3.
Make a hat from black paper. To do this, cut the circle with a diameter of 12 cm and the billet for the cone. The cone will have a height of -15 cm, the base diameter is 6 cm. Make cuts on the edge of the cone, bend inside the valves. Apply a small amount of glue on them and glue the cone to the center of the circle.
Step 4.
When Paper-Masha is completely dry, pour the ball and pull it out through the hole. Draw and cut the face.
"Jack Lantern" from Papier Masha do it yourself
The very mystical per year holiday is Halloween. The symbol of which is a pumpkin, thanks to the Irish legend about the miser Jack, who, after death, kicked out of hell, and from Paradise after death. So Jack and wanders alone between the worlds. And the only element related to him and highlighting his path is a small corner from the devil, which he received because of compassion (!), And Jack he was placed in a leaning rep. It is believed that the "hellish lantern" of Jack scares the evil spirits on a festive night and helps not be resting from the true path. Initially, it was taken to cut out of turnips, beets or potatoes, but later pumpkins began to use for these purposes.
Today we also decided not to retreat from this tradition and show you how to make a cute "Jack Lantern" with your hands from Paper-Masha, who will not lose the appearance for a long time and can become an excellent gift for Halloween.
As you know Papier Masha is a mixture of glue and paper. It is done very simple: the paper rushes into small pieces that need to be labeled with glue and put on each other. With papier-mache, you can create any embossed form.
To create a candlestick from Papier Masha, it will be necessary:
Small pumpkin or other Round shape
Pieces of paper
Acrylic Paints (Yellow, Red, Green)
Satin gypsum or ordinary
Small sawdust (they need to sift through Citz)
Tools: Kitchen sponge, stationery knife, brush, emery bar or paper.
The process of creating a candlestick made of papier-mache:
Tip: Pumpkin It is advisable to choose a minimum height of 15 cm So that the flame from the candle-tablet could not touch the inside of the form - thus, the candlestick will be able to serve much longer and will not create a fire hazardous situation.
In order for the future molding to take off from pumpkins without any problems, impose the first paper layer without using glue. For which they simply moisten the pieces of paper with water and impose on the pumpkin (Fig. 1).
Subsequent paper layers must already be laid on the basis. For what to apply glue into a small space of the form, and overlap the pieces of paper on it. Invorate his brush for a more dense fit. You can also lubricate and pieces of paper and then glue them to the base.
Tip: Better paper to break into pieces with hands, and not cut with scissors, as torn edges will be better superimposed on each other.
Before you have a gloss form, consider which areas you will not apply papier-mache. The strength of the entire form will depend on the amount of layers applied.
After drying, it must be removed from the base, for which you can simply cut it off by the stationery knife (Fig. 7).


Draw a traditional "Jack Face" with a pencil on paper pumpkin (Fig. 13).

In this case, a semblance of a lit pumpkin was created - half-scenes were drawn along the edge of the form (the visibility of Jack's teeth fingerprints (Fig. 14).
In order to protect the shape of the flame of the candle - apply a satin gypsum solution on the inner side of the pumpkin. For what to spread the plaster with water (it takes a small amount) (Figure 16).
Tip: You can also use the usual gypsum, but it hardly hardens. Therefore, it is necessary to work with it faster.
Stir until the solution is powered sour cream (Fig. 17). Apply the solution on the inner surface surface and leave until complete drying (Fig. 18). If you apply a very thin layer of plaster, then after drying it can easily fall from the form.

After drying the gypsum, apply a mixture of very small sawdust and PVA to the upper part of the form - this will make it homogeneous, without protrusions.
After complete drying, prepare the shape to painting, for which it takes the skin to smooth the roughness (Fig. 20).
Tip: You can also use sandpaper and for the inner, gypsum part of the form.
Using a piece of kitchen sponge, apply a couple of layers with basic yellow acrylic paint to the candlestick. Color the candlestick from above (Fig. 21-22).

Connect yellow and red paints before getting an orange tone and draw on the form of characteristic orange strips (Fig. 23). On orange stripes, make green splashes and paint in brown fruit.
Tip: Acrylic paints have a property to dry pretty quickly, so they can add a special preparation during drawing, which will increase the period of painting. It can be purchased at any artistic store.
"Jack Lantern" from Paper Masha is ready! Happy Halloween!
Papier-Masha is a mass that is usually obtained from paper and glue. Those who are interested in the question of how to make papier-mâché, are usually interested in the fact that it is possible to do with the use of this technique. In fact, you can do everything from Papier-Masha, causing only what the layers will be consisting of and how much they need them. When excavations in China even found helmets made from papier-mâché with a variety of varnish layers.
In order to make the papier-mache at home, it will take: the basis, any paper (newspaper, office, toilet), a lot of PVA glue, bandages, brush, glue tank.
To begin with, it is necessary to cut or narrow a rather large amount of paper into pieces with different size. It is better that these pieces be very much so that they do not end at the most important point. Experienced needlewomen advise in each layer to use another type of paper, and some layers do from bandages. All this is best to prepare so that the "spare parts" have enough at least two to three of the following layers.

Also, prepare for work glue. PVA glue can be used in its pure form, but you can and dilute with a little water so that it impregnate paper faster. You should know that the diluted glue more softens pieces of paper and, moreover, dries longer. PVA in its pure form dries noticeably faster, but it will be needed much more.
A glue is applied to the brush, after which the pieces of paper are superimposed on top of top, which are also tested with glue on top. Pieces of paper should go a little on each other. Most often, newspapers are used for the first layer. Paper must completely close the entire base, after which you can start applying the second layer. If you use toilet paper for him, it will work much easier, because it will be clearly seen where the new layer is already stuck, and where else is not. If the foundation is too much clearly pronounced dents or faces that the finished product should be displayed, you can go a little differently. In this case, paper (better to use toilet) is cut as magnificently, it is folded into some container, poured with glue and is thoroughly mixed. As a result, a sufficiently thick mass is obtained, a bit similar to home sour cream. This mass is smeared on problem areas. It is important that the mass be laid in a very thick layer so that the process of its drying is not too tightened.

After all the big irregularities are smoothed, this mass can cover the entire model entirely. This method allows you to create a finished product much faster, its only disadvantage is the need to wait for a complete drying of paper, which is not necessary with the traditional method.
Sometimes there is a need at the end of work to cover with something model for the final coating of irregularities. Experts warn from using relief acrylic, because it, although it is well leveling the surface, strongly softens the model. If this happened, you can reanimate, placing several layers of papier-mache from the bandage.

It is better to cover the model with a putty, it is suitable for leveling much better. If it is necessary to open the nervousness of the putty, it is necessary to use non-empty paper, but an abrasive tape. Before the painting model, it is necessary to impregnate the primer, which, in order to save, you can buy not in the store of goods for needlework, but in construction.
If the putty is not planned to use, you can paint the surface layer of paper in the desired color. Before painting, the entire model must be missed by glue once again to strengthen it and additionally protect against damage. On the finished figures from Papier Masha look very impressive.

Another, rarely used method of manufacturing a papier-mache is the modeling of the gloves from the adhesive-paper mass described above. This mass is easily amenable to formation, but it dries very long. Any technique of papier-mache does not differ in difficulty, but requires patience and limit accuracy. Sometimes due to the long-term drying of the material, the process of manufacturing the model is delayed for several days.
How to make papier-mache pumpkins
If you want fun and with benefit to hold an autumn vacation, then this master class on the manufacture of papier-mache pumpkins for you.

This will be an excellent decoration on Thanksgiving or serves as a costume for Halloween. In addition to this, Papier-Masha pumpkin can be used as a street lamp, a masquerade mask, a vase for candy or the door decoration.

There is nothing complicated in the manufacture of Papier-Masha Pumpkins, the main thing to catch up with the desire, stock patience and be guided by this master class.
It will take:
- Balloons;
- Dense thread;
- Newspaper;
- Flour;
- Water;
- Salt;
- Wooden bitch;
- A piece of cardboard;
- Paints;
- Scissors;
- Hot glue gun.

Production:
Inflation the ball of the size of the future pumpkin and tightly tie it. Measure the thread the circle of the ball with a small margin and cut off four threads of this size.

Tearing the ball threads, creating the volume, as close as possible to the pumpkin. I do not bandage badly so that the ball does not burst.

In the bowl mix water with flour, adding a little salt. All stir up to homogeneity until we get a sufficiently viscous adhesive consistency.

The newspapers are cut into stripes and, with a lot of each strip in the glue, we glue the whole ball. Let him dry two hours and glue again. Thus, we apply to the paper ball 3-4 for a robust pumpkin.

When the last layer of paper dries, process the pumpkin from all sides by sandpaper.

Holding the ball at the base, pierced it with a needle and remove from pumpkin.

To create a volume in pumpkin deepening, we apply a black paint strip.

Then the pumpkin is completely stained with orange paint, preferably in several layers.

If we plan to use a pumpkin as a vase, then cutting it up its upper part - it will be a lid. For pumpkin's tail, we select a suitable wooden bitch with a diameter.

Gently attach the tail to the pumpkin with the help of washers and glue.

If we make a mask from the pumpkins, then instead of the lid we do the necessary slits, taking them with a black cloth with an inside.
Halloween is a creepy and at the same time a cheerful holiday, full intrigue and adventure. On the day, the doors open between the otherworldly and our world, people put on costumes and hide in the crowd so that they did not take the evil. Lanterns of Jack are lit in homes to take evil spirits, and the tables are exhibiting a strange look. To give Halloween a little ease and festive, we offer to make a pumpkin from balloons with a video lesson.
To handle it, we need to take the following components:
- three orange ball balls - 12 inches or 30 cm;
- one ball for modeling (shdm) of green - size 160;
- two pumps are small for shdm and large for round balls;
- calibrator.
We take one orange bowl by 12 inches, inflated it with a large pump. Then we descend the air and influence again. On the calibrator, we set the markup of 6 inches and measure the desired size of the balloon.
Tie a ball when it comes to the desired size. Then we divide the ball in half, pushing the big fingers to the center. We try to capture the opposite side, and then we twist.

This is such a workpiece must end up.

And we do the same with two other orange balloons, leaving the size the same.

After that, take two blanks and connect them to the cross. We twist so that they get up at one level. Next, we make the same actions with a third ball. We sprink them all over the same line. We get the base for pumpkin.

Now, take the green shdm 160th and make a tail to the pumpkin from it. When sprinkling the ball, we leave not an inflated tip for three fingers. From the other end, I dwell the segment for four fingers, we make a twist, then - on three fingers and twist again. We connect them together with the help of the tail.

We continue, we make a bubble on four fingers again, then three, and connect two segments. We do so five times, connecting them together in the flower. We put bubbles so that the bottom of the workpiece was segments on three fingers, and at the top four. We look at how shown in the video lesson.

To connect the fruit with a pumpkin, we try to shove bubbles on three fingers of the green bowl inside the cuts of the pumpkin.

Four fingers on the remaining piece of bowl and spinning from the bases of the fruits and twist. The rest is cut off and tie into the node. We get a pretty "air" pumpkin on Halloween.

Papier Masha is an excellent material for the manufacture of various crafts: masks, dolls, caskets. We all certainly did different apples and plates at school in labor lessons. The manufacture of various souvenirs from Papier Masha besides positive emotions will bring and practical advantage, children develop a motor pain, spatial thinking.
In this lesson, we suggest you make a pumpkin from dad mache with your own hands.

For her manufacture we will need:
- Large balloon IR;
- Several meters of the twine;
- Newspapers;
- Water, flour, salt;
- Paints;
- A small piece of branches (to give the future pumpkin of naturalness);
- Round piece of cardboard;
- A measured spoon (optional, you can do without it).
From tools:
- Scissors or a sharp stationery knife (the perfect version of course there will be a bormer with nozzles of type Dremel, but not everyone has it);
- Small nail;
- Adhesive pistol.

Note:Not all tools are depicted in the photo.
Preparation of a ball
First of all, decide on the size of the future pumpkin. Inflatable ball to the desired size, take the twine and measure its circle. Cut 4 cuts of the rope of the desired length, fold each of them in half and all the ends tie to the knot.
Now you need to insert a balloon inside the received loops and start to inflate it, correcting the loops in such a way as shown in the picture. When you align them - continue to inflate the ball until the moment when you do not get a good pumpkin shape. (See photo).


Making papier mache
To make a papier mache, you need to simply take water and flour and mix them until a good consistency is obtained (the basic rule is one part of the flour to take 2 parts of the water). You can also add a little salt in order to prevent the appearance of mold on the finished pumpkin.


Now that you have prepared a hubby, you can cut the strips from the newspaper and lower them into it. Here are some tips:
- Strips should not be very wide. The optimal width is about 2-3 centimeters. When gluing wider strips will appear wrinkles;
- Newspapers must be so impregnated with a Cleaster, but when gluing you need to squeeze too much, stretching the strip between your fingers. Excess Claysther will not allow the finished papier of Mach to dry quickly;
- It is best to stick the layers one by one, waiting for each of them will not dry completely.
Three (better four) layers will be enough for good, tight pumpkin.


Painting
After your pumpkin is saved with enough layers and dried well - you can proceed to painting. It is advisable to sneak a little unevenly sandpaper.


If you use a conventional paint from the canister - follow all instructions and spend painting only in a well ventilated room.
I decided to paint the space between the ribs of the pumpkin black paint to visually give her volume. Black paint can not be regretted, because In the future, the entire pumpkin will be completely covered in two layers of orange paint (see photo).


Your pumpkin is more and more like this)
Cutting up the top
I wanted my pumpkin to be removable at my pumpkin, so I took a small bowl, put on top and marker outlined the outline of the future cut line. If you have a dremel (little bormer with nozzles) - this will greatly facilitate the process. If not - not the trouble - the same result can be achieved by an ordinary stationery knife.


At the same stage, you can cut your eyes and mouth pumpkins if you want to make Halloween pumpkin)
Add naturality
I decided to make a pumpkin as much as possible on the real and to attach her a small tail. To do this, you will need to cut a small circle of cardboard. It is necessary to attach a small puck to it, drive a small nail through it and put a piece of the branch through it. The resulting design is to turn through the hole in the top of the pumpkin from the inside and glue with a glue gun.


Addition
The finished top of the pumpkin can be easily turned into an unusual hat for the autumn photo shoot. You just need to attach a small piece of twine or gum from the inside.


Here are some photos:


In my opinion, it turned out a great pumpkin from Papier Masha with their own hands.
From Papier Masha, you can create almost any shape than the masters use, manufacturing their own diverse crafts from this incredibly flexible and plastic material. In the article, we will look at only one master class, you can create crafts from papier-mache, you can create both on it, and fantasy, embodying your unique ideas.


Decoration on Halloween - Pumpkin

Step 1: Basis
Most of the successfully completed work depends on the framework, the basis of the product. After all, if it is clearly and correctly fulfilling it, it remains only to push it with paper and the product is almost ready. In the role of a frame for the base, you can use balloons, paper tapes, bags, wire, paper, various leaving materials, which usually people throw out (for example, a cardboard bobbin from Scotch). To create the basis of our sculpture, we will use:
- ball;
- narrow scotch;
- food film.

The ball does not influence too much so that when the "Pumpkin" is forming, he did not burst - the ball should have a tension reserve.

We create a thin tape on the pumpkin "slices". You can increase their convexity at this stage or later using the mass. And you can generally leave the ball absolutely round, because such pumpkins are also there.
Before you start working with Paper-Masha, the ball can be wrapped with a food film so that it is easier to remove the ball from the inside. But this stage can be skipped, then with the removal of the ball, you may have to tinker.

Flashing newspapers can be chopped and rushing with their hands. In our MK, it is not fundamentally, because we will still be deceived from above. We apply to start 2-3 layers of paper. In order not to get confused with the layers, you can use colored paper or glue pieces in different directions, for example, one layer along, the other is across. After 3 layers, it is necessary to leave the workpiece until complete drying, and then apply another 2-3 layer of paper.


After the foundation finally dries, we get a solid product with which, however, will still have to work. Then we must extract the ball from the inside. To do this, do not stick the score of the ball, just unleash it and the ball himself slowly blows away, remaining unharmed. However, you can just pierce it.
It's time to cut the face. Practice to start on a piece of paper, and then you can transfer ideas to the "pumpkin". To create the effect of thick walls, we simply glue a wide paper strip by contours.

From the pumpkin, we decided to make a lamp, but how to fix the light bulb away from the base, because the pumpkin is the paper? To solve the problem, we will put it on a funeral from the bucket from under the putty, which was saved by various pieces of paper to create irregularities. Inside it and will be located the base with the light bulb.
By the way, from the previously cooked masses, such animals will turn out: the wire frame is covered with paper scotch and failed papier-mache.

Cut the bottom at the dried pumpkin. Since we can see her "insides", then we need to paint it from the inside.

Pumpkin stem can be made from the cylinder from the food film or foil. Cut off the required length, coat the adhesive mass, creating a shape, stack make a stalk stroke. Breeping to the pumpkin is all the same mass, you can additionally observe PVA.

Step 2: Design
From plastics we make a teeth for pumpkins, we wait until they frozen.

Fresh teeth with transparent glue for plinths and baguettes. Later, with the help of the same glue, you can fix the eyeballs of pumpkins. The result of "visit to the Dentistist" in the photo:

Pumpkin lips add volume.

Praying the stand-stand, make the pumpkin itself, increasing the volume of "poles".


We are waiting for complete drying, painting, cover with acrylic varnish.