When the season of fresh corn comes, we are happy to prepare it for our family. It is a pity that this time passes quickly, and already in autumn we can only enjoy dry, frozen or canned grains. Frozen grains are perfect for our culinary creations. But how to cook sweet canned corn for the winter at home? Yes, not just boil it, but so that homemade canned corn according to the recipe is not difficult to prepare, it is tasty and stands all winter, just like in jars. It is today that we are publishing a detailed step-by-step recipe for this.
Ingredients for homemade canned corn (for 5 half-liter jars):
- Corn - 16 ears (large);
For marinade per 1 liter of water:
- Salt - 1.5 tsp;
- Table water - 1 liter;
- Sugar - 4 tbsp. l.;
- Apple cider vinegar - 1.5 tbsp. l. (6%).

How to prepare homemade canned corn for the winter:
1. Be sure to pay attention to corn for a winter preservation recipe. Do not choose cobs that are too young. But too old dry corn will not do. Take a look at the photos of the ingredients for this recipe. We chose dark yellow corn. Its grains are already well ripened, but these are not old ears yet.
Boil the corn for at least 20 minutes. Test for readiness, it may take more time. Our corn cooked in 30 minutes. 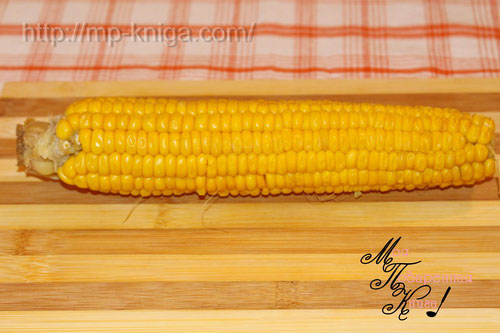
2. Cool the heads. Then put the corn on the board with one side, hold on to the other edge with your hand. Carefully cut off the grains. It is advisable not to touch the cob with a knife. 
3. After the grains are in the bowl, you will need to separate them from each other. This is very boring and painstaking work, but believe me, it's worth it.
Spoon the corn into sterile jars. Given that corn is very capricious! The container must be sterilized both inside and out. How to sterilize dishes we described in the recipe for the winter. This process is absolutely hands free.
Advice:
jars of homemade canned corn should be incomplete. To do this, you do not have to be guided by the bend of the can. Tara is completely different. Keep two of your fingers away from the top of the container. ![]()
4. Cook the brine for today's preservation. For this, it is desirable to use corn broth. Run it through a clean piece of gauze to remove any excess. First, add a liter of water, salt and sugar to the pan. After boiling, boil the brine for 5 minutes, add vinegar, mix and remove from heat.
We will fill the jars with brine to the very top.
Advice:
look at the number of canning jars. It is described how to cook corn brine for 1 liter of water. You can double and triple these proportions.
Also about vinegar - you can not add it. Then the sterilization time will increase. Sterilize jars of half a liter without vinegar for 1 hour. After sterilization, preservation will stand, and corn will be sweet. Vinegar will give her sourness. ![]()
5. If you want to ensure that the corn is tasty and sweet, then sterilization is a must! Otherwise, it won't stand.
Lay a towel on the bottom of a wide and deep pan, place filled jars on it. We simply put the lids with which we will preserve on top of the cans. If the covers are with rubber bands, then we remove them for the duration of sterilization. Pour water into the pan at such a temperature that it does not differ much from the temperature of full jars. The water level should not exceed the level of the corn in the jars.
After boiling water, mark 40 minutes for half-liter jars. Make sure the water doesn't boil too much. 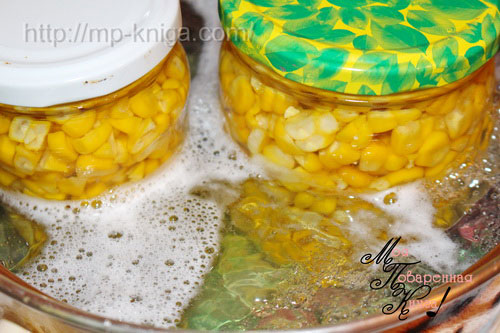
When the set time has passed, we simply take the cans out of the water and roll them up without opening them. If there were elastic bands, then carefully return them and tighten with a key. As usual, turn the seaming over and wrap. 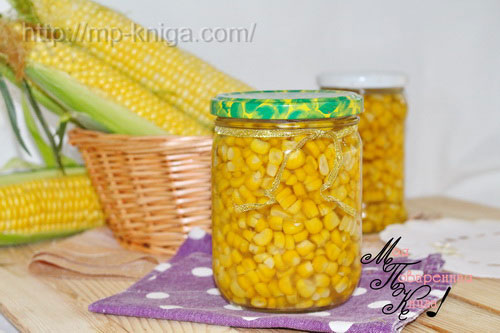
After cooling, homemade canned corn for the winter should be stored in a cool place. Its storage temperature is a maximum of 10 degrees Celsius. In heat, such preservation can deteriorate and break.
Note:
a week after spinning the cans, the brine in the middle of them may become cloudy. This is fine. Think store corn. Its brine resembles diluted milk.