A rare person, especially a woman, can indifferently walk past a showcase with elegant jewelry and memorable decor items. It seems that to create such beauty, extraordinary abilities are needed. However, with the invention of epoxy jewelry resin, the process of creating sophisticated jewelry has become available to almost everyone who wants to test themselves in this field. Working with the material is simple, experience and skill come quickly if you have patience and high-quality raw materials.
Our online store is a platform where you can profitably and quickly buy jewelry epoxy resin in Moscow. The assortment is formed from the material best brands foreign manufacturers. Both amateurs and professionals find their basis for the implementation of creative ideas.
Features and advantages of the material
Epoxy resin for jewelry differs from technical modifications in a number of properties. Among them:
- transparency. It lets in light as freely as window glass;
- obtaining, after solidification, an absolutely smooth surface, resistant to mechanical damage;
- resistance to ultraviolet radiation. Brooches, pendants, other accessories do not turn yellow over time, do not lose their luster;
- convenient liquid working consistency, which allows for delicate manipulations;
- non-toxic after curing, no smell.
The price of jewelry epoxy resin depends on the manufacturer, volume, hardener and / or accessories included in the kit. We have various packaging options, from 0.320 to 1.6 kg, so the first experiments will not cost much.
Resin jewelry: beauty is in the details
So, you decided to buy a jar to try. What to do next? Ready-made forms for jewelry can be purchased from us. But another option is more interesting: to make an audit of the contents of old caskets and grandmother's boxes. It is worth turning on imagination, looking at an ordinary object from a different angle, in order to understand that in the hands is the basis of a refined little thing.
As handy materials, you can use:
- fragments of herbaria;
- dried insects;
- feathers, colored threads, stones.
You will immortalize your creation - crystal clear resin will add volume and depth to the object placed inside.
We offer to buy epoxy resin for jewelry from us and start an exciting creative process. Ready? Call us or leave a request on the site. To keep your enthusiasm alive, we will deliver everything you need to get the job done very quickly.
Wonderful twig and epoxy braceletMany have probably seen original epoxy resin jewelry in stores. Such products are very popular, because each piece of jewelry combines magic, romance, and creative design ideas. Like frozen drops of clear spring water with amazing compositions inside, earrings, rings, brooches attract fashionistas who want to emphasize tenderness, femininity, and an extraordinary taste in the choice of accessories. Undoubtedly, in order to buy such a product, you will have to spend a fair amount of money, because the price of author's works is fairly high. Do you want to look stylish and smart with a minimum of money? We offer to learn how to make beautiful epoxy resin jewelry with your own hands. The process is incredibly creative, interesting, and will appeal to all lovers of beautiful hand-made jewelry.
What is epoxy resin
You need to be able to choose a resin for creativity. This is, first of all, a synthetic product; its choice should be approached very responsibly.
Round earrings with leaves and flowers Epoxy resin jewelry with leaf
 Unusual earrings with roses
It is not worth saving, because cheap and low-quality material can turn yellow, has too sharp and unpleasant odor, low plasticity and transparency.
All these properties determine the quality and aesthetics of jewelry. It is important that the resin completely imitates glass or transparent ice, amazing compositions from any natural materials... How to choose an epoxy resin? The material is safe, is a transparent liquid, contains chemical resins and hardeners. In the process of mixing these ingredients, polymerization and solidification occurs.
The product, valuable for its unique properties, is widely used by decorators, designers, artists, jewelry and souvenir manufacturers. If you learn how to work properly with epoxy, you can create magical 3D effects, protect any craft from dust, scratches, and moisture. As a rule, for creativity, manufacturers prepare complex kits, which include a chemical product directly, gloves, a measuring cup for easy mixing, a stick for mixing the substance. Preference should be given to trusted manufacturers in order to avoid harm to precious health. The main secret success - strict adherence to instructions and proportions of the epoxy composition.
Epoxy resin
Despite the relative chemical safety, extreme care should be taken in the work:
- avoid contact of resin on mucous membranes, skin of hands, use gloves, medical mask or a protective petal;
- if glaze particles do get on the skin or mucous membranes, immediately rinse the area with running water;
- it is forbidden to use resins for the manufacture of products that come into contact with food;
- work with epoxy should be carried out in a ventilated area;
- when turning products, be sure to wear a respirator so that particles do not fall on the mucous membrane.
Compliance with simple safety rules can make the creative process more comfortable.
How to work with epoxy
5 main secrets
Many craftswomen were able to turn their favorite hobby into a successful home business, because beautiful and original jewelry is at its peak today.
 Wood and epoxy decorations
 DIY epoxy studs
 Dandelion pendant on a chain
To learn this art from experienced needlewomen there are several secrets:
- Pouring forms. The molds, which the craftsmen call molds, must be made of high quality platinum silicone. This type of molds makes it possible to control the pouring at any stage, as well as to conveniently remove the product after solidification. After work, be sure to wash the molds with warm soapy water.
- Temperature conditions. You should be aware that the polymerization process is closely related to the release of heat. During a chemical reaction, the resin can be heated to high temperatures, even up to 60 degrees. Please note that the mold for pouring blanks must be heat-resistant.
- The desired consistency. Before the polymerization step, the resin retains its viscous liquid properties. If dry filler is used, such as cork, wood cuts or chips, it goes down. This should be taken into account when distributing the composition.
- Transparency. The main difficulty faced by beginners and experienced craftsmen is air bubbles.
To make the surface and structure of the product as transparent as possible, you can let the mixture settle a little, and then heat it up. This will float up the bubbles and can then be carefully removed.
- Use of decor. In this matter, everything is limited only by the imagination of the needlewomen. Small cones, leaves and flowers, dried flowers, glitters, rhinestones, beads are the most popular decor for making beautiful jewelry made of epoxy resin. Using leaves and flowers, it is better to dry them first. The classic way is like in school, between the pages of a book.
You should not skimp on accessories for your jewelry, the stingy, as they say, pays twice! Agree, it is very important what the so hard-fledged compositions are framed inside a transparent drop.
Epoxy video tutorial
Diy epoxy jewelry
Armed with theoretical knowledge and the secrets of experienced needlewomen, you can proceed to the practical part of the creative process. We offer several simple and interesting master classes for beginners on making original jewelry.
 Transparent ring with grass
Diy mysterious ring made of wood and resin
Decoration with dried flowers
To create beautiful earrings you need quality epoxy resin, beautiful dried flowers of heather, forget-me-not, veronica oak or any other flowering forest herbs. You will also need an earring hook. We will use the simplest method without special molds.
 Fern brooch and earrings
 The blue flower pendant looks alive
 Round pendant with cute flowers
The work algorithm is as follows:
- Let's prepare an epoxy. Strictly according to the instructions, knead all the ingredients, and then leave the resin to set the desired viscosity, for about 2-3 hours. Do not be alarmed, initially a lot of air bubbles collect in the resin. After the mass has settled, they will gradually disappear.
- Draw several stencils on a sheet of paper. You can make them of any shape, oval, round or even irregular, so the product looks more interesting.
- While the mixture is thickening, prepare the surface. This stage is very important, because every small speck of dust will violate the delicate aesthetics of the transparent jewelry. The surface should be perfectly flat, you can cover it with oilcloth or cling film on top.
- We lay out our stencils on an oilcloth, and cover them on top with ordinary office files. We begin to pour the resin directly onto the file, spreading it over a stencil, and straightening the edges with a stick or toothpick. The height of the workpiece should be 2-3 centimeters. Cover with a dome lid on top.
- We leave the blanks for a day until complete solidification. After we remove them from the files, they are separated from the polyethylene surface without any extra effort. We give the correct shape with a nail file or sandpaper, slightly sharpening the edges of the product.
- We knead a new batch of resin, and in the meantime we lay out the dried flowers. We drip a little viscous mass onto the base and apply dried flowers, cover with a lid and let dry. To make the coating as voluminous as a lens, we again coat it with resin. We give the final shape with a file or sandpaper.
- With a needle we drill a hole at the base and thread the hooks. The product is ready.
 Chamomile on a red background
Epoxy resin and dried flowers jewelry
Skeletonized leaves
Designer bracelet
Epoxy resin is used to cast amazing accessories with any filling. We offer an interesting lesson on creating an original bracelet.
 Bracelet with flowers
 Bracelet with weed and red berries
 Bracelet with delicate flowers
Useful in work:
- special mold for the bracelet;
- two-component resin with hardener;
- plastic container for mixing the mass;
- wooden stick;
- dry leaves or flowers.
From tools, simple toothpicks and scissors are useful, as well as sandpaper for grouting.
DIY epoxy and wood bracelet
Let's get to work:
- Wash, dry the form. We will knead the epoxy "dough" in the proportion indicated by the manufacturer. Stir the mixture until the bubbles come to the surface.
- Let's prepare a decorative filler. Cut the leaves so that they do not look out of the mold.
- When the resin has thickened and settled, carefully pour it into the mold.
Fill should be done slowly, in a thin stream. The more accurately the substance is poured into the mold, the less polishing is required for the product.
- Immediately put the leaves in the resin in a circle, spreading them with a toothpick. So that all air bubbles come out of the resin, you can put the mold for 10 minutes in the oven, heated to 80 degrees, and then turned off.
- After heating, we take out the workpiece, leave it to harden.
When the jewelry is frozen, we remove it from the mold, grind unevenness and sharp edges with fine-grained sandpaper. To make the surface of the bracelet glossy, open it with acrylic varnish.
DIY epoxy bracelet
Colored resin products
The creative materials industry keeps pace with the development of the creative industry. Today, epoxy resin can be used to make not only transparent, like a teardrop, products, but also bright colored decorations of any rainbow colors. Especially popular are jewelry of any shades made of epoxy resin and wood. They can easily complement a boho look, creating a romantic mood. We offer you to create a creative miracle with your own hands by making an original and fashion accessory... In the work we will use transparent resin, pieces of acrylic, wood cuts, glowing pigments. To shape the product, you need a grinder.
 Epoxy Rainbow Earrings
Let's start the process:
- Let's prepare a sketch of the decoration on paper. We will distribute the areas where the resin should be, and where the wood decor should be, we will determine the color transitions.
- We glue the pieces of acrylic, put the slices of the tree on the bottom according to the sketch, glue them to the base so that they do not float up in the resin mass.
- We mix the resin and the hardener in the desired ratio, add a blue or green fluorescent pigment to the mass. Using a simple glow pigment will give the resin a milky color. With colored pigments, the product looks brighter, more original.
- We knead the resin, stirring with a stick strictly in a circle so that the bubbles come out to the surface. Fill the workpiece.
Curing time depends on several factors: room temperature, correct mixing and ratio of ingredients.
We cover the workpiece with a lid to avoid dust particles falling on the delicate surface.
- A day later, if the workpiece has frozen, we disassemble the formwork and remove the block. It's time to give it the desired shape.
We level the surface with a grinder, cut the desired shape according to the sketch, process the edges of the product.
From one block, you can make several jewelry at once in the same theme for yourself, as well as as a gift to relatives and friends.
Epoxy resin jewelry is always stylish and distinctive. Each product combines natural fragility, tenderness and a unique creative idea of \u200b\u200bthe master. Having learned all the secrets of unusual art, you can create with pleasure, creating a collection of unusual author's accessories.
Earrings "Colored glass" from epoxy resin and paint
Fruit rings
List of everything you need:
- Epoxy resin, two-component
- Two syringes without a needle (sold at any pharmacy)
- Container for mixing resin and hardener ( plastic cup)
- Stick for this very mixing (wooden)
- Ceramic tiles or cardboard (generally any flat solid surface, preferably on a flat table)
- Scotch tape (wide one-sided)
- Accessories for jewelry (connectors, ear wires, connecting rings, bases)
- Mini drill (sold in almost any construction site, take the cheapest one, I personally use DREMEL 300)
- A set of bits for her (small drill and emery head for turning)
- Good mood for yourself;) Well, gloves with a respirator would be nice

Advice: Make sure you have a suitable work area before purchasing. If you live in a single room with your grandmother and mother, you will have to postpone making resin jewelry. At the very least, you need a separate room where you can inhale harmful resin vapors (if you don't take care of ventilation) in splendid isolation.
This work is dirty, noisy and generally does not contribute to health, but a few simple manipulations will reduce the negative influences of creativity to a minimum.
Safety precautions when working with epoxy:
- if you are not a toxicomaniac, open at least the window
- always keep a rag close at hand - believe me, it is much easier to wipe the resin off than later chipping it off the linoleum
- don't want a thrill? Then remove all carpets in sight
- have pity on your neighbors in the living space, do not grind jewelry while they are at home. Wear a respirator during this action
By the way about the leaves
Leaves (petals, flowers) must be well dried. This is not a quick case (4 weeks), so prepare them in advance. I put fresh petals in folded white paper, then into a book (so that letters are not printed on the flowers). The thicker the book, the better (old Soviet textbooks are great). Magnetic photo albums can be used to store dried leaves.

If you decide to work with buds (for pouring into balls) you will need a dark, dry space, such as a closet. Thread the needle, tighten the knot thicker at the end of the thread and pass the needle through the legs of the buds (it is for this operation that these very legs should be left). We tie the resulting garland to two hangers and hide it in the closet. Four weeks and the material is ready.

It should be borne in mind that many petals visually change during work, and completely cease to resemble what you plucked in the garden. Some shrink to something awkward, some turn black or completely discolored. And if you don't feel sorry for the stupid chamomile, then the ruined expensive hydrangea flowers will definitely make you sad.

Fittings
The lion's share of the pleasure of working with jewelry is precisely the choice of accessories. It's simple: the more expensive it is, the better the quality. In the entire process of creating jewelry, you can save money, but not on accessories, this is exactly the case when a miser pays twice. Not only do the fasteners made in China break regularly, but they also look frankly shabby and, most likely, your hand will not rise to stick something like that on your hard-fostered leaf.

Resin preparation
Well, all preparations are complete, we can begin. First, read the instructions for your resin - mixing ratios vary from brand to brand. I personally use Crystal resin, 4 ml resin per 1.2 ml diluent.
We collect both the resin and the hardener with syringes without needles, naturally different. After using them, it is better to throw them away, they cost a penny. It is better to gently lower the hardener down the side of the cup so that it does not splash.

After that we start mixing. There is nothing phenomenal here: you can even interfere with your finger for 3-4 minutes. Do not be confused by the abundance of bubbles in the resin, let it settle and they will go away.
Stir the resin periodically. The ready-to-use mixture should have a honey-like consistency. It is difficult to explain on your fingers exactly how much to mix it, it naturally depends on the number of prepared petals, their size and, remarkably, the density of the resin. Fresh instantly spreads and it turns out that you have ground the tray itself more than the petals. So it's important to catch the moment here.
While the resin is settling, prepare workplace... Remove the table, take out the tray and flowers. It is advisable to do wet cleaning, because there is nothing more offensive than a potentially beautiful piece of jewelry covered with dust.
Preparing the tray
Requires a flat table, which is not a pity to spill, and a tray. The key point here is the choice of coverage, which should have a number of properties, such as:
- cheap
- affordable
- should not stick to resin
- must be glossy (matte surface makes the resin matte and cured)
A store-bought plastic bag immediately comes to mind, but to our deep regret it does not satisfy point 3 and sticks tightly. At one time I used food bags for baking, but they periodically failed and ruined entire trays of jewelry.
Advice: Tape the tray with duct tape and forget about sticking jewelry forever.
Fill

So, the resin has thickened, the petals are laid out on a surface covered with adhesive tape, we begin to create. We take our battle stick, dip the tip in resin and apply a drop to the petal.
In principle, you can smear it on it, holding the leaf with your finger (in latex gloves, so that there are no greasy marks left), but it spreads well itself. This is where you check how flat your table is. After covering all the prepared petals with the first layer of resin, we cover our miracle tray with a lid and leave it all for 24 hours. Then we apply another layer of resin (so far both layers are on the front part).

After a day, turn the petals over and apply the last layer, but already on the backs of our products.

Turning
Now these shapeless epoxy blots with petals inside need to be processed.

It's time to uncover our mini drill. You attach an emery tool to it and grind the jewelry (with a shudder I remember how I sharpened them by hand with a nail file). Keep the edge of the product perpendicular to the drill. After turning, you can varnish the edges of the products or make another fill.

If the resulting jewelry suits you, make holes for attaching the rings. We make holes with the same drill, but with a drill (diameter 0.5 mm).

In general, we did the most difficult work, now all that remains is to attach the fittings. We pass a ring into the drilled hole, and a hook into it. Our real flower petal earrings are ready!

Rules for storing and caring for flower jewelry
- Jewelry coated with jewelry resin should not be wiped with alcohol or any other solvent, as this may damage the glossy surface. Epoxy is not chemically friendly at all, so keep it away from detergents, air fresheners, etc.
- Wear jewelry after applying decorative cosmetics, perfumes, deodorants. Do not expose glossy surfaces to acetone. It is better to wash off nail polish without rings, since acetone is a volatile substance, and it is not so far from a nail to a ring with a leaf.
- Do not wear jewelry while playing sports or go to bed.
- Fasten the brooches to your clothes before putting them on (in this case, be sure that the pin is well fastened).
- Cured epoxy resin itself is very strong, but with the proper degree of diligence, anything can be broken, and in this case it is no exception, store products in boxes.
- Do not leave them in the open sun for a long time.
Inexpensive bijouterie on the shelves of jewelry stores has always attracted the attention of the buyer with its bright colors. Epoxy resin jewelry is in great demand and popularity. It is they who ideally embody the flight of design ideas, a kind of magic emanating from decorative natural materials. For them, frozen in resin, it was as if time had stopped. Unique properties resins allow you to capture irreversible processes in nature. You can enjoy the fragrance of your favorite flowers for an infinitely long time, consider a drop of morning dew, simulate the flapping of a butterfly's wing.
At first glance, we are talking about some fantastic paintings that appear only from the magic pen of the artist. But in fact, these are quite real crafts that ordinary people work on, the same as you and me.
Brooches, bracelets, rings, earrings, pendants and other jewelry are made from epoxy resin. Some items are used as souvenirs. Jewelry has its own audience of fans and admirers. Even absence precious stones and metals in jewelry does not reduce the interest of fashionistas with extraordinary taste.
Since the cost of such products is quite high, many would like to learn how to make jewelry out of epoxy resin with their own hands. On the Internet, there is quite a lot of literature describing the technique of working with resin. Unfortunately, some of the sources are limited only by general principles and do not reveal all the nuances, although the percentage of successful results for a beginner master is quite low.

Epoxy is a very moody material. On the one hand, he does not require specific knowledge. On the other hand, skill and experience come only after a series of unsuccessful experiments. Of practical importance for novice masters are articles that are step by step algorithm with the presentation of qualitative and quantitative indicators. We will give a few examples that anyone can use, but a few theoretical questions still need to be considered.
General information about the material
Basically, you don't need to know a lot about resin to work with resin. A type of epoxy used to make jewelry is called a compound. It is sold in the form of two components, one of which is considered the main compound and the other is the hardener. The main composition is oligomers containing epoxy groups. Amines or acids are the hardener.
The working composition is prepared by mixing the components. Entering into a chemical reaction, they form a bound polymer, the physical properties of which differ from the primary oligomer. In simple words, the resin hardens and crystallizes.

The proportion for the components depends on the resin grade. It is indicated by the manufacturer in the documentation. Externally, the hardened resin is similar to transparent plastic or plexiglass, but surpasses these materials in terms of strength. Its other qualities are also important, allowing the use of epoxy as a compound, these are transparency, wear resistance, and UV resistance. But the most important quality that the master operates with is retaining its shape after polymerization.
The presence of epoxy resin properties attractive to the master does not guarantee a satisfactory result. Before designing work, you need to get acquainted with some of the requirements that the compound makes at different stages. Preparatory stage begins with the selection of material. Today you can buy ready-made resin specifically for jewelry without going into details of its characteristics. However, there are a number of important parameters to watch out for.
- Availability of instructions. Experiments with the proportions of the components can lead to material deterioration. Lack of hardener will prevent the resin from hardening, and excess will interfere with pouring. Detailed steps are indicated in the instructions that must be attached with the product.
- Resin life time. An important parameter showing how long an intense polymerization reaction takes place. As a result of this reaction, heat is released, therefore, when pouring large volumes, boiling of the compound can be observed. Since the consumption of material is minimal in the manufacture of jewelry, you can choose brands with a short lifetime.
- No air bubbles. Bubbles may form in the resin during the preparation process and pouring. It is necessary to reduce the possibility of their formation to a minimum. To do this, mix the components and pour the compound with extreme caution. The composition is preheated in a steam bath. Decorative elements covered with a primer.
- Sparkling transparency. Even the most transparent models of epoxy resins are covered with a matte film after curing. After polishing, a characteristic gloss appears.
Decorations created with epoxy resin and mold amaze with their original appearance... This master class will present step-by-step instructionsupplemented with photographs and detailed description each stage. By repeating all the actions of the master, you can independently create a unique decoration that attracts the attention of others.
So, for work we need:

- epoxy resin;
- silicone molds that are combined with epoxy resin;
- disposable gloves, plastic cups, syringes, mixing sticks;
- decorative elements: shells, colored stones, dried flowers;
- powder, stained glass paints and leaf;
In order not to stain the surface of the table, it is better to do the work on an ordinary file. The hemisphere pendant will look beautiful if you add dandelions to it. For work, we need two dandelions, so that later we can compare how they look in the finished version.

Before work, carefully rinse all prepared molds, wipe them dry with a cloth. Wear disposable gloves to protect your skin from unwanted damage. Then pour resin and hardener into plastic cups. In the future, it will be convenient to draw them into a syringe. Follow all the decorating steps in a well-ventilated room.

Measure out the required amount of epoxy and pour it into a clean plastic cup. Draw out hardener using a syringe and add it to the resin cup. Different manufacturers indicate different proportions required to get the result. Therefore, first read the instructions on the package. It is important to carefully follow all the manufacturer's recommendations for work. The quality and beauty of the finished craft directly depends on the accuracy of the calculations. In the event that you mixed epoxy resin and hardener, and the mixture is not frozen, then the proportions are out of order. This can also happen due to insufficient thorough mixing of the ingredients.
If the syringe has a rubber insert, the hardener will not spray out. The resulting mixture is mixed with pre-prepared wooden sticks. You can use kebab skewers. The solution should be stirred for ten minutes in a circular motion.

The dandelion fits very neatly into the mold. Parachutes that interfere with work can be removed with tweezers.

After mixing the ingredients, leave the resin for half an hour. This time is enough for all chemical processes to pass. You can see what a chemical reaction is taking by the state of the glass. It will heat up. It is not recommended to work with epoxy in hot weather, as the reaction proceeds quite violently and the resin completely solidifies within half an hour. Though, different manufacturers offer epoxy resins of different quality.
Gently, in a thin stream, pour the dandelion placed in the mold with epoxy resin.

After hardening, the resin will settle slightly. Therefore, it should be poured into the mold with a small margin (bulge).

Now let's try to make beautiful rings out of glass washed by the sea.

So, we take a little resin, lay out the pebbles and fill them with a mixture as when working with a hemisphere. A slight bulge should form.


You can make dandelion parachute earrings. Pour in a small amount of resin and spread it gently with a stick. In this step, the resin will thicken slightly. This will help the parachutes stay in the position in which they were laid down.

Make a bunch.

Pour some resin over the top to create a bulge. If you work very carefully, then in the future, minimal grinding of the product will be required.

A truncated ball is created in the same way. Pour resin over half of the mold.

Place the required number of parachutes with a toothpick or needle.

Pour epoxy into the mold.

Now let's try to make a beautiful bracelet decorated with seashells. Pour resin into a special bracelet mold. By this point, the epoxy has become even thicker. This is what we need. Add pebbles and shells to the mold. The crushed shells will stick to the walls, giving the impression of being suspended.

About half an hour ago, a new batch of resin was prepared. It should be poured into the mold from above. This should be done with great care to avoid bubbles. What if bubbles appear? Preheat the oven to 80 degrees and place the mold and resin there. Leave in the oven until the temperature rises to 204 degrees. After that, the bubbles will come out.

Make sure that the mold is in a level position during operation. Otherwise, the resin will harden at an angle. Remember that the more careful you work with the epoxy, the less sanding the finished product will have.

Now leave the mold for a day until it dries completely. To prevent debris from getting on the surface of the future product, cover the mold with a box or lid.
While the bracelet is drying, you can make a pendant. We start by creating the main background. For this, liquid plastic is applied to the workpiece. Cover her polymer clayrolled into a thin layer. The resulting composition is baked in the oven. After cooling down, you can start working.

Pour a couple of drops of resin onto the surface. Using tweezers, a composition is made from dried leaves or flowers. In this case, the resin is the glue. It will not allow the composition to budge. Do not use fresh flowers to create a composition. Over time, they will turn black and lose their appearance.

There is a holder on the back of the pendant. It should also be put in a mold to create a flat surface. You don't have to think about the composition in advance. You can create masterpieces by improvising.

The result is a unique picture. The craft needs to be dried. When it dries, a second layer of resin is poured, forming a bulge.

After a day, the bracelet hardened and you can get it out of the mold. This is the top of the product.

Rings, earrings and pendants are created in the same way.

A beautiful hemisphere decorated with a dandelion.


Unusual truncated transparent balloons with parachutes.

You can also make small decorative hemispheres.


Previously made rings, decorated with sea glass.

In order to give the epoxy resin a bright shade, you can add a little powder or stained glass paints. If you decide to use stained glass paint, add very little to the resin. Otherwise, the proportions between resin and hardener may be out of order. The finished product will not harden but become sticky.

If you add gold leaf, you get very unusual jewelry.

And these are beautiful lenses decorated with dandelion parachutes.

The reverse side, after drying, remained flush with the edges.

This is the reverse side of the pendant, which turned out after the resin hardened.

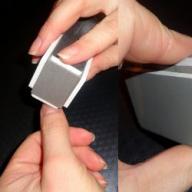
It should be carefully sanded. In order not to breathe dust, you can use a respirator.

After grinding, this is the rear part of the hemisphere.

All sharp and uneven edges must be sanded carefully after the resin has set.

We do the same with the bracelet. You can use a special manicure machine.

If you work carefully, then a minimum of grinding is required in the future.

The sanded edges can be varnished. The varnish coat should be very thin.

After it dries up, you can enjoy the result from the work done.

A very beautiful frame has been selected for the pendant, which is decorated with a miniature steel butterfly.