Introduction to the quilling technique. Detailed master classes with photographs.
Quilling is the creation of various beautiful compositions from paper using the rolling method. It should be noted right away that quilling is not an activity for restless people. Such a hobby requires perseverance, accuracy, patience and limitless imagination.
Postcards are usually made using the quilling technique. If you want to try yourself at something new, pay attention to quilling. With this exciting hobby you can please your friends and family with gorgeous cards.
How to make a postcard using the quilling technique? Quilling postcard step by step
Important: Before you start making a card, try making basic shapes. Once you can make the basics with ease, you can master any pattern.
Special kits are sold for quilling. You can choose it yourself necessary tools. To create a quilling style postcard you will need:
- Multicolored strips of medium weight paper
- Scissors
- Tweezers
- Safety pins
- Quilling template (ruler with holes in the form of geometric shapes)
- PVA glue
- Cardboard for the postcard base
- The main quilling tool is an awl with a forked needle.
You may also need:
- Curly scissors
- Comb for creating special shapes
- A utility knife and a paper cutting mat (if you are using a regular colored paper)
A strip of paper rolled into a roll is called roll. Their roll consists of a pattern. After rolling the roll, shape it using safety pins, fingers or a comb. Secure the tip of the roll with glue. Some bends are also fixed with glue.

 The main element is the roll
 Step by step creation postcards:
- Prepare the basis for the card: make a frame, think about how your rolls will be positioned
- Make a lot of rolls different colors and diameter. How to make a roll: grab the tape with a special awl, wind it around its axis to the required diameter, fix the end with glue. You can loosen the roll a little after twisting, it will not be very tight
Use a toothpick to carefully stick the end of the tape.
- When the required number of rolls is ready, glue them onto the base of the card in the form of a crown.
- Form a pot out of fabric
- Add your own decorative elements to the card. In this case, the card is complemented by a cute butterfly
Video: Quilling for beginners
Ideas for cards using quilling technique
It's impossible not to fall in love with the charming quilling style cards. Below are ideas for creating cards.

 Birthday card idea
 Floral motif
  Postcard on silver wedding
 Postcard in quilling style
  Birthday Card
 Children's card in quilling style
For the holidays, children often make cards with their own hands. Together with your parents, you can master the quilling technique. Children's cards should be simple. Simple figures can be completed by the child himself with a little help from adults. At the same time, the themes of the postcards should be interesting to children, then the child will make a postcard with great inspiration. For example, these could be postcards with animals or cartoon characters.


 Simple and cute patterns
 As for the card intended for the child, there are also a lot of great ideas. Even if now the child cannot yet appreciate your efforts, at an older age he will certainly rejoice at your gift.

 Card for a child
 Card ideas for children
 Postcard in quilling style for March 8
It is impossible to imagine March 8 without flowers. It is customary to decorate postcards for the holiday of March 8 with flowers of various shapes and colors. There are many ideas on this topic. Your mother, grandmother, friend, sister will be very happy with such a postcard; many women appreciate and love handmade work.

 Flowers on a postcard for March 8
  Postcard from March 8
 Postcard in quilling style for February 23
You can choose a gift for your husband, dad, brother, grandfather to suit every taste, color and budget. But it is much more pleasant to receive gifts made with your own hands. Give your men a card in quilling style on February 23rd. They will be very pleased with your attention and effort.

 Happy Defender of the Fatherland Day
 Postcard for February 23
 Ideas for unusual cards for February 23
 Quilling style card for Valentine's Day
The most romantic day of the year is Valentine's Day. On this day, thousands of declarations of love are heard, hearts are filled with love. The symbol of Valentine's Day is a valentine in the shape of a heart. You can make a card in the shape of a heart.

 Valentine's Day card
 Valentine's card
 But the idea for creating a postcard can be not only the heart. You can come up with another love story. In quilling you can give freedom to your imagination.

 Ideas for Valentine's Day Cards
 Birthday cards using quilling technique step by step
The card will be a great addition to a birthday gift. You can make a simple, but very cute card.
We will need:
- Quilling paper
- Quilling tool
- Double-sided colored cardboard
- White paper
- Glue, scissors, ruler
Let's start making:
- Bend a sheet of cardboard in half
- Prepare in advance a white sheet of paper with the inscription “Happy Birthday”, cut out the inscription beautifully, glue it to the base
- Make colored or plain rolls, form them into flowers, and glue them to the card
- Decorate your card with beads
- Write inside the card nice wish

 Birthday Card
 How to make a wedding card in quilling style?
A wedding card can serve not only as a greeting card, but also as a wedding invitation. You can glue a postcard in the form of an envelope, and you will get a postcard for money.
To work you will need:
- Sheet of white construction paper
- Sheet of thin white paper
- A sheet of colored paper in the desired shade
- Decorative elements: beads and small ribbon
- Scissors, glue, ruler, pencil
- Quilling tool
Master class:
- Cut thin long strips about 0.5 cm wide from thin white paper. They will be needed for rolls
- Form a rectangle from thick paper - the base of the postcard.
- Make a smaller rectangle out of colored paper, flowers will be placed on it, glue it to the base
- Roll the rolls. Make the number of flowers and petals at your discretion
- Press each roll with your fingers until it takes on a petal shape.
- Glue the petals onto the card, decorate the middle of the flower with a bead
- Make several loose rolls for the flower stems
- Add small beads
- Decorate your card with a satin bow
- You can add a caption
 Step-by-step creation of a wedding card
 Simple quilling cards step by step
Quilling cards can be quite an art, but if you're just learning, try making simple cards first. Simple cards consist of elementary rolls assembled into simple patterns, such as simple flowers. Try making a postcard using a ready-made template.
To make simple cards you will need all the quilling materials listed above.
The technique for making a postcard is as follows:
- Preparing the basis
- Making rolls
- Forming a pattern
- Decorating a postcard
- We write wishes

 Simple cards in quilling style
 How to make a beautiful and unusual card using the quilling technique: tips and reviews
Pauline: “I mastered the quilling technique by accident. I was browsing the Internet and saw beautiful curls. The thought immediately arose that this was not mine. But then I came across detailed master class, and learned the technique from it. Now I already have a quilling kit and am happy to make cards. A very interesting and exciting activity.”
Valeria: “My daughter makes cards like this at school. It turns out very beautifully, and I was especially struck by the work of their teacher. I haven’t tried to make such cards myself, but I think it’s a very labor-intensive process.”
Irina: “I have already been familiar with quilling for 3 years. I want to say that everything is not as complicated as it might seem. I just saw beautiful flowers and wanted to make the same ones. Buying regular colored paper and cutting the strips yourself is cheaper than buying ready-made kits, but you need to get used to cutting out the strips. Now I delight my loved ones with postcards and paintings.”
If you liked quilling style postcards and you have free time, if you - creative nature with a rich imagination, try to make the same ones. We will be glad if you share your creativity with us.
Video: Master class on creating a postcard in the quilling style
Having learned to create simple images from twisted strips, the child will subsequently be able to develop this skill, moving on to more and more complex images.
What you will need for work:
- double-sided colored paper;
- scissors;
- glue;
- pencil;
- toothpicks or thin wooden kebab sticks;
- plain quilling paper (you can do without it).
The most simple card can be decorated with a simple heart of two curls. To make it, we prepare thin paper strips, folded in half.

You can use ready-made quilling tape. Or you can cut the strips with scissors.
We twist each half of such a strip using a thin wooden stick, directing the curls towards the center.


We fix the curls on small white squares with glue, after gluing the ends of the paper spirals to each other so that they do not unfold.
Cut white squares.


Glue colored squares to the bottom.

All that remains to be done is to glue the squares to the postcard itself. You can make different compositions from them, or you can decorate a postcard with one such square.


Another way to get curls is to cut a tightly rolled sheet of paper.


Having made many small “lambs”, you can decorate with them a paper heart, a tree, or any other figure glued to the title page of the card.


You can fill a voluminous heart with curls. To do this, we first make the outline of the heart from a thin strip of paper,

and then glue paper spirals of different colors inside.


Even the simplest postcard, made with your own hands using the quilling technique, looks very original - three-dimensional elements give it a certain charm and a certain charm.
DIY postcard for mom using quilling technique. Master class with step-by-step photos
Greeting card using the quilling technique with your own hands. Master class.
Moskalenko Anna Nikolaevna, teacher, BMKDOU kindergarten No. 19 compensating type. Berezovsky, Sverdlovsk region.The master class is designed for children over 8 years old, teachers, parents
Purpose: DIY gift
Target: Making a postcard.
Tasks:
1. learn to obtain basic elements from strips of paper;
2. develop:
- creative skills;
- constructive abilities;
- fine motor skills hands;
3. cultivate perseverance, accuracy, and the desire to do beautiful work;
4. encourage the desire to do something nice for a loved one.
In the house near the sun
And it’s warm in the cold,
Even on a dark night
It's always light there.
When I see the Sun,
I always sing like this.
I probably
I love you the most!
I'll give you flowers,
Because Sunny -
it's you, MOM!
Among the many holidays celebrated in our country, Mother's Day occupies a special place. This is a holiday to which no one can remain indifferent. On this day I would like to say words of gratitude to all Mothers who give their children love, kindness, tenderness and affection.
On this day, it is customary to congratulate mothers and pregnant women, in contrast to International Women's Day, when all female representatives accept congratulations. There is not a single country in the world where Mother's Day is celebrated. At all times, a woman-mother was revered, because she carried new life. Mom is the most important person in life for all of us. Mother gives us care, love and patience.
Various events dedicated to this Day are especially beautiful and unforgettable in schools and preschool and educational institutions, where children give their mothers not only kind words and smiles, but also a lot of handmade gifts and specially prepared concert numbers. I suggest you make a card using the quilling technique.
Quilling is based on the ability to twist long and narrow strips of paper into spirals, modify their shape and create three-dimensional or planar compositions from the resulting parts.
To make a postcard we will need the following materials and tools:
- colored cardboard;
- quilling strips 6 mm, 3 mm. 30 cm long;
- scissors;
- a tool for twisting strips of paper;
- stencil for quilling (or ruler with a circle);
- PVA glue.

1. Let's make a roll. To do this, take a paper tape 6 mm wide, insert the end of the tape into the quilling tool and twist it.

2. Then carefully remove the roll from the tool, place the roll in the hole of the ruler with a certain diameter (in this case 20 mm) and slightly loosen it. Move the center of the roll and fix it with glue.

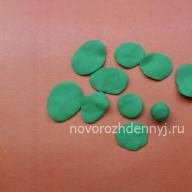
3. Then take it big and index fingers and squeeze it. It turned out to be a drop. You need seven such droplets.

4. Then we make the base - cut out a circle from cardboard and glue the petals.

5. U simple flower The petals can not be glued to the base, but glued together by applying a drop of glue to the base of the petals.

7. The middle of the flower. We glue two strips of different colors and roll them into a roll. Glue the center to the flower.


8. For more complex flower you need to make 12 drops. Then for one petal we take two droplets and glue them at the base.

9. Next, take a strip of the same width as for the petal, apply glue to it and wrap the two petals together.

10. We got this heart. For a flower you need six such hearts.

11. Glue them onto the base.

12. Glue the middle on top. For our card we need two of these flowers.

13. For decoration we will make beautiful curls. Take quilling strips of two colors and fold them in half.

14. We twist the fold onto a toothpick, then remove it - we get a curl.

15. Distribute the strips at the same distance from each other. We cut the paper along the shortest strip and glue them together.

16. For the leaves, take green stripes and do the same as in steps 1 and 2. Only leave the center of the blossomed roll in the middle. Squeeze it between the thumb and forefinger on both sides.

17. To fill the extra voids, you can make several multi-colored rolls from strips 3 mm wide.

18. For the base of the postcard, take cardboard. We collect all the elements into a composition.

Our postcard is ready to delight our loved ones. I wish you creative success!
Most best gift- one that is made with your own hands. Therefore, on Mother's Day, every mother will expect from her beloved babies pleasant surprises, warm words and, of course, original crafts. Let's look at how to make crafts for mom with your own hands on Mother's Day, what you will need for this, and what available materials you can use.
Crafts from cotton pads
Postcard
On Mother's Day, every mother wants to receive flowers. Great option will be crafts for Mother's Day from cotton pads in the form of beautiful and delicate callas. Children of any age, including preschoolers, can be involved in creating such crafts.
Materials and tools:
- Cotton pads.
- Cardboard.
- PVA glue.
- Colored paper.
- Scissors.
- Braid.
First you need to prepare the base. To do this, cut out a rectangle from red cardboard.
Now start making flowers. Let's take a cotton pad. Let's bend its edges so that one overlaps the other. The composition may include several flowers. Now you need to make the stamens. To do this you will need yellow paper that needs to be cut thin lines. Insert the stamens into the buds and glue them.
Cut stems and leaves for flowers from green paper. Glue them onto a pre-prepared base. We glue flowers on them. We complement the composition with leaves. To make the craft green and fresh, you can also glue grass to the bottom.
Take some white lace and make a frame out of it for your craft.

Bouquet of daisies
The best gift for mom is flowers. Fresh flowers will quickly wither, but if you make them from paper and cotton pads, they will be able to please your mother for many years.
Materials and tools:
- Colored paper green and yellow.
- 5 kopeck coins or thick cardboard.
- Cotton pads.
- Glue.
- Scissors.
Cut out 2 circles, 1 yellow and 1 green, the size of a cotton pad. We also cut out a green rectangle - this will be our stem for the flower.
Lubricate the rectangle with glue and roll it into a tube. We take a 5-kopeck coin and wrap it in yellow paper, the bases of which are twisted. As a result, we should end up with a small twisted tail. We coat it with glue and insert it into our stem.

The green circle is the base of the flower. The ego needs to be cut in the center and then glued so that it becomes cone-shaped. We make a small hole in the center for the stem. Along the perimeter of the base, glue petals from cotton pads. Insert the stem and the craft is ready.

These DIY crafts for mom on Mother's Day from cotton pads are easy to make, but at the same time they look neat and cute.
Paper crafts
Make a bright bouquet for mom from affordable materials that can be found in every home. The finished painting can be hung in your home or placed in a frame on your desktop. The work is quite painstaking, but the result is worth it.
Materials and tools:
- Plastic cups.
- Cardboard.
- Colored paper.
- Scissors.
- PVA glue.
- Paints.
- Cotton wool.
To make yellow flowers, fold colored paper in several layers. Cut to create semi-oval petals. Fold the finished petals into a fan. Cut out the center from green paper and glue it.
To create a leaf with pink veins, you need to fold green paper in half and cut out oval parts from it. The contour can be made either straight or wavy. Now you need to cut out ovals from pink paper and glue them under the green petals. The size of the ovals should be such that its edges do not protrude from under the petals. Glue the finished leaves with veins to the base of the applique.
Let's move on to making mimosa. For it you will need a blank in the shape of a herringbone with fringe. Paper strips can be curled using scissors. Make small balls of cotton wool and paint them yellow.
Cut out two triangles from plastic cups. Each of them needs to be cut into thin strips. However, there is no need to cut to the edge. To create a flower bud, glue a green semicircle on top of the petals from the cup.
All that remains is to make a large flower. This will require a whole plastic cup. Cut it into the thinnest strips and open it. If the flower petals are too long, you can trim them a little. Glue an orange or yellow core in the center of the flower.
Secure all parts to the base. The craft is ready. On back side applications you can write nice congratulations Happy Mother's Day.

If you want to give your mom some DIY paper crafts for Mother's Day, pay attention to quilling-style appliques. Thus, on such a special occasion for your mother, you can give a truly unique thing, created with love and kindness.
Materials and tools:
- Cardboard or Whatman paper.
- Colored paper in delicate pastel shades.
- A special quilling tool or a regular wooden stick.
- Glue.
- Curly scissors.
- Regular scissors.
- Double sided tape.
- Thin satin ribbon.
- Beads and other decorative elements.
First, you should cut out as many circles as possible from colored paper or loose cardboard. It will be our future boots flower arrangement. Give preference to soft pink, caramel, yellow, orange, peach and other warm shades. The more colors are used, the more delicate and lively the finished composition will become.
Now the prepared circles need to be cut from the edge to the center in a spiral. At the same time, use curly scissors for some buds, and cut some with regular waves, but in waves. Thus, the buds will turn out different, and the finished bouquet will look like the real one.
The cardboard should be carefully twisted in a spiral, screwing it onto a stick. This must be done as carefully as possible so as not to tear. After which the stick is removed, and the finished flowers are glued to the central part of the spiral. This way, the parchment will not unwind and maintain its shape.
We prepare the basis for the craft. To do this, fold a sheet of cardboard or whatman paper in half. The background for the composition should be cut out of cardboard of a contrasting color. In this case, its size should be 0.5 mm smaller than the front part of the application. To attach the background to the product, it is most convenient to use double-sided tape. Using glue may create dark streaks, spots or bumps on the surface. And this will make the craft less neat.
A vase should be cut out of cardboard of some other color. It also needs to be attached using double-sided tape. Now all that remains is to glue the buds onto the card. Try to glue them so that there is practically no distance between them. Use white or mother-of-pearl beads as the center. Decorate the craft satin ribbon. And write congratulatory words.

Beautiful paper flowers are a great gift for Mother's Day. There is nothing complicated in making them, so children of any age can make them.
Materials and tools:
- Colored paper.
- Tubes.
- Glue.
- Scissors.
First you need to cut out many flowers of different sizes from colored paper. To do this, use the diagram.

We make a hole in the middle of the flowers and put them on a tube, starting with the largest and ending with the smallest. The main thing here is not to overdo it with the hole; you need the flowers to fit tightly and stay on the tube themselves.
We make cuts on one side of the tube and bend them a little, pressing them with our finger. Cut out a petal for a flower from paper and glue it onto the tube. Our craft is ready. You can give ready-made flowers as a bouquet, or make a lawn from a cardboard egg cup.

Such paper crafts for mom will become a real decoration for her home or her desk.
State budget preschool
educational institution
kindergarten No. 79
Primorsky district of St. Petersburg
Correctional group No. 12 “Sun”
Craft "Daisies" using quilling technique for Mother's Day.
Master class
Prepared by teacher G.I. Gordeeva
2016
Strips of quilling paper in yellow and green.
White printer paper
Toothpick
Disk
Tweezers
PVA glue
Scissors From printer paper white in width
cut 3 identical strips 2 cm wide Fold the strips, placing them one on top of the other.
Using scissors, make fringed cuts without cutting to
edges 0.5 mm.
Let's separate the strips. One blank will be used for one chamomile
LET'S SEPARATE THE STRIPES. ONE CHAMOMILE WILL BE USED FOR ONE PREPARATIONCraft stores sell quilling kits. The length of the strips is usually 25 cm and the width is 0.5 mm.
CREATIVITY STORES SELL KITS FORQUILLING. THE LENGTH OF THE STRIPS IS USUALLY 25 CM, A
WIDTH 0.5 MM. To make the leaves and middle of the chamomile we will need
green and yellow quilling strips
To make the middle of the daisy, take a strip of yellow color and
screw it onto a regular toothpick, split one end of it into 2
parts so that the toothpick holds the strip when twisting.
Let's twist the yellow strip into a tight roll, loosen it a little when the twist is complete, and glue the end of the tape with PVA glue.
LET'S TWIST THE YELLOW STRIP INTO A TIGHT ROLL, WHICH IS A LITTLEWE'LL LOSE UP AFTER THE TWIST IS FINISHED AND GLUE THE END OF THE TAPE
PVA GLUE.
Take a white blank and a yellow roll.
LET'S TAKE A WHITE PIECE AND A YELLOW ROLL.10. Glue the white strip to the roll and wrap it around it.
WE GLUE THE WHITE STRIP TO THE ROLL AND WIND IT AROUND IT.11. At the end, fix it with glue and straighten the petals of our flower.
FINALLY FIXED WITH GLUEAND LET'S SPREAD THE PETALS OF OUR FLOWER.
12.
To make leaves you need to take green strips.Let's use the toothpick again and twist the paper tightly
tape.
Then spread the resulting roll evenly, carefully
glue the edge of the tape.