The arrival of spring is absolutely impossible without the beloved Maslenitsa! Even the ancient Slavs introduced the tradition to celebrate the arrival of spring, farewell to winter from year to year! In those days, large dolls were made, which were called Maslenitsa, and after the festivities, with everyone laughing, Maslenitsa was burned at the stake!
The holiday of the Born Sun was held in songs, jokes, round dances, and its symbol was a pancake associated with the Sun! Therefore, at home all the walkers were expected to have ruddy-cheeked pancakes with all kinds of fillings!
We will not bake pancakes, but we will make a talisman like Maslenitsa! And the house is good - protection has appeared, and the child is happy - a new bright toy!
Our Maslenitsa craft will be something like this and can be easily done even for school:

To create such a craft with your own hands for the holiday, prepare:
- Bright red acrylic yarn - 1-1.5 m;
- Bright threads "Iris" of all kinds of shades (for your taste);
- Sharp scissors;
- Cardboard with sides 10 cm.
The size of our dolls will closely depend on the width of the cardboard, since we will use it to shape the body of the dolls.
1. We spread the "Iris" threads in front of us and determine the sequence of overlapping layers of threads. We lay out the threads in the desired sequence.
2. We begin to tightly wind the first layer of thread on the cardboard. The threads must fit tightly, one on top of the other, so that our thread doll has the required volume. Having wound the first layer along the entire length, we go to the second, then to the third, and so on ...

3. Now you need to carefully remove all the threads from the cardboard, then tie all the threads well on one side, and cut on the other side with scissors.

4. Before proceeding to the next stage of work, you need to properly align the color layers and trim the sections with scissors:

5. Let's take care of the future hairstyle of our thread young lady! To do this, you need to weave an ordinary pigtail from all the same threads, only one tone! But the length of the braid should be twice the size of the doll. We fix (wrap, tie) the braid on the basis of the doll and form any hairstyle you like.
6. Tie the neck tightly with a thread, the head should be round and small!
7. The next task facing us is to make the doll's hands. To do this, again, we return to our cardboard and wind threads on it, but in any sequence and alternately with each color:

The arms should not be the same thickness as the body, therefore, it will be enough to wind three times less thread.


10. We put the handles between the halves of the body and attach them well there. We tie the waist to the doll:

11. And now, to add the elements of amulets, you need to tie the torso crosswise with red acrylic thread, wrapping it around the neck on one side, and around the waist on the other. You can wrap around the waist several times and impose such a belt with tassels on yourself. Then carefully straighten the skirt of our thread beauty, the first doll is ready:

12. So that the young lady from the thread is not bored, I propose to make a boyfriend for her. The first steps are absolutely identical, but we will do our hair a little differently!
13. To make a guy a hairstyle, we do this:
We make a small bundle of threads of the same color as the "luxurious hair" of a thread guy should be. We tie a knot in the center of the bundle and tie it all to the future head of the doll:

14. The head is formed identically to the first doll, only we lay out the hairstyle in a different way and fasten it with a red thread.
15. Body and arms - we repeat everything as for a young lady of thread!
16. The final stage is the legs! We distribute the bundle of threads coming from the body into two equal parts and rewind them tightly at the very bottom, so to speak, separate the feet. If you wish, you can make a shirt for the guy by cutting the first three layers of thread going down from the waist to the desired length. Here's what a "good fellow" we got:


18. If your Shrovetide craft is given to a young couple who wants to have children, then you can add children to this composition to clarify your wishes:

Children should be very young. With a size of 4-5 cm. The manufacturing technology is identical to the “parental” one until the “swaddling” stage - just twist the little body almost to the very bottom and the thread “baby” is ready!


That's all the "difficult" work on making - a talisman for the celebration of the merry Maslenitsa!
The arrival of spring is absolutely impossible without the beloved Maslenitsa! Even the ancient Slavs introduced the tradition to celebrate the arrival of spring, farewell to winter from year to year! In those days, large dolls were made, which were called Maslenitsa, and after the festivities, with everyone laughing, Maslenitsa was burned at the stake!
The holiday of the Born Sun was held in songs, jokes, round dances, and its symbol was a pancake associated with the Sun! Therefore, at home all the walkers were expected to have ruddy-cheeked pancakes with all kinds of fillings!
We will not bake pancakes, but we will make a talisman like Maslenitsa! And the house is good - protection has appeared, and the child is happy - a new bright toy!
Our do-it-yourself Shrovetide craft will be something like this and can be easily done even at school:

To create such a craft with your own hands for the holiday, prepare:
- Bright red acrylic yarn - 1-1.5 m;
- Bright threads "Iris" of all kinds of shades (for your taste);
- Sharp scissors;
- Cardboard with sides 10 cm.
Master class: funny crafts for Shrovetide
The size of our dolls will closely depend on the width of the cardboard, since we will use it to shape the body of the dolls.
1. We spread the "Iris" threads in front of us and determine the sequence of overlapping layers of threads. We lay out the threads in the desired sequence.
2. We begin to tightly wind the first layer of thread on the cardboard. The threads must fit tightly, one on top of the other, so that our thread doll has the required volume. Having wound the first layer along the entire length, we go to the second, then to the third, and so on ...

3. Now you need to carefully remove all the threads from the cardboard, then tie all the threads well on one side, and cut on the other side with scissors.

4. Before proceeding to the next stage of work, you need to properly align the color layers and trim the sections with scissors:

5. Let's take care of the future hairstyle of our thread young lady! To do this, you need to weave an ordinary pigtail from all the same threads, only one tone! But the length of the braid should be twice the size of the doll. We fix (wrap, tie) the braid on the basis of the doll and form any hairstyle you like.
6. Tie the neck tightly with a thread, the head should be round and small!
7. The next task facing us is to make the doll's hands. To do this, again, we return to our cardboard and wind threads on it, but in any sequence and alternately with each color:

The arms should not be the same thickness as the body, therefore, it will be enough to wind three times less thread.
8. Remove the winding from the cardboard and thread bright red acrylic threads on both sides and tie tightly:

9. With the same red thread, drag and select the small cams on the handles:

10. We put the handles between the halves of the body and attach them well there. We tie the waist to the doll:

11. And now, to add the elements of amulets, you need to tie the torso crosswise with red acrylic thread, wrapping it around the neck on one side, and around the waist on the other. You can wrap around the waist several times and impose such a belt with tassels on yourself. Then carefully straighten the skirt of our thread beauty, the first doll is ready:

12. So that the young lady from the thread is not bored, I propose to make a boyfriend for her. The first steps are absolutely identical, but we will do our hair a little differently!
13. To make a guy a hairstyle, we do this:
We make a small bundle of threads of the same color as the "luxurious hair" of a thread guy should be. We tie a knot in the center of the bundle and tie it all to the future head of the doll:

14. The head is formed identically to the first doll, only we lay out the hairstyle in a different way and fasten it with a red thread.
15. Body and arms - we repeat everything as for a young lady of thread!
16. The final stage is the legs! We distribute the bundle of threads coming from the body into two equal parts and rewind them tightly at the very bottom, so to speak, separate the feet. If you wish, you can make a shirt for the guy by cutting the first three layers of thread going down from the waist to the desired length. Here's what a "good fellow" we got:

17. We connect both dolls together with a thread, and we get the following pair:

18. If your Shrovetide craft is given to a young couple who wants to have children, then you can add children to this composition to clarify your wishes:

Children should be very young. With a size of 4-5 cm. The manufacturing technology is identical to the “parental” one until the “swaddling” stage - just twist the little body almost to the very bottom and the thread “baby” is ready!

19. And in order for our children to hold on to their “mothers”, we need to tie them tightly to their mother with a belt for several knots !:

That's all the "difficult" work on making crafts - a talisman for the celebration of the merry Maslenitsa!
In this article, we want to tell you about crafts that you can do with your child on Shrovetide. Previously, Maslenitsa in Russia was celebrated on the first day of Spring, March 1. It marked the arrival of Spring, the awakening of nature and the farewell to winter. With the introduction of Christianity, Maslenitsa began to be celebrated in the last week before Lent, so now Maslenitsa falls on different days in each year. But in our time, Maslenitsa is a mischievous and cheerful farewell to winter and a meeting of spring, which brings revival in nature and the warmth of the sun. From time immemorial, people perceived spring as the beginning of a new life and revered the Sun, which gives life and strength to all living things. For Shrovetide week, it is customary to bake pancakes, which are a symbol of the sun. The theme of the sun is also reflected in Shrovetide crafts for children.
1. Crafts for Shrovetide. Crafts for Shrovetide with your own hands
To make such a spring, sunny Shrovetide craft, you will need: colored paper, scissors and a hole punch. Draw a circle on the yellow double-sided paper. To do this, you can simply put a plate of a suitable size on the paper and circle it. For this DIY carnival craft, you will need to cut out many multi-colored strips of paper, or more precisely, long triangles. For young children, you can independently prepare all the details of the future crafts for Shrovetide, necessary for work. Older children can handle this job on their own. After that, using a hole punch, make many holes around the perimeter of the circle at the same distance from each other (see the photo of the carnival for carnival below).
You just need to thread the multi-colored triangle strips into the holes with the sharp end, bend them and glue them. Here is what a wonderful Shrovetide craft!

2. Crafts for Shrovetide for children. Crafts for Shrovetide in kindergarten
For kindergarten, you can make the following carnival craft. This is a paper sun, the rays of which are prints of children's hands. Rays can be cut out of colored paper by tracing a child's palm on it the required number of times. Or you can make prints of pens on paper using paints. In both cases, beautiful and unusual crafts for the carnival for children are obtained. Here is an example of one of the crafts for Shrovetide in kindergarten.


And this is another version of the carnival crafts for children. See and choose which one you like best. Please note that the sun in the photo below is decorated with an applique made of buttons arranged in a spiral. Such an ornament makes this craft for Shrovetide in kindergarten especially interesting.


3. Crafts for Shrovetide photo. Paper crafts for carnival
We continue to consider with you various options for paper crafts for Shrovetide. In the photo below, the sun base is made from a disposable cardboard plate. Agree, an unusual solution! Such a sun would be good to do with a group of kids. Each child will be able to take part in making crafts for Shrovetide. To do this, he will need to circle around the contour and cut out his palm. The group leader will only have to help the kids to glue the rays to the base.


4. Crafts for Shrovetide. Crafts for Shrovetide with your own hands
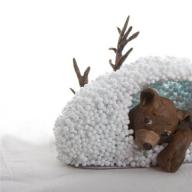
Another indispensable attribute of Shrovetide is the Shrovetide Doll. Just do not confuse it with the Shrovetide effigy, which is burned at the stake on the last day of the oil week. We are talking here about Home Maslenitsa, which is considered a powerful talisman. Made with good thoughts, this doll will bring prosperity, love and good luck to your home. There are many different options for making a Maslenitsa Doll. We have selected for you the simplest and most popular master classes for making Maslenitsa Dolls. See the article here.

Prepared by: Anna Ponomarenko
Find out what crafts you can make with your child for the Shrovetide holiday from paper, plasticine or salt dough.
Shrovetide is the most joyful and merry winter holiday after the New Year.
It is not for nothing that they call her broad, cheerful, abundant with epithets. It is celebrated in the week that precedes Lent before Easter. In this regard, Maslenitsa is not celebrated on a clearly established day.
Crafts for Maslenitsa with their own hands for children to school, kindergarten made of paper
For children to school, kindergarten or just at home, you can make crafts from colored paper.
The simplest thing is to make a paper sun as a symbol of the end of winter and the expectation of spring.
- A circle is cut out of yellow paper. To make it even, you can put a plate or saucer on the paper and circle it.
- Rays from strips of paper are glued to the sun.
- If you take multi-colored stripes and glue them to the sun, then it will turn out to be brighter and more joyful.
IMPORTANT: And instead of stripes, you can make acute-angled triangles, and nothing if they are not the same - the sun's rays are also not all under the ruler.
For those who want to be creative, you can offer this option:
- child traces his palms on paper
- he cuts out the resulting handprints and glues them to the sun as a kind of rays
It turns out fun and funny.
 The palms are rays for the sun.
 The basis for the sun with rays - palms.
 Decoration of crafts for Maslenitsa.
 Crafts for Shrovetide: the sun with palms - pens.
 The sun can be given volume using a plastic or cardboard plate, it will serve as a solar disk, to which, again, funny rays are attached.
IMPORTANT: The sun disc can be cut from thick, wrinkle-free fabric. Make the rays from threads. Yes, the sun can be revived by sewing on eyes-buttons, a nose and a mouth that spreads into a smile.


In addition to the sun, you can make a doll from threads, from colored paper, depicting either spring or winter. The doll should be bright, cheerful, red-cheeked.
 Paper doll for Shrovetide.
 The sun can also be thought of as a wreath:
- from cardboard you need to cut a circle in the form of a donut
- Wrap the "donut" with bright threads and additionally decorate with braid or lace
For the most assiduous and creative, one more idea about crafts for Maslenitsa. Try to make a three-dimensional painting or panel.
- You need a large, dense sheet of approximately A3 size. It's good if it's cardboard.
- Make a diagram of what and how will be located on the panel. For example, a house or a couple of houses, possibly surrounded by a fence or trees.
- Let snow drifts appear on the panel, if possible, a sleigh.
- It is necessary to make several figures of children having fun and playing in the snow, figures of adults who keep up with children in fun and joy.
- Again, do not forget about the sun, because it is one of the key symbols of Maslenitsa.
- Now you can start cutting out all the listed elements of the panel from paper, or making figures of people from threads, as you like.
- At the last stage, all elements are placed on the panel, according to the scheme.
- It is imperative to depict snow. To do this, you can use a special spray that simulates snow, cotton wool, just white paper.

 Pannels on Shrovetide with their own hands.
 VIDEO: The sun is a carnival craft
Do-it-yourself Shrovetide card: crafts with children
A postcard for Shrovetide can be drawn or made in the form of an applique. What to depict on it? Of course, first of all, the wide, smiling sun. On the postcard, there may be dancing girls in multi-colored wide skirts. Skirts can be specially folded from colored paper.
 Do-it-yourself card for Shrovetide.
 VIDEO: Doll Shrovetide Souvenir
Crafts with children from salt dough for Shrovetide
A great option to tinker with a child and create a DIY decoration for Shrovetide is crafts made from salt dough.
Recall that salty dough is good at work, keeps its shape well, affordable and environmentally friendly material for creativity, based only on flour, water and salt. Additionally, ingredients such as starch, gelatin, PVA glue, paints and dyes, vegetable oil can be used, which will give the craft strength and durability.
How to make salty dough:
- Flour, salt (not stone, but fine, extra) are mixed in a ratio of 1: 1, water is added to the mixture in a ratio of 0.5, for example, 0.5 shares of water are needed for one share of flour and salt.
- The water is pre-diluted with a dye, if necessary.
- The dough is kneaded until it does not stick to your hands. The mass ready for sculpting should not spread if rolled out, but immediately return to its shape if you press on it.
- If it was decided to add starch to the dough, then it is added, based on the proportion of 0.5 share of flour and 0.5 share of starch. The starch will make the dough more elastic and the craft more durable.
- The prepared salted dough can be used more than once, the main thing is that it must be well packed in polyethylene so that it does not dry out, and stored in the refrigerator.
Despite the many advantages of salt dough as a material for crafts, it also has possible drawbacks, it will take several hours to dry the product from it in the oven, which means that the child may get tired of waiting. Children love immediate results.

 Craft for Shrovetide from salted dough: the sun.
 Salted dough for Shrovetide can be used to make:
- the sun
- toy pancakes
- snowflake stars
- ringlets-wreaths
- chrysalis - an image of spring or winter
- scarecrow of winter
- gingerbread horses and stuff
Crafts from plasticine for Shrovetide
Plasticine is a material for crafts that children have loved for a long time. All Shrovetide symbols can be sculpted with it.
Products sculpted from plasticine are best represented as:
- panel
- free standing figures
- compositions
 Plasticine panel for Shrovetide.
 And, if a child makes an uncomplicated figure quickly, then, in the case of a composition, he will have to connect creative thinking.
For example, you can mold a table, place a samovar on it and a pile of pancakes on a platter. Place figures of both people and animals around the table, so that the child can blind. After all, they still love to feast on!

Do-it-yourself sun on Shrovetide: crafts with children
The sun on Shrovetide can be made:
- cutting out a circle of yellow paper and adding rays and a cheerful face to it
- molding it from plasticine or salt dough
- cutting a ring out of thick paper and wrapping it with threads
- cutting out a circle of foam rubber and sewing or gluing rays and parts of the face to it
A very interesting and simple sun is obtained from a computer disk and colored paper:
- colored paper of yellow and orange colors is cut into thin strips
- form loops from them - rays
- glue the eyelets to the disc in two rows
- a circle of colored paper is glued to the center of the disk - this will be a face

 Paper beams.
  The first row of rays.
 The second row of rays.
 The sun from a disk and colored paper.
 You can also make a cone out of paper, which will be a kind of sundress, and glue the sun to it, which will be a kind of head. Such a figurine will be fun, voluminous and stable.
VIDEO: Making a craft "Sun" for the Maslenitsa holiday
Crafts with children from pancakes for Maslenitsa
When you bake pancakes for Shrovetide, put your child next to him and try to put together interesting faces and figures from pancakes, for example, bears or Mickey Mouse.
Also give the child jam for the eyes, mouth and nose of the pancake animal, sour cream for the cheeks, and the like.


Scarecrow for Shrovetide with their own hands
On Maslenitsa in the old days, it was customary to make a large effigy of winter and burn it as the culmination of the celebration. This interesting and wonderful tradition has been revived now: in many cities and towns, festivities are held on Maslenitsa, an indispensable attribute of which is a scarecrow. However, your little scarecrow can also be made at home from scrap materials:
- dry stalks of grass or hay (if any)
- paper
- thread
- old unnecessary doll, dressing it in a sundress and painting it under a scarecrow
- pieces of cloth by attaching a figurine, for example, to a stick or a wooden skewer
Do-it-yourself Shrovetide charms
You can read about how to make a doll - a charm for Shrovetide with your own hands in.
VIDEO: DIY craft ideas for the Maslenitsa holiday