Dresses with frills (flounces, ruffles) crocheted a lot of interesting things (video and MK) in our group. I present to you dresses with frills (flounces, ruffles). this style is very attractive, does not require padding. It all started with a search for schemes for a shuttlecock, I wanted something new. At Julia Mikhovich I saw a wonderful "sea wave" PHOTO №1 that's what I got for 2.5-3g, dress length 55cm. for chest volume approximately 52-54 cm. Dress length 55cm. threads ANNA 16 (color 340 bright blue turquoise) 100g 530m, hook 1.5mm. Consumption about 230g. A yoke with sloping shoulders, all rows are knitted behind the back half loop (a relief effect is created). PHOTO # 2 for the yoke was gaining 160 sts approximately + 4 raglan loops. for the yoke, I divided the loops into 4 parts, 40p for each part to find out the length of the armhole (from the shoulder to the armpit), I use the formula pog: 4 + 7, where pog is the half-girth of the chest. I divided the loops by 4 hours, or maybe by 3. I also tried it for 3 hours, but it didn't fit me - the neckline seemed too high (under the throat). therefore, I prefer to divide the yoke with sloping shoulders into 4 hours. At the same time, you can divide not into an equal number of loops, but so that there is a little more on the front and back than on the sleeves. for example, 120 /, then 34 on the front and back, 26 on the sleeves (that is, I threw the loops from the sleeves to the shelves) there are still tables for raglan lines, but I did not use them. here in the photo I marked the dimensions of PHOTO No. 3, so I knitted with increments in a circle along the raglan line of 9.5 cm, then another 1.5 cm with increments separately in front and back (that is, increments are also obtained from the edges). we have a raglan length of 11 cm. The length of the armhole is 13.5 cm. The length of the armhole and raglan is 2 different sizes, the armhole is vertical. Then I pick up the loops in the armpits to the desired chest circumference. I have it 28p. then knit straight PHOTOS No. 4 and 5 the number of increases in the net depends on the rapport of the ruffle. I expanded by one ruffle (this is according to the rapport \u003d 4 cells). if it is necessary to expand more, then the number of increments should be a multiple of 4. this can be done in two ways (for example, we want to expand by 8 increments \u003d 2 ruffles) -1) the simultaneous number of increments in one row (8 checkboxes) or 2) uniform increments through a row (in 1 p. - 4 increments, in 3-4 p. 4 more increments \u003d total 8) PHOTOS 6, 7, 8, 9 yoke-crossed columns with 1 and 2 crochets (alternating) for the back half loop attention! in the photo, the first (red) columns are also done with 2 yarns. The grid is expanding - evenly 4 ticks (rapport 1 ruffle) in a row. the frequency of increases in length is in every 12th row. PHOTO № 10, 11, 12, 13, 14 Published by ribles in the group Everything in openwork ... (crochet) Source: http://www.stranamam.ru/post/6250799/ AND NOW REGLAN INFORMATION! Published by Natalia Pasashkova in the Knitting group Source: http://www.stranamam.ru/post/11640369/ There is information on how to knit it in MK, the link to which I gave above. And I will write my calculations for the raglan according to the standards of my child, and about how and how many loops on the raglan, how to distribute it. Girls, I draw your attention that according to the formulas that I have given below, knowing only the measurements of the child, you can knit a raglan, which will certainly sit well, even without trying it on, has been verified by my own experience, as an experiment! My daughter's measurements: ОШ (neck girth) - 26 OG (chest girth) - 56 cm.First of all, I calculated the knitting density, in my case 3.4 p * 1 cm.I measured the neck girth and made an increase of 4 cm. neck) 26 cm + 4 cm (increase) \u003d 30 cm. I count the number of loops 30 cm * 3.4 cm \u003d 102 loops .. For myself I decided that my yoke will be square, so I divide 102 loops into 4 parts. 102/4 \u003d 26 (rounding up). Now I distribute the loops sl. 26 + 26 + 26 + 13 + 13 \u003d 104 loops .. Where 26 sts - on the left sleeve, 26 sts - on the right sleeve, 26 sts - on the front, and 13 sts on both shelves of the back. After distributing the loops, I add 4 ragged loops, in total I have 108 loops of the typesetting row! I consider the height of the armhole: POG (half-girth of the chest) / 4 + 7 \u003d 28/4 + 7 \u003d 14 cm (including the sprout). I count the sprout: (POSH (neck half-girth) / 3) -1 cm \u003d 13 / 3-1 \u003d 3 cm. IN HELP VIDEO https://www.youtube.com/watch?v\u003dDWg4hRK050k https://www.youtube .com / watch? v \u003d KJixff8BdWc AND IN ADDITION TO KOKETKA !!! Let's look at the example of a square yoke with a raglan sleeve. Knitting of any thing begins with taking measurements, selecting patterns and calculating the knitting density. To knit a yoke from top to bottom, it is necessary to take a measurement of the Neck circumference (OBW) of the chest circumference (OG). Obsh \u003d 25 cm OG \u003d 52 cm We will assume that we knit the yoke with double crochet (ssn). If the yoke is knitted with a pattern, then when typing and calculating the required number of loops, the rapport of the selected pattern is also taken into account. Determined the knitting density: 3ssn \u003d 1 cm.We collect a chain of air loops (VP). If a yoke with a neckline is planned almost under the very neck, then the length of the typesetting row of a chain of air loops is equal to Obsh + 2 (1) cm. Since in this version the neck girth is less than the head girth, in order to easily put on the dress on the back (or a shelf, depending on the idea, I will describe the back), a cutout is made for the fastener. If you decide to make a yoke without fastening, then the length of the typesetting row is equal to the head circumference plus 2-3 cm. Neck circumference \u003d 25 cm + 2 cm \u003d 27 cm 27cm * 3ssn \u003d 81 loops. We knit ssn in rotary rows, and at the beginning of the row the first ssn will always replace 3 VP lifts. Therefore, we type 80vp + 3 vp \u003d 83 (further along the loops, I count 81 loops). After the typesetting row is connected, it is necessary to calculate the number of loops for the back, front and sleeves. Classic version: subtract 4 loops for raglan lines from the total number of loops. Divide the remaining number of loops by 3. 1/3-on the shelf; 1/3 on the back; 1/3 for both sleeves. Since we will have a fastener on the back, the number of loops on the back should be a multiple of 2. 81-4 \u003d 77 loops 77/3 \u003d 25.66 loops fractional number How do we do? We will leave 27 loops on the shelf; On the back 26 loops; And 24 loops for sleeves, 12 loops each. Let's check: 27 + 26 + 12 + 12 \u003d 77 loops There are a lot of patterns for knitting square yokes on the Internet, so here I explain only the principle. If you divide the loops in this way, you get a square yoke with a "beveled" shoulder fig. 1.1. The second variant of separation for a yoke with straight shoulders Fig 2.1. From the total number of loops, subtract 4 loops for raglan lines. Divide the remaining number of loops by 4. 1/4 per spike; 1/4 on the shelf; 1/4 for sleeves. 81-4 \u003d 77 loops 77/4 \u003d 19.25 loops Taking into account that there is a fastener on the back, the number of loops db divisible by 2. 20 loops for the back; 19 loops right sleeve; 19 loops shelf; 19 loops left sleeve; When calculating and distributing loops, it is always necessary to take into account the pattern rapport, if the yoke is knitted with it. Also in this version, I left 4 loops on the raglan line (1 for each line), but based on the idea, this line can be knitted with a pattern, and then this factor should be taken into account.The next question that arises for beginners: what length of yoke do you need to knit? This means how high along the armhole line. For knitting products with raglan sleeves, the average values \u200b\u200bof the length of raglan lines (in figures 2.1,2.2,2.3) I highlighted them in gray. Size (height in cm) Up to 80 86-92 98-104 110 116 122 Raglan line length (cm) 13 14 15 16 17 18 These measurements are averaged and also depend on the dress model. A more accurate value of the height of the armhole can be calculated using the formula: POG: 4 + 7cm Where POG is the half-girth of the chest. I add up to a year (up to a height of 80 cm) 5-6 cm. In our example, POG \u003d 52: 2 \u003d 26 cm 26: 4 + 5 \u003d 11.5 cm PHOTO No. 16 In this figure, the armhole line is highlighted in red. We considered 2 options: either we focus on the length of the raglan line; or calculate the height of the armhole. Having tied this part of the yoke to the desired height, we close the knitting in a circle, and then we knit according to the idea (in accordance with the schemes, calculations, measurements, style, etc.). Very often, beginners have a question: "I knit to the desired height, but the sleeves are too wide." We proceed as follows: We knit to the desired width of the sleeve, then we divide the knitting and continue to knit the yoke in rotary rows. PHOTO №17 Then we divide the knitting and knit the shelf separately, making increments along the raglan line at the beginning and at the end of the row. And, in the same way, we knit the back. We don't knit sleeves anymore. Having tied the yoke to the desired height, we close the knitting in a circle. PHOTO №18 Do not forget that we close the yoke in a circle along the chest line. Accordingly, the total number of loops at this stage should be the length of the chest circumference plus 2-3 cm.In our example, 52cm + 3cm \u003d 55cm 55cm * 3ssn \u003d 165 loops. At this point, we add the missing loops under the armholes. For example, we have 66 loops on the shelf, 70 loops on the back 67 + 70 \u003d 137 loops 155-137 \u003d 18 loops So under each armhole we will need to knit a chain of 9 VP (18: 2). These figures are conditional. Published maxi in her personal diary
Fashion changes over time. More recently, casual and sporty style with rough elements of clothing was popular, but now you can see that most designers are trying to emphasize the female figure, give it tenderness and romance. This function is performed by ruffles on the dress. Their unique and inimitable shape will easily hide all the flaws in your figure and give it a feminine silhouette. Such outfits should be safely worn for romantic evenings, special events or for everyday walks around the city. The most important thing is not to overdo it with the number of frills, they should look harmonious with the whole image. Dress with ruffles can be worn to suit any shape. For girls with a large physique, it is better to choose asymmetric outfits, on one shoulder. But for the owners of the rectangle figure, you can try to wear a dress with bare shoulders to the floor. Long ruffles on suits will add elegance and romance to your look.


Crochet
The process of making a dress with ruffles for a girl can be traced to the example of a master class.
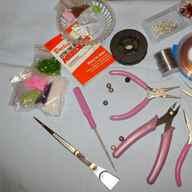
In order to make an outfit, you need to prepare materials such as yarn (about 250 grams), a hook.

The first step is to tie a yoke with a raglan. We crochet 164 loops, of which four raglan loops. After that, you will need to divide the number of loops into four parts. One should get 41. Take the measurement from the girl, the distance from the armpit to the shoulder. Divide the girth of the chest by four and add seven loops. Photo shows all sizes.

After that, we make increases in a circle. We knit a workpiece about eleven cm - this is the length of the raglan, and then we collect the required number of loops in the armpits to girth the chest, and then continue to knit directly. The photo shows a yoke diagram and a finished version.

After that, you need to sew the raglan and connect the yoke with buttons.


The following diagram shows how the ruffles are made, which we sew onto the mesh.

As a result, the number of increases in the grid should depend on the report of the ruffle. If you want to expand the product more, then the number of increments must be a multiple of 4. This technology can be done in two ways (for example, we want to expand the next row by two ruches). The first method says that we need to make a simultaneous number of increments in one row (specifically 8 checkboxes). And using the second method, we add ruffles evenly through a row. In the first row, four increments are made, in the third four more.

The ruffled dress is ready!

We work with knitting needles
The next master class shows the step-by-step process of making a dress with ruffles at the bottom with knitting needles.
The ready-made clothes fit perfectly for a girl of three. If your child is older, then more yarn will be needed. In our version, prepare two skeins of different colors.

We start knitting: it is necessary to start work with knitting the back of the dress. Cast on a chain of 45 stitches. Having studied the pattern of the third scheme in the next photo, we begin to knit the back of the product. We knit twenty-two cm, and then proceed to the process of making the frill. It must be knitted according to the scheme No. 2. After we have made a couple of blanks, we attach threads of a different color. And we begin to knit the bodice of the dress - a yoke, having previously studied the scheme No. 1. Gradually knitting thirteen cm, remove a couple of columns. And then, when you have knitted the required length, we begin to remove the loops to decorate the neckline. After that we knit a couple of cm and finish the work.
The front of the dress is knitted with ruffles. Start knitting in the same way as you worked with the back. After the height has been reached twenty cm, we decrease the central three groups for the neck. Then each side is knitted separately, gradually decreasing three columns twice. We knit forty-seven cm and close the work. Sew the side shoulders from top to bottom and don't forget about the shoulders. After that, take a thread of the main color and tie the edges: four double crochet in one loop, skipping one cm.And we repeat this to the end.
Patterns of various outfits
The last step in our article is to look at the patterns of dresses with ruffles. So you can make a dress with sleeves, the pattern is shown in the following photo.


Beautiful crochet skirt
from Olga Verenich and Tasha Podakova
The nuances of crocheting a tiered dress with ruffles:
1) Ruches are interconnected using a sirloin mesh: 1 tbsp. with a crochet, 1 vp, 1 tbsp. with a crochet, 1 vp etc.
2) If a lining is used, then the deep rows under the ruffle can be knitted with a larger sirloin net, replacing the double crochet posts with double crochet posts and / or increasing the amount of air between the posts.
3) A slight fit can be obtained by changing the size of the hook to a smaller one. If necessary, it is possible to make a fitting / expansion using the amount of air in the fillet net and, then, decreasing / increasing the number of rapports.
4) If the dress is planned to be worn without lining, then in the necessary sections of the dress, instead of a sirloin mesh, you can try to tie a solid canvas with double crochets. Although, if the yarn is not very thin, and the ruffles are not very mobile, then you can do without lining with a regular fillet mesh.
5) We begin to knit the dress from the bottom up. We knit a ruffle pattern. We erase it, measure the width of one element and calculate the required number of rapports, focusing on * hips plus a few cm for freedom *. Then, if desired, we narrow the fabric closer to the waist. closer to the chest expansion.
6) Everyone chooses the threads to their taste. Original dresses are knitted from natural silk yarn, but we have to choose from what is at hand: Iris, Kamtex viscose silk, Narcissus, Pekhorka Pearl, Orion (Vita), Tulip from Yarn Art (knitting needs to be adjusted, but the products look gorgeous) , delicate yarn Yarn Art sophist.
I may try to knit from the last or the penultimate one, I want a light flowing dress. I read reviews about this yarn. The needlewoman writes (though about another product): “The skirt turned out to be flowing, light. Wore it all summer! I washed it many times: it didn’t stretch! ” If you believe the review, then just right. Although, such dresses even from denser yarns look great. *


Pink Outfit for the baby.
Material acrylic "Baby" "Baby Luve" is very soft and silky to the touch. Hook No. 2 US
Yoke
We will knit back and forth to make a clasp at the back.
Crochet number 2 dial 55 p.
0th row: 1 tbsp. from 2 n. in the 4th p. from the hook, 1 tbsp. from 2 n. in each. n. to the end (\u003d 52 tbsp. + 3 air n.)
1st row: (Addition) 3 air. n., 1 tbsp. from 2 n. in the next. Art., * 2 Art. from 2 to the next Art., 1 Art. from 2 n. in each. from the next. 4 tbsp. *, repeat from * to * to the end, 1 tbsp. from 2 n. to the top of 3 p. Turn (\u003d 62 st. + 3 air p.).
2nd row: 3 air. n., 1 tbsp. from 2 n. in the next. Art., 1 Art. from 2 n. in each. Art. to the end, 1 tbsp. from 2 n. to the top of 3 p. Turn.
3rd row: (Addition) 3 air. n., 1 tbsp. from 2 n. in the next. Art., * 2 Art. from 2 to the next Art., 1 Art. from 2 n. in each. from the next. 3 tbsp. *, repeat from * to * to the end, 1 tbsp. from 2 n. to the top of 3 p. Turn (\u003d 77 st. + 3 air p.).
4th row as 2nd row
5th row: (Addition) 3 air. n., 1 tbsp. from 2 n. in the next. Art., * 2 Art. from 2 n. in the next. Art., 1 Art. from 2 n. in each. from the next. 2 tbsp. *, repeat from * to * to the end, 1 tbsp. from 2 n. to the top of 3 p. Turn (\u003d 102 st. + 3 air p.).
6th row as 2nd row
7th row: (Addition) as 5th row until 1 st. from 2 n. and 3 air. n., 2 tbsp. from 2 n. 1 in st., 1 st. from 2 n. to the top of 3 p. (\u003d 136 st. + 3 air p.).
We divide the yoke into 4 parts. We get the front, back, and armholes.
Next, we knit the bottom of the dress. We knit in a circle.
From the 2nd row to expand the hem in fans, we collect 11 double crochets instead of 9!
We knit 5 rows of fans.
We begin to tie the armholes of the sleeves in a circle one row of fans according to the pattern.
We knit in a circle.
Panties-
We collect 110 stitches and knit 10 rows with columns with 1 crochet. From the 11th row, we begin to subtract 1 column in each 2nd row. Now we knit the front and back separately!
Panties 10 rows high, 3 of them are on the cuff for elastic, the lower part of the panties is the next 13 rows, for the legs it was simply reduced evenly by 1 column in every 2 row.
At the end we sew the lower part. We bend the top of the panties into 3 rows, hem and insert the elastic.
On the bottom edge of the panties we collect arches from 4-5 air loops
In each arch we knit 6 columns with 1 crochet. Insert the satin ribbon.
2.
3.
4.
5.
6.
7.
8.
9.
10.
11.
12.


You definitely met often of various kinds ruffles on clothes or in the interior. There are a lot of decorated items in everyday life that look so organic that we don't even think about how such an interesting element as ruffles was made. In this article, we have prepared information on how to crochet ruffles, diagrams and descriptions will make it as simple as possible.
You can use such a made ruff on a blouse, dress, skirt, bedspread and so on. Those needlewomen who have at least some knitting experience are often fond of knitting such things, conducting experiments, and inventing their own patterns. Many ideas can be found in the literature and on the internet.
Element varieties
Having got acquainted with the products with ruche and having examined them thoroughly, you can divide them into three separate varieties:
- Solid short ruffles;
- Smooth simple;
- Patterned or openwork.
Of course, all these ruffles have the same basic knitting method. But such small differences as the alternation of individual parts make up the main difference. Elements such as ruffles and flounces replace each other. And the length of the rows at the end is less than at the beginning.
We select materials
Crocheting ruffles in complexity is not much superior to conventional knitting and crocheting. Almost any scheme can be performed using this technique. When choosing a yarn, it is best to look for narrow, soft yarns. Choose thickness from 400 m / 100 gr.

Thin yarn will provide lightness to the fabric, it is perfect for summer clothes or for airy decor elements. For the formation of high-quality folds, non-thick threads are also best suited. If the yarn is a little thicker, then in order not to get wooden rigid stripes, use more crochet than indicated in the description for the yarn. With it, you will not be able to tighten tight loops.
Such tricks were usually used for beginners, but more recently, experienced needlewomen have also used them.
Skirt options
Most often, ruffles can be seen in the form of ornaments for a skirt, and not only children's, but also adult models are popular. Naturally, children's skirts differ in their styling from adults. But one thing remains unchanged: in both the first and second versions, this is the method by which ready-made ruffles are combined with a skirt. First, a solid fabric is made, it is most convenient to knit it with a fillet net. And after that they knit on it with the help of a ruffle hook. When choosing patterns, prefer openwork. And see if the initial rows overlap the subsequent ones.

Following these tips, the skirt will turn out to be light, voluminous and airy, which will definitely delight its mistress.
For a dress, decorations from ruffles are also very relevant.

For example, here's a model with a mesh top and a flounced bottom.
The video shows how to knit such things:
Simple knitting
The short tutorial below will show you how to knit ruffles. Pay attention to the photo.
Ruffles, ruffles and flounces will always be in fashion on children's outfits, because it looks so cute. Especially pink patterned things for girls. Such a mini-master class will clearly tell you how to independently learn how to make such products. In this version, the ruff will be knitted on a fillet net, with ordinary crochet columns, at their discretion, some will knit two crochet columns. And one more thing: if you knit a mesh in several rows at once, then the route for ruffles will become visible by itself.
To start knitting, loops are typed, their number is due only to your intended length.


Having reached the imaginary end, we knit air loops, three is enough. And now in the same column we knit a double crochet.

We knit ten double crochet stitches into the hole from the sirloin mesh.

Then, as you can see in the photo, knit 4 more in the same hole.

In total, we get the first fully tied hole.

To get to the second, we will knit under an air loop.

Now, as shown in the photo below, inserting the hook just like this, we knit four double crochet loops.

Again, pay attention to the location of the hook, knit air loops.

So, gradually, step by step, this lace will begin to form:

Then, having learned to knit in this way, you can come up with products where you can really apply it. The most common ideas are, as shown above, dresses, skirts. Take an interest in napkins in this design or decoration of bedspreads. Give your home a coziness and a good atmosphere. And also ruffles can be perfectly used in the manufacture of gifts.
Video on the topic of the article
For a full disclosure of the topic of crocheting ruffle, see the video selection.