New Year holidaysProbably one of the most anticipated per year. They begin to prepare in advance. And a festive decor of the premises is played by the latest role in training. , wreaths, a Christmas tree ... How else can you decorate a dwelling or even workplace? Make a New Year Topiary with your own hands!
Composition of christmas toys
Christmas balls you can decorate not only green beauty, but also different crafts. Topiary is no exception.
- Start work on the New Year's composition with support. For her, a smooth wand will be consolidated: wooden, metal, plastic, etc. Cover it with white or silver paint, self-adhesive film, scotch.
- In a foam ball base (can be replaced with a homemade ball from a newspaper or paper, for example) insert the "leg", i.e. support.
- Prepare plastic christmas balls of red and silver colors. Remove the fastening attachments from them.
- Glue with liquid nails to the ball christmas decorations "Sorry." Start from the center and make a diagonal row from the Christmas balls of the same color, then fill out the entire base of Topiaria toys, alternating the colors of the row-strips.
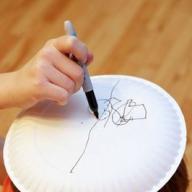
- Next, re-adjust the pot for crafts: cover its main part of red paint, and from above Draw a white strip. On a red background, draw a black strap. It turned out Santa Claus fur coat.
- Put a plasticine in the pot or pour sand (Crupe) and insert the topiary. Top "Plush" with a cotton swab into small pieces.
Do not necessarily do such a tree in Santa's dress. You can simply go around the ball base with christmas balls of any colors and in any order, and to the bottom to suspend several miniature toy.
Eco-Cleather
Beautiful natural material for creating a New Year Topiaria with your own hands (I confirm the photo!) - Corses! It is suitable cones of any coniferous trees.
- For the legs of the "cishetic" Topiaria, it is better to find a real twig of the tree. Choose a branch wide enough so that it can hold the ball. Your wand can be without branches, but you can leave several branches.
- Clean the branch from the bark and dirt, dry and cover the silver paint on the tree. It needs to fasten a round blank, better if it is a foam or plastic ball. Make a suitable hole in it and put the blank on the wand.
- The cones can also be cleaned from dirt, cut the legs to make it easier to glue them to the workpiece. Start forming topiary from above, carefully picking a bump in size.
- Now the designs need to give stability. In the pot or plastic container, divert the plaster and insert the craft into it. Gypsum dismiss the same lumps, for example.
- After soaring the gypsum, cover the whole hand of silver paint, and if it seems to you that something is missing, you can decorate the topic with small christmas toys.
Do not want to mess with paint or do you like the natural type of natural materials more? Then add to the cones of the branch of the coniferous tree (and even better - artificial branches, because then the composition just gives longer) and do not handle the composition of the paint.

Snow Topiary with garland
If you dream to create a flickering New Year Topiary with your own hands, then the master class is at your service:
- Topiary's leg can be absolutely any. Cover her paint or self-adhesive film of white or silver color.
- At the container for your crafts, glue the floral sponge, then stuck in the center the wand, lubricated with glue.
- Foam ball wrap with food film. Then make a hole in it and drip glue. Put the base on the leg.
- Now you need to stick the plastic cups along the entire surface of the ball base. They must be arranged symmetrically and not close to each other.
- Between the glasses, laid Mishuru, fixing glue only its beginning and the end. Through the garlands on top of the tinsel. Its beginning can be jacked by an English pin to the base.
- From blue, white, blue cardboard or felt, cut the snowflakes of different sizes and decorate the rasms of glasses and tinsel.
- The pot and the base of your composition do not forget to decorate with Mishur! It will look beautiful and, tied on the leg.
Not necessarily to use a floral sponge as a "secure". Use what is being taken at hand: the same plasticine, plaster or small cabbage kochan!

Elegant Christmas tree
Are you going to refuse to install a big christmas tree or think about how to decorate the workplace? Then we boldly begin to create a Topiari-New Year Christmas tree.
This handicraft will differ from others primarily by its basis: it must be in the form of a cone. Roll down the sheet of sufficiently thick paper into the clarity, cut down too much and fix everything with scotch. Put the blank to the cardboard, circle the base and cut the resulting circle.
- In the usual plastic cup Instruct the gypsum (up to half a glass) and insert the not too thick wand. Perfect pencil or feltster. The top of the glass cut the knife.
- In the circle for the cone, do the hole, put on the pencil of the leg and glue the cone itself.
- In the top of the cone, insert the wire, curved to the side. For better fixation can be glued. On the tip, turn the wire into the ring.
- Now prepare sisal. This material is sold in floristry stores. Stick a beam of sisal to a ring and start wrapping to them. When the bundle will end, remove the new one.
- Change the pencil with a narrow ribbon, and the glass is a tape sewing. A slice of sisal is applied inside the cup to mask the gypsum.
- Now you can dress the Christmas tree. Create small beads and christmas toys. Make a bows from a thin ribbon and decorate the craft.
Sizal completely replaced by the usual Christmas tree or even rain!

Christmas wreath in pot
Do you like New Year's wreaths? You are welcome! Great idea - combine decorative tree and wreath.
- For Topiaria wreath you will need a special basis. If there is no ready-made volumetric foam ring, then make it from newspapers. Take a sufficient paper, collect up to the desired thickness and roll into the ring. Lock the newspapers with a twine or painting scotch.
- For support, it is better to take two or three sticks at once. Cover their paint or wrap with ribbons. In the paper ring, make holes for the supports. Crerate with glue design.
- Stick to the ring area "strands" of sisal and wrap it to it. If the strands do not have enough, tide a new one, etc.
- The lower part is better fixed in the tank with the plaster. When plaster freezes, "hide" it under a piece of sisal. Under the wreath, on the support, tie a beautiful bow of ribbons.
- Circle a wreath of thread with beads or glue beads separately. A decorative firing branch will look beautiful, which can be noted with threads or stick it again.
You can place on the support, you can not only a wreath of sisal, but also any other you do with your own hands.

Gift option
Topiary can become a great souvenir, especially if he acts as a "gift" tree! How to make a New Year Topiary with your own hands as a gift?
- Prepare the basis (it can be done by paper, for example) and leg. Crerate them with each other.
- In the container, pour the gypsum solution and insert the workpiece into it.
- From a sisal beam, separate a small amount and roll it into the ball as if we sculpt from plasticine. The balls need to do so much to cover them all the surface of the ball. Stick sistel balls to the base.
- Take match boxes or small boxes, put inward gifts (sweets, decorations, etc.). Wrap the boxes in the packaging paper and stick to the topiary.
- It remains to decorated the leg and pot. You can take advantage of the same packaging paper by turning it and the support and the container.

If the time to the thematic Topiary is not enough, then you can transform a little to any topic. For example, classic. It is enough to wear a Santa Cap, tailored from felt or even paper, how you get the most real New Year tree!
Creating Topiaria - the process is creative, so do not be afraid to replace something or do in my own way, you may have to make the craft much more interesting than we wondered!
The main element of the New Year decor is an elegant Christmas tree - it is not always possible to install in home interiors. Sometimes the room in the room is not enough to accommodate a large Christmas tree, and reduced copies of New Year's beauties are used as a replacement.
You can make a simulation of a small Christmas tree with your own hands using a remedy and spending a minimum of time. They are called Topiarii (translated - trees of happiness) and can be used not only as an element of the interior, but also as a gift to guests on New Year's Eve.
The possibilities of decoking such Christmas trees and trees can be limited to your fantasy: for decoration, almost any material can be used to decorate.
But some ideas of the design of Topiariyev have already become traditional, so let's learn how to create original decorations for your home, passing the master class about New Year Topiaria do it yourself.
New Year's Topiary do it yourself photo
New Year Topiary: manufacturer options
Surely you paid attention to the finished topiaries that are sold in stores: from the side such decorations look complex and professional, but in fact it is necessary to make an even better and original Christmas tree.
Our master class of New Year trees Topiary will tell you how to create such jewelry, without having the skills of the own manufacture of decorations and accessories.
The main feature of those decorative elements - This is interchangeability of jewelry used for decor.
Reduced copies of the Christmas trees can be decorated in different ways, focusing on the color gamut and a variety of design of the New Year's interior.
By the way, it is not necessary to be limited to the creation of mini-ends: topiaria may look like small trees decorated new Year's toys and other devices.

New Year Topiary with your own hands: master class, photo
Decide whether your Topiary should look like: Depending on the shape, sizes and features of the decor will have to use different materials. Follow everything you need - and you can transform your room in a short time, focusing on the photo and master class about New Year Topiaria do it yourself.
Necessary materials
To create a New Year's Christmas tree Topiaria, you may need the following materials and tools:
- ball from foam, papier mache, plaster, plastics Or a large Christmas ball that will be used as a crown. If you decide to create a small Christmas tree, use durable paper or cardboard;
- flower pot, cup of yogurt, small box or other container in which the finished tree will stand. Consider that the Topiary should stand tightly in such a basis, so do not choose too variants of small sizes;
- pencil, wide wire, needle, branch or other axiswhich will be used as a finished design holder;
- materials for the potwhich quickly frozen after use: for example, gypsum or cement;
- glue or similar mass that reliably captures all the elements of the decor, as well as the components of the New Year Topiaria;
- accessories for decorating. Preferred as bright and brilliant accessories as possible, which will emphasize the celebration of the holiday;
- resistant paints and tassels. They will be applied to design some parts of the Christmas tree, for example, for painting a pot or creating imitation of white snow on the surface. Best option - Water soluble acrylic paint.
When all the materials and decorations are prepared, you can start compliance with the step-by-step instructions of the New Year Topiary with your own hands: If you wish, you can make it possible to make up New Year's Christmas trees or a tree, using your ideas.

New Year Topiciary Photo
Preparatory work
How to make New Year's Topiary? The first stage of this process should include preparation of the Crane of the Future Trop. Create imitation of a small Christmas tree will be easier: it is enough to choose durable paper or cardboard and minimize the cone.
Tip: If you plan to decorate the Christmas tree with heavy toys and accessories, you should not make the inside of the base of the floor. It can be stuffed with cotton or foam rubber or make a ready-made cone from wood, plaster and other materials.
Most often the cone-shaped base of the Christmas tree is wounded by a wide thread: First, this approach allows you to disguise the material, and secondly, it serves as the basis for further decoration, since it allows you to attach almost any accessory.

If you plan to create a tree, his crown will be a big ball. Many prefer use a conventional Christmas ball of large sizeBut if you do not have such an accessory or you are afraid that it can spoil and lose shape, choose more reliable materials.
For example, a foam is perfectly suitable as a ball: glue a large cube from small foam pieces and cut extra pieces with a stationery or wallpaper knife.
Remember! Solvent-based glue will cride foam plastic, therefore it is not suitable for bonding individual fragments of the ball, nor for subsequent stickers of jewelry and accessories.
In order for the finished ball from the foam to had a flat surface, put the basis of the hand.
Small disadvantages can be disguised with accessories, so it is not worth spending time to correct all flaws. By the way, this approach allows give Topiaria and other unusual forms: Christmas trees with an inclined end are made this way.
At this ball you can immediately stick christmas toys or other decorations.

Another option to create a ball for the crown is using balloons . Inflate them to the desired sizes, turn thread throughout the area - and thoroughly treat with glue. After the surface is freezing, you can blow away the ball and pull out through the base.
The second stage of creation christmas trees Topiariyev is the manufacture of the axis on which the finished decoration will hold. The trunk of a tree or christmas tree can be made of a small twig or tube, plastic sticks or pencils.
If there is no primary materials suitable in form and sizes - Create an axis itself from cardboard or papier mache.
Do not forget that the trunk must withstand not only the ball or cone, but also all the elements of the decor.which will be involved.
Such elements are connected very simply: if it is a foam - the barrel is lubricated with glue and inserted inside. If more than more durable baseYou will have to glue items without inserting each other.
Tip: Decorate the stem of the tree in advance, using paints, sequins, varnish, bright threads or beautiful paper. After connecting two parts, it will be more difficult to transform it.
If you wish to create a tree or a Christmas tree, which can be tilted in different sides – use thick wire as a pillar. Such an axis will look more original if you select the wire of different sizes or colors - and go away with each other.

New Year Topiary with a flexible trunk
Foundation for topiciary
Do not forget that the basis for your Christmas tree should be stable, and beautiful. The standard method for designing the foundation for topiary is the use of a small flower pot. It can be painted in new Year's pictures, arrange a cotton-imitating snow, or convert with threads, bows, coffee beans with threads, bows, coffee beans.
Instead of a flower pot, you can use a small vase, a jar, a plastic glass. Even match boxes are suitable for small herring.
Do not forgetthat the originality of your craft will depend on external view Basics, so you can show fantasy and personally make the basis of non-standard forms.

To create a pot or foundation for the Christmas tree, you can use Papier-Masha technique. Prepare a small vase, paper or newspaper, glue, scissors and brush. Process Vaseline Vasel or fat cream, wet pieces of paper - and get on the prepared surface. All subsequent layers of paper are superimposed similarly, but we are labeled with glue for reliability.
For convenience, you can use paper. different colorsnot to be confused in the layers. As a rule, for a strong foundation there are enough five-six paper layers.
When the application is dry, you will be able to remove the paper from the base of the vase without obstacles. Such the pot can immediately be attached to the collar post.. The material is poured on the material like plaster or cement. The mixture is diluted with water (you should not start with pouring liquids, since the base is splashing, and the dry mixture will affect the respiratory tract).
The solution is immediately attached to the solution and keeps until the base is free. If desired at this stage of work can decorate a pillar and an inner pot: Enter beads, beads, rain, coffee beans and other decorations. Such elements will serve as an additional holder of the entire composition.
At the next stage, the master class about the New Year Topiary can be seized with decorative work. After all, such a tree should replace the New Year tree - which means that decorate it should not less bright and interesting.

Methods of decor
There are many diverse ways to decorate such mini-chips. If you like standard imitation of the New Year tree - Use small Christmas toys and rain. As elements of the decor, garlands and tinsel will be useful, but try not to overdo it with the decor: sometimes abundance of accessories can make a Christmas tree tasteless.
Complex, but interesting ways to create a bright and festive Christmas tree using a plastic ball. The openings under the garlands are drilled inside it.
Using the ball like the top of the tree and decorating other accessories, you will create a bright element of the New Year's interior. Such Topiary can be put on the table or the most darkened zones of your room.
Most toys and jewelry are attached to topiary with hooks, glue or double-sided tape. If the Christmas tree or ball is wrapped in thread or cloth, you can sew accessories to the prepared surface.

What other decorations are suitable for the decoration of New Year Topiaria? We present you the most common design ideas:
- creating reduced copies of plastic or felt toys To simulate a real New Year tree;
- fastening small cones (if desired, they are decorated with sparkles, paint or decorative snow);
- using small christmas balls of different colors;
- decor with help mandarin and candy;
- decoration with bows or ribbons throughout the area of \u200b\u200bthe village and his pillar;
- cuffing coffee beans throughout the base of the ball or cone or in the form of individual compositions;
- using rain or small fir branches;
- beading Beads and Beads To impart the brightness of the New Year's composition.

Usually, in the New Year's interior of the rooms, several topiaries of this type are used.. They can be performed in a single style to follow the setpoint of the design, or make different color, brightness and form - and place in different zones of the room.
Since the creation of the New Year tree Topiaria does with their own hands implies decoration for every taste, a variety of christmas trees and trees can be given to your guests and close people.. Such crafts will harmoniously fit into any New Year's interior and emphasize the solemnity of this night, so increasingly used not only as a replacement, but also as an addition to the usual Christmas tree.

Now you know how to diversify new Year's decor and do festive evening More brighter and more interesting. Watch the video lesson Elena Rogacheva, how to make a decorative Topiary with their own hands from the primary materials:
Follow our advice, implement your ideas - and the decor of your room with a tree of happiness in New Year will be unforgettable.

In the interior design, Topiaria is becoming increasingly popular. These are small artificial trees made from various decorative materials. Paper, fabric, candy, tapes, artificial flowers can be used in the Decor of Topiarica - everything that the author's fantasy will tell.
New Year Topiary is an excellent idea for those who love needlework and new ideas. Topiary can become a supplement to the traditional Christmas tree in the decoration of the room and the fashionable alternative for those who want something new. Little bright trees will revive the interior and will strengthen the feeling of the holiday. Master classes on creating such New Year's mini-trees with their own hands and an article will be devoted.
A tree made with your own hands in such a technique consists of four elements: bases, barrels, crowns and stands.
- The basis of Topiaria takes a ball. It can be a foam, mounting foam, cardboard shape, wire or made of papier-mache. You can simply hide the paper into a dense ball and wrap a scotch.
- To create the trunk, it will take a durable wire that will endure the weight of the base. The wire is decorated with a rope, ribbon, can be rushed with plastic, plaster or clay. As a trunk, you can use a beautiful tree branch covered with varnish. If the toopiary is small, then the barrel can be made from Chinese sticks or wooden speakers.
- Crown is the most interesting detail of a decorative tree. For her decoration, ribbons, beads, paper flowers, coffee beans and seashells are used. But since we create New Year's Topiary, then the materials will need appropriate: Christmas toys, balls, tinsel, bumps, fir branches, artificial snow, candy.
- The stand for the composition is also different. It can be a flower pot, bucket, flat stone or wooden timber. If the sidew weight is large, then the stand must be massive and severe.

Krone New Year Topiari
The first master class will be devoted to the creation of their hands the crown from Christmas toys. For this we need:
- christmas balls similar size and colors,
- tinsel,
- spruce cones that can be covered with gilding or artificial snow,
- small sprigs with berries (you can take artificial),
- satin golden ribbons,
- toothpicks for fastening.
As a basis, we take a foam ball. To make the crown of the New Year tree, you need every Christmas decoration and other decor elements with toothpicks and glue to attach to the base without losing the shape of the ball. The gaps between the large balls are filled with small parts, and so that the composition does not break down, you can glue parts with each other. Then it will only remain decorate the crown of the improvised Christmas tree with ribbons and tinsel, you can spray a little artificial snow. 
New Year Topiary with natural materials Created in the same way, but fir bumps are decorated. It is desirable that they, too, be the same size, and the space between them can be filled with small coniferous twigs, beads of beads or tinsel. It will be good to look in combination with big cones, very small monophonic Christmas balls. The cones for a larger aesthetic effect can be covered with gilding or silver. 
Topiary-tree also can be good decoration New Year's interior. To create such a tree, they will need fir branches, cones, beads and artificial snow. Based on the basis, it's not a ball, but a cone, to which the branches will be attached so that the tree will be like a real Christmas tree.
The crown in the shape of a Christmas tree can be decorated with cloth, sisal or felt will be suitable. The fabric is fastened, then decorated with toys, threads, tinsel and other beauty. New Year tree with your own hands is ready!

New Year Topiary Tree It can be performed from artificial coniferous branches that are divided into small twigs. The base is also taken - a ball or a cone, to which fluffy parts are attached. Then it remains only to decorate the Christmas tree with toys, beads and small candy.

Essentially looking embroidered christmas trees. For their manufacture, you can sew together two pieces of fabric in the form of a Christmas tree, fill with cotton to give volume and squeeze threads. You can leave cheva, and toys attach separately.
The master class on the creation of New Year Topiaries from candies is very simple. The basis in the shape of a ball or cone should be wrapped with green tinsel and with the help of toothpicks to attach various candy, which will be like bright toys adorning the green Christmas tree.
You can use a combination of christmas balls and sweets, cones and candies, fir branches and candies. Any composition will look elegant and festively, and most importantly - appetizing.
Barrel for New Year Topiaria
New Year's Christmas tree master class continue ideas about what you can make the trunk for the festive mini-trees.
- If the tree is small, you can take a few wooden speakers or Chinese sticks, copp them together and re-establish a tight rope or satin ribbon of suitable color.
- You can build a wire trunk, if necessary, connecting several parts if the wire is thin. It is decorated with such a trunk in the same way. The wire is convenient because with its help you can create not only straight, but curved trunks: such a tree look more elegant.
- Suitable as a trunk and a plain wooden wand found in the forest. You can pre-clean it and cover it with varnish, give the desired color to the paints or reaplae with ribbons. The length and thickness of the stick can be chosen depending on the overall size of the Topiaria.

The basis for Topiari
There are many options:
- Polyfoam of any form. Such a base is suitable for small lung compositions.
- Cardboard stand filled with various fixing and decorating materials: cheese, tinsel, bumps, etc.
- Flower pot that can be realmed different ways. Suitable for more massive topiaries.
- Glass, mug, vase, jug, any vessel suitable in size for composition.
- Small wicker basket.
- Stone or wooden bar. But such a basis is quite difficult to attach the trunk.

To fix the trunk in a pot or cup, you can use alabaster or cement solution. This also gives the entire sustainability composition.
Decor Topiari
The decoration of Topiaries in our master class has already been mentioned quite a lot. As can be seen, the decoration can be no less spectacular than the professional designers.
The ideas of the decoration of New Year Topiarias there are many.
- Decoration with christmas balls. You can select balloons in size, and you can use a contrast, alternating large and small balls. Elements may be in a single color gammaBut you can use 2 colors or more. It looks good for the combination of brilliant and matte balls.
- Tinsel . It can imitate firing chew or serve decoration with other toys. Large advantage of tinsel in design is a variety of coloring and forms.
- Natural materials : Fir twigs and cones, acorns, minor berries, leaves. The decoration of models of coffee beans is not only beautiful, but also fragrant, and in combination with a misher or a cheeveyor can be created wonderful christmas tree. Mandarins and small lemons are used in the Decort of Topiarias, combined with a mustache create an excellent New Year's theme.
- Edible elements : Candy with beautiful candy, cookies in the form of various figures and so on. Such a tree is not only beautiful, but also appetizing.
- the cloth . It may be felt, satin, lace, gentle organza, flowing silk - it all depends on what image creates a designer.
- Ribbons and elegant bows - A win-win version in the decoration of Topiariyev for the new year.
- Knitted elements . They can be performed with knitting or crochet. This, for example, snowflakes, snowman figurines, Christmas toys. Tie such small figures is quite difficult, but it looks like this decor is very beautiful and cozy.

Several ideas for the creation of New Year Topiaria
Master class on creating fragrant coffee christmas tree
Coffee beans are placed on the basis of the cone, which is better to paint in brown. The grains are glued in an arbitrary order, by any side. The main thing is that all the space is saved. Next, the crown is covered with varnish, then the grains of coffee will glisten. For the decor you can take the lace and make small flowers from it, the center of which is decorated with a bright red bead.
Several such flower places are pasted on the crown of Topiaria. A few beads and bows of red and white can be pasted between coffee beans.

To secure the composition you need to reap the cup with a lace and fill it with an alabastral solution, fixing the barrel.
Creative master class on creating topiary from candies with their own hands
The base cone is decorated with a ribbon. To the top of the cone using a wire the bell is mounted, the wire is also wound with a ribbon. Candy is glued to the lower edge of the cone attached to the trunk. It is desirable that the rope and candy are harmonized in color. The space between the candies is filled with tinsel and small silver-plated cones, you can use small christmas balls.

New Year Topiary "First Snow" is made of dried chestnuts, Walnuts shells, acorns with caps, sisal and rattan balls. The elegant tree of happiness to the new year is planted in a renovated flower pot. The barrel from the curved branch is strengthened by plaster. A small composition is collected on a snow-covered glade: a small composition: cinnamon sticks, sisalous balls, acorn, smooth berries.

Used big foam ball with a diameter of 15 cmYou can also make a frame yourself.
Total height of New Year Topiaria - 42 cm, pot - 10 cm, Diameter Crown with Decor - 20 cm. For the manufacture of topiary of such sizes is necessary 5-6 hours.
Materials for creating a New Year Topiaria "First Snow"


- Gypsum or alabaster for fill.
- Thermopystole, 5 silicone sticks, 20 cm, d \u003d 11.2 mm.
- Scissors, tassels.
- Paint - acrylic white and bronze.
- Crushed stone - to the bottom of the pot.
- Any pot is 500 ml.
- Sticks for ice cream (curly or straight) - 20 pcs.
- Ball from foam, d \u003d 15 cm, fabric on a ball winding.
- Barrel branch, length 30 cm, plasticine.
- Dried chestnuts.
- Walnuts - whole and halves.
- Acorns with caps and without.
- Plus acorns.
- Peach bones.
- Chocolate sisal on balls.
- Italian pasta, dark
- Satin ribbons: chocolate 2 pcs., Bronze 1 pc. - 10 cm.
- White organza - 20 cm.
- White satin tape is narrow (wrap of cinnamon sticks) - 10 cm.
- Polobusin - 10 pcs.
- 1 Bundle of white and 2 beam of burgundy berries - 20 berries / bundle.
- Rotan balls, D \u003d 3 cm - 4 pcs.
Video master class - Topiary for the new year with their own hands
Convenient and simple master class in excellent FullHD 1080p quality, how to make a New Year Topiary "First Snow" from natural material With rattan and sisal balls. See, inspire, generate new ideas and share them with friends!
How to make a New Year Topiary - MK in 1 picture

Did you like the format of the master class in 1 picture? See everything from Alena Tikhonova!
Step-by-step master class with photos - New Year Topiary do it yourself
Restoration of pots
Stage 1. Powing sticks for ice cream. Any capacity is suitable for restoration - the main thing is that without cracks and chips. On the bottom we glue the plastic cover or similar product: close drainage holes so that the plaster does not fall out when pouring. Put a pot with chopsticks for ice cream: if the height does not coincide - cut the sticks.


Stage 2. Painting Kashpo. Using white acrylic or gouache with PVA glue, paint a completely pot for New Year Topiaria in 2 layers. At the same time, the second layer must be scratching a soft tassel to cover the pot evenly, without smears.
Alternative to liquid paint - acryl in a spray punishment potted pot under the tree of happiness to the new year.


Bronzing of the trunk and decor
Stage 3. Painting of the decor. Acrylic paint - antique bronze or medium gold - painted dried chestnuts, halves of walnut, acorns and hats.
Highly dried (wrinkled) chestnuts can be painted partially, even a sponge powder is allowed: It turns out a very interesting texture!
Stage 4. Painting the trunk. In color with decor, bronzing the barrel of the New Year tree of happiness. All elements are scoring evenly, in 1 layer.


Formation and decor of the crown of the New Year tree of happiness
Stage 5. Preparation of a ball. The foam ball melts from hot silicone, especially with a heavy decor. Cloth winding, twine or knitted threads Decides this problem.
Instead of purchased ball, alternative solutions can be used from foam. Learn how to make your own hands almost free and very easy!
Stage 6. Crown Decor. The secret of coloring New Year Topiaria is a variety of decor from natural material in combination with artificial elements. Over the entire surface of the ball, duct, without spaces, glue the decor, alternating painted and not painted items:
- Chestnuts, walnuts, acorns.
- Single and paired acorn caps.
- Rotan balls.
- Sisal balls. Step-by-step instructions, how to do.
- Corn cinnamon sticks.
- Peach bones.
- Badyan asterisks.
- Foam berries of white and burgundy (Kalina).
- Italian macaroni dark brown.
First glue a large decor, then we close all the gaps on the crown of the New Year's crafts of Topiaria.


We recommend processing the crown from natural material by any hair varnish to avoid insect damage. It is important to do before sticking snowflakes and garlands with beads so that plastic elements are not deformed.
Stage 7. New Year's decor. The finished crown is winding in different directions with garland - beads on the fishing line, fix big beads on glue. On the surface, we turn plastic snowflakes on the surface, closing the balders, if such remained on the New Year tree of happiness.


Vase decor
Stage 8. Satin Bow. You can use a ready-made brown globe bow or make an independently triple bow satin ribbonsAs shown in the video. Under the bow glue cross-cross-eater, white organza loops, and from above - snowflake and bead.


Stage 9. Decoration of Kashpo. We glue plastic snowflakes and semi-graysins on each side, except for the one where the bow from satin ribbons is banging.


Fill and filling the wood vase of happiness
Stage 10. Pouring with plaster. New Year's Topiciary "First Snow" It turned out heavy: For the bottom of the bottom, the pot lay a layer of rubble. The trunk is attached to plasticine, fill with plaster (alabaster) on 2/3 of the pot volume. The solution is dragging thick, the proportion of plaster / water - 2: 1.
After filling, the tree of happiness needs to be fixed in the right position and leave until complete drying - 18-24 hours.

The last stage 11. Filling a pot. Gypsum surface cover in 2 layers by syntheps, we carefully sample. This is a snow-covered glade, on which we form a composition at the base of the New Year Topiary. We use all the elements that decorated the crown: chestnut, sisal and rattan ball, acorn, walnut, 2 tied cinnamon sticks, badyana asterisk. In the glade chaotically scatter a few berries of viburnum.


Photo - Presentation of the New Year tree of happiness "First Snow"


Today, designer solutions for the traditional New Year tree are very popular. It is made of various (including thrusters) materials, in a wide variety of techniques - it may be volumetric Applique, and modeling, and even to the topiary. Topiciary "Christmas tree", master class on which we now present to your attention -
the appropriate option for the one who wishes to make an interesting decorative product.
And since it is not difficult for making a Topiary with your own hands even for a child, it will be possible to use this souvenir as small for friends or relatives.
We offer those who plan to do Topiary "Christmas tree" with their own hands, a step-by-step photo that will help to deal with all the stages of the process of its manufacture.
First of all, you will need to choose a suitable container - a support for Topiaria. It may be a miniature flower pot, and even better - a decorative bucket. Previously, live ate often put in buckets filled with water or earth so that they retain freshness longer. Topiary in the bucket will remind this peculiar tradition.

Then we will need a large volumetric piece of foam, which you can cut a cone. You can take a ready-made foam cone, they are sold in the departments of goods for hobbies and creativity.

The bottom of the cone we get a foil. You can take a silver or golden foil, it does not matter.

Now another interesting point: you need to take a cut quite thick copper wire and spin one end in the form of a spiral.

Permeate the wire foam cone.

And you have a bilateral scotch. Scotch can be applied not with a solid layer, but separate vertical rows. Prepare in advance the yarn for knitting a pale green and dark green.

Wrap a light green yarn cone, trying to put the ranks close enough to each other and is tight enough so that they do not sculp.

Between light green yarn wrapping dark green.

The ends of the threads are tied at the top of the cone a beautiful bow, tie to them large beads.

From the bottom, at the base, wind up the Christmas tree with dark green wool for felting, sisame or just fluffy threads.

Dress up a Christmas tree with multi-colored beads or beads. You can use buttons, glue rhinestones, confetti or serpentine - everything that will seem appropriate to you.

Let's place the Christmas tree trunk in the bucket, pour the gypsum. Alternatively (if a small Christmas tree), you can take a floristic sponge and fix the figure in it.

We cover the gypsum or sponge with the remnants of the material to be covered with the remnants of the Christmas tree.

So we made the Topiary "Tree" with your own hands!

Topiciary "Christmas tree" with his own hands
At the foot of this Christmas tree you can hide a small gift - such a surprise will doubly delight to whom it is intended.