Every autumn, kindergartens announce contests for the best autumn craft. Usually nature itself suggests ideas for implementation: it is easy to imagine curved driftwood as snakes and dragons, you can make any little people and animals from acorns, chestnuts and cones, and plots for applications suggest themselves from leaves. But if you have no time to fantasize, but you want to make an autumn craft for kindergarten with your child with your own hands, the Active Mom did her best for you and created a selection of interesting ideas.
Crafts from acorns and chestnuts
Perhaps the most popular natural autumn material - acorns and chestnuts, which are in abundance in every park at this time, take it - I don't want to. And we want something! And we return from a walk, carrying packages with these treasures in our hands.
Acorns and chestnuts make excellent topiary. To make such a decorative tree, crumple the paper, forming a ball out of it, wrap it with threads and cover it with white napkins / paper towels. The "trunk" of the tree will be a strong, even branch, which must be wrapped with twine, tape or corrugated paper. Any container can be used as a pot, the main thing is that the tree stands firmly in it.


But, of course, most of all, children love to make men, animals and birds from acorns and chestnuts, because this is a great opportunity to smoothly transform creativity into play.

These adorable owls are obtained from chestnuts, acorn caps, paws cut from felt, wings, beak and glued doll eyes.

As additional material, matches (toothpicks), plasticine, maple and ash fruits (for wings, ears, tails) are also required. Such autumn crafts for kindergarten easy and simple to perform even with a three-year-old child:

But not just a craft, but a real composition.

The door wreaths of chestnuts and acorns look great. If the animals seem to you too "childish" option and with a preschooler from senior group I want to make not a toy, but an element of decor - this is your option. The base of the wreath is an intertwined vine. For fastening acorns and chestnuts, Moment glue or liquid nails are used.

Candlesticks made using natural material look stylish. It's very easy to make them.

Crafts from cones
Cones are the second most popular natural material in the fall. Cones make spectacular baskets and vases that can be filled with autumn gifts of nature: apples, grapes, mushrooms, twigs with mountain ash, rose hips, sea buckthorn. To make a vase, you will need wire, fishing line, pliers.


And look how charming flowers come out of cones when you paint them! Admit it, did you not immediately guess that these are bumps?


Well, where in kindergarten without a variety of pine cone animals and birds.


Autumn crafts from vegetables and fruits
In creating compositions for kindergarten, you can actively use vegetables and fruits, which are rich in autumn.

The most popular vegetable for making crafts is, of course, pumpkin. You can make a flower vase from it or autumn leaves, basket for vegetables.

And you can use it as a blank for creating an animal or a bird ...

... or even such a madam.

You can build such a ship from a pumpkin:

Apples, potatoes, zucchini will be an excellent material for crafts:


Autumn gives us a lot of materials for creativity. These are leaves of various colors, and chestnuts, and dried flowers, and acorns, and a decorative miniature pumpkin.
But, before you start making souvenirs from them, you need to properly prepare them, namely dry them and, if necessary, cover with varnish or paint.
If you make a craft from unprepared raw materials, then it will be a short-lived product.
As soon as the material dries on its own, the souvenir will lose its shape and have to be thrown away. And besides this, half-baked leaves can simply rot or become moldy.
So let's dry up our fall finds first.
Prepare the leaves for the herbarium as follows:
Method 1:
Place them between the sheets of books and place them back on the shelf, pressing firmly against the side of the other books. After about a week and a half, the leaves will become suitable for crafts.
This method is the best, since natural color leaves do not change and then they do not break for a long time.
Method 2:
This method is good if you do not have the strength to endure a week and a half and want to get started quickly. Place the sheet between two white sheets of paper and iron with the lowest iron setting.

In this case, the yellow and red leaves retain their color, but the green ones can darken and become an ugly, brown hue.
Dry chestnuts, acorns and decorative pumpkin.
Method 1:
Drying outdoors in the shade. You will need to wait a long enough time before these materials acquire the dryness we need.
Sometimes this process takes a month. This is especially true of decorative pumpkins, from which wonderful autumn DIY crafts come out.
You will see for yourself when the moment comes when the gifts of autumn are ready. Acorns and chestnuts will become lighter, and the pumpkin will look like a rattle, as the cavity inside will dry out and shrink, and dry seeds will beat against the walls.
Method 2:
We use the oven for this. It must be set at a temperature of up to 60C, and dried until tender, stirring occasionally.

The main thing is not to rush and do not put on a lot of heat, as the fruits will simply cook and become completely unusable.
Drying dried flowers
There is only one way and it is long lasting. Flowers need to be strung on a thread threaded through the stems and hung in a dry place, peduncles down.
Drying in a book or iron will not work, so the shape will be lost and they will become flat. After the dried flowers are completely dry, they must be covered with a layer of hairspray. It will give them the desired density and will not allow them to crumble at the slightest touch.
Well, now, let's move on to specific master classes and examples.
1. Panel from autumn leaves
We offer you a great do-it-yourself leaf panel idea. It is not difficult to make it, but the result is quite impressive.
It would be nice if you placed other autumn decor elements next to the finished picture of leaves. For example, pumpkins, spikelets and other gizmos that match the style. Then you will have a whole autumn ensemble.

What we need to work:
- 1. Dried yellow-red maple leaves.
- 2. A branch of a tree for the trunk
- 3. A piece of square plywood
- 4. Stain or dark varnish
- 5. Simple pencil
- 6. PVA glue
- 7. A bunch of dry spikelets
- 8. Wicker basket for pumpkins
- 9. A few pieces of Jack Be Little or Baby Boo pumpkins
If you do not have such pumpkins, then the basket can be filled with chestnuts and acorns. But next year it would not hurt to grow them, as they look very colorful and festive. Of course, if you have a piece of land.
See what a variety of varieties and how harmoniously they combine with each other:

Master class step by step:
Step 1. Sand the board, paying particular attention to the edges. They should be smooth.
Step 2. Cover it with wood stain or varnish, preferably brownish. Apply the coating in several layers, trying to make the board not uniform in color, but slightly "spotty".
Step 3. Draw a large maple leaf freehand.
Step 4. Start gluing on the maple leaves. Start from the edges, gradually approaching the middle. The edges of the leaves should match the edges of the sketch as best as possible. The next row of leaves should overlap the previous one. Do not glue the ends, they should be "overhang" for the effect of volume to emerge.
Step 5. Glue the chosen twig in place of the stem.
Now hang a do-it-yourself autumn panel over a curbstone and lay out other decorative elements around.
2. Topiary from herbarium and other autumn materials

Topiary is an ornamental tree. In the fall, you can collect beautiful leaves and make such a wonderful and cozy decor element.
Any leaves, dried flowers, acorns, spikelets will be used here. The main thing is to understand the very essence and make the right foundation. And how to fill it - fantasy will tell.
What we need to work:
- 1. A ceramic pot of a dull color
- 2. Smooth tree branch for the trunk
- 3.1 ball of foam, polystyrene or special floristic foam
- 4. Dry moss, sesame or a handful of beautiful pebbles, acorns, dry mountain ash
- 5. Glue gun
- 6. Gypsum dry
- 7. Decorative elements: herbarium, dried flowers, mountain ash, acorns, etc.
Master - class step by step:
Step 1. First, let's make a base. Take a styrofoam ball and place it on the branch that will serve as your trunk. Then remove it and drop glue from the gun into the hole formed. Reattach the ball and let dry.

Step 2. Secure the trunk in the pot. To do this, drop a drop of glue on the free edge of the branch, attach it to the base of the pot.
Then, dilute the gypsum with water to the consistency of liquid sour cream and fill the container. Do not forget that you will still need to decorate everything on top with moss or acorns, so leave a gap of about 3-4 cm from the top.

Step 3. Now we insert the leaves, dried flowers into the ball, sticking them with the stems inside. If you want to add acorns to the composition, then pre-plant them on pieces of wire.
Step 4. Now you just have to decorate the top of the pot so that the plaster is not visible.
That's all. Using this simple scheme, you can make a variety of autumn crafts with your own hands, not only from leaves, but also from dry peas, nuts, and other things, etc. They will all look great!
3. Roses from maple leaves

Looking at this elegant bouquet of roses, it would never occur to you that it is made from ordinary maple leaves!
But, nevertheless, it is so. You just need to learn how to fold them correctly and you will get a great basis for many ideas.
Such roses can be included in various autumn topiary, wreaths, compositions and panels. They look great in combination with any natural materials.

Well, let's get down to business.
What we need to work:
- 1. Maple leaves, not dried
- 2. Thread or soft wire
- 3. Matte hairspray
Master class step by step:
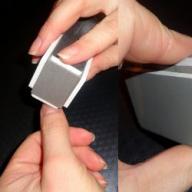
Step 1. We form the middle of the bud. To do this, fold the sheet as shown in the pictures below. Try to twist it as tightly and evenly as possible. First in half, and then sausage.

As a result, we should get the following blank:

Step 2. Now we take the second sheet, fold it in half again and wrap the base with it.

The sharp edges of maple leaves must be carefully hidden inward, like this:

Step 3. We continue to build up the mass around the base, fitting more and more new leaves. If you want to end up with a bud, then twist it more tightly, and if you ate a more lush rose, then loosen the twist a little.

Step 4. When you see that a real rose has blossomed in your hands, you need to fasten it with threads as tightly as possible.

Step 5. Cut off the edges with scissors and place the rose on a lining of leaves, preferably already dry. We cover the composition with varnish and admire!

Such roses from leaves stand for a long time, they will definitely be enough for the entire autumn season. You can make as many of these colors as you like. The more there are, the more gorgeous this autumn composition looks, reminiscent of a fabric motif.
4. Compositions of decorative pumpkins
Even if you do not grow this vegetable on your plot, in the autumn you can freely buy them on the market, and then dry them yourself. We have already described how to do this above, so let's not waste time talking.
Let's get started!
There will be no master classes in this block, we will just show you examples of such a decor, and how to make them is already quite clear from the photo.
Of course, there are more complex techniques, for example, carving or painting on dry lagenaria, but this is a vast topic and deserves a separate article. Here we will consider only the simplest compositions that even a schoolboy can do.
Option 1. Basket with a scattering of pumpkins. It couldn't be easier, but the view is spectacular!

Option 2. Candlesticks made of mini pumpkins. To do this, you need to cut a hole with a knife so that you can place a foil-based candle in it.

Or this option:

Incredibly simple, right?
Option 3. A wreath on the door of pumpkins. Take any circle as a basis, for example, an embroidery hoop, and attach mini-pumpkins to it.
Pierce the ponytails with wire and screw it to the base, circle. Use berries, acorns, twigs and autumn leaves as additional decorative elements.
It will look something like this:

5. Chestnut topiary

To create this spectacular do-it-yourself autumn craft, we will need the same base materials as for creating a decorative herbarium tree. And for decoration you just need other elements.
For work we need:
1. The pot is ceramic
2. Styrofoam ball
3. Gypsum dry
4. Glue gun
5. A branch of a tree for the trunk
6. Cones, chestnuts, acorns
7. Severe thread or twine to form decorative balls
Master - class step by step:
- 1. We form the base of the tree in the same way as in the case of the topiary from leaves.
- 2. We fix the base in the pot with glue and plaster
- 3. Apply drops of hot glue to chestnuts, acorns and other elements and fix them in a chaotic manner to a foam ball-crown.
- 4. Chestnut wreath on the door

Such a wreath of chestnuts on the front door will cheer up not only you, but also passers-by. It is very easy to make it. Follow all the steps for making a pumpkin wreath.
Find some kind of dense base, then pierce the chestnuts and other elements through from the back side, insert the wire, form a hook and use it to screw them to the circle.
Complement the chestnut composition with leaves, acorns, berries and other autumn decorative elements that this fertile time of the year presented.
6. Autumn garland "Leaves" from salt dough

This is a very spectacular do-it-yourself autumn craft. The big advantage of such a garland is that it is not seasonal and will decorate your home for many years.
After all, it is not made of natural materials, and from salt doughthat does not deteriorate for years. The only thing is that such products are fragile and you need to handle them carefully so as not to break. But, even if this happened, they can always be glued together, and the joint will not be noticeable.
What we need to work:
1.2 cups flour
2.1 glass salt
3.5 cups water
4. Gouache
5. Sewing pins with an eye-hook
6. Twine
7. Oven
8. White landscape paper, pencil
Master - class step by step:
Step 1. We draw on the album sheet patterns of leaves of various types, but approximately the same size. We cut them out.
Step 2. We knead a tough dough from flour, salt and water. If the dough turns out to be non-plastic, then you can add liquid drop by drop. Knead the resulting material well and roll on the board. The layer should be about 5-7 millimeters.
Step 3. Lay out the templates on the rolled dough and cut them along the contour with a knife.

As a result, we should have about as many blanks.

Step 4. We make holes with pins and fasten the heads neatly. We will hang our leaves on them. We squeeze out the veins with a knife.
Step 5. Dry the dough in the oven at a temperature of 50-60C until completely dry.
6 step. We paint the dough blanks with gouache, trying to make natural tones and transitions.

7 step. We string the garland onto the string, making a knot over each leaf so that they do not move.

So our do-it-yourself autumn craft is ready. You can hang it anywhere, it will be in place in any corner of the house, especially if you have some other decorative elements in the autumn style.
7. Vases and houses made of ordinary pumpkin
Autumn is the time for pumpkin ripening. It costs mere pennies and it is not difficult to find a beautiful shape and coloring.
And making an element of autumn decor based on it is as easy as shelling pears! There is no need for any step-by-step technologies and accessories.
The only thing you need: pumpkins, a carving knife, a tablespoon to choose the pulp and flowers with which you will fill these colorful vases.
Take a look at our selection of photos of pumpkin vases. It looks very dignified and autumnal.


As you already understood, you just need to cut off the top and peel the core of the vegetable. Then fill the container with water.
Or you can make pumpkin houses. To do this, you just need to cut holes in the right places. Where exactly they are located, you can see in the picture below. Children love these things!

8. A wreath on the door made of natural materials
We have already given above an example of pumpkin and chestnut wreaths. You already know how to make them. Here we just present a selection of the most effective, in our opinion, ideas.


9. Acorn frame for a photo or a mirror
It is very simple to decorate any base in this way. We think that explanations are not needed here at all.
The only thing we can advise is that you should not glue acorns on a glue gun or PVA. Much better if you use plasticine.
Because, most likely, you will soon get tired of this decor and have to throw it out. And so, you can always dismantle the acorns and get back to use a regular photo frame.
This is how it will look.

On the photo frame - solid acorns, and on the mirror - only hats. Thus, you can create a variety of autumn crafts with your own hands and decorate any surface: caskets, bread bin, etc.
10. Grape bunch of acorns

This autumn craft will look the best way, if you paint the "berries" in natural colors, and instead of grape leaves add a herbarium of maple, of various colors.
Also, a bunch of acorns is a wonderful element of any autumn wreath on a door or a large topiary. After all, it can be made not only for desktop, but also in human height!
Only instead of a foam ball, you need to take a large, plastic one. Grapes from acorns are made very simply, we will now tell you exactly how.
What we need to work:
1. Acorns without caps
2. Shiloh
3. Wire
3. Glue gun
4. Acrylic paint
5. Autumn leaves for decoration
Master class step by step:
Step 1. We pierce the holes at the base of the acorn with an awl.
Step 2. We break or cut the wire into pieces 7-10 cm long.
Step 3. Dip the ends of the wire in a drop of glue from the gun and insert into the punctured holes.

Step 4. We paint the acorns any color you want. The main thing is that it is combined with leaves, which will complement the composition.
Step 5. We collect the acorns in a bunch, forming a wire rod from above. Then we attach the leaves to it.
Now you can make any decoration based on this autumn craft. Panel, wreath, etc.
11. Autumn crafts from felt
It is a pleasure to work with this fabric! The material does not crumble, keeps its shape perfectly. This means that any beginner can make an autumn craft out of felt with his own hands and it will turn out to be no worse than the products of experienced craftswomen.
We offer you a selection of the best and simplest decors in autumn style, and you already choose any of them! They are so simple that they don't need to describe their step-by-step technology in detail.

As you can see, on the basis of felt leaves, you can make both a wreath and a garland, like the one we already made from salt dough. Here are a couple more DIY options for autumn wreaths.

All you need is to draw templates, cut out felt and arrange it according to our photos.
12. Pigtail of garlic and red pepper

How cozy it is when bunches of garlic, onions, and red peppers are hanging in the kitchen! But if you hang them fresh, they will lose their appearance very soon or simply run out, because they will be used as food.
Let's do something like that, but for centuries! Now we will look at how garlic and pepper are made, from which we will form a pretty braid for the kitchen.
For work we need:
1. White nylon tights or a plastic bag (for the base of garlic)
2. Cotton wool or synthetic winterizer (for filling)
3. White harsh thread (for dressing and forming lobules)
4. Glue gun
5. Buckwheat or twine (to imitate the roots of garlic)
6. Fabric for sewing peppers or salty dough for sculpting it
Master class step by step:
Step 1. We form the body of the garlic. To do this, we need to cut into squares or nylon tights or simple plastic bags. Garlic made from nylon looks, of course, more realistic.
But it looks good even from the packages. But most importantly, this material is always at hand. So, we cut out a square, about 7 by 7 cm in diameter.
Step 2. We roll a ball out of cotton wool or synthetic winterizer, put it inside the nylon flap and form a head of garlic. It looks like this, as shown in the photo.

Step 3. Then we begin to tie the head with a harsh thread, forming cloves of garlic. First we divide in half, then into quarters, then into 8 parts.
Look at the photo, the process is clearly shown there.

Step 4. On the place where the roots of real garlic are, drip a drop of glue and sprinkle this place with crushed buckwheat. If you like, you can replace it with twine, which must be loosened and finely chopped.
Step 5. We make a pigtail from twine and attach the resulting cloves of garlic to it.
6 step. Now it's time to tackle the pepper. You can sew it, but pepper sculpted from salted dough looks much better.
We have already given the recipe for mixing, in the sub-heading "Garlands of autumn leaves." These are the peppers that should come out in the end.

7 step. We make holes in the ponytails of the peppercorns (we will then thread the twine in them and use it to fix them on the braid with garlic). You can do this with an awl or any item at hand.
The main thing is to make them large enough so that later you can thread the thread freely. Otherwise, after drying, you will not be able to attach the finished product to the composition in any way.
And one more thing: if you make a hole, make sure that the edges at the leg remain more or less large. Otherwise, after threading the thread, the thin walls may crack and the pepper will fall to the floor.
Step 8. Dry in the oven, paint with acrylic paint, cover them with varnish when dry. When the pepper is shiny, it looks more natural.
Dry on a low temperature, do not rush, otherwise, your work may burst and you will have to re-sculpt everything. Cracked peppers can no longer be painted the way you would like.
9. Attach the pepper to the garlic and hang this autumn composition in the kitchen. You can make several of these bundles. You can make carrots with salted dough and brown tights for an onion bunch.
The principle of making bulbs is the same as for garlic, only it's even simpler. Lobules do not need to be formed.

Also, a bunch of mushrooms on the wall will look great, which you can also sculpt from dough and paint realistically.
So our great review has come to an end. You have seen many examples and any kind of autumn DIY crafts. We really hope that our master classes will benefit you and that you will definitely take something into service.
Outside the window, autumn has already come and everything around has begun to hide with beautiful multi-colored fallen leaves. And until the rain turns this beauty into a wet mess - it's time to get creative! Especially if your kid came from kindergarten or school with the task of making an autumn-themed craft.


A herbarium of leaves collected in autumn is a whole wealth and raw material for children's crafts. You can think of a lot of options for using such a natural material. Since it is imperative to practice creative activities in creating unusual figures with children, we offer you an interesting idea for creativity.

Only work with dry and fragile material should be very careful.
Practicing such activities, children will eventually independently learn to think creatively and notice the amazing features of natural objects.
If the soul wants something original, we suggest creating an autumn floral arrangement. Namely - the "Autumn mood" bouquet.

The product consists of two elements - a vase and flowers.
For flowers we need:
- leaves of different sizes and colors;
- glue gun;
- wire or thin twigs (for the stem);
- scissors, pliers (for wire).
Be careful with your glue gun when doing leaf crafts with your child. It is better to entrust the baby to select the leaves, arrange them by color, cut them and serve them to you.

As it turned out, more realistic roses (green flower) emerge from leaves with slightly curved edges. Try to wrap the edges of the leaves to avoid sticking out petals. Large leaves can be cut in half. For a rose 8-10 cm in diameter, you need 15-20 leaf fragments 5-6 cm in size.
Progress:
1. We take the wire, bend the edge.

2. We begin to form a rose from leaves and their fragments. We wrap the first sheet around the ear of the wire and fix it well with glue. We continue to glue the leaves in a circle, filling in the empty spaces.

3. The lowest row is the sepal. Take 5 leaves of a small size and contrasting color. Glue in a circle, thereby covering all the "insides" of the flower. The photo shows small red leaves under the green petals - this is the sepal.
4. The stem of the finished flower can be wrapped with floral tape and a few leaves can be tied to the stem. If you are using twigs, then simply glue a couple of leaves along the stem of the flower. The autumn rose is ready.
To form a beautiful bouquet, you will need several flowers - 3,5,7. Try to make them different in color and size. It will look more colorful. You can add several buds to the composition. They will help fill in the empty spaces in the flower arrangement.
Vase for an autumn bouquet
For a themed vase, you will need any small bottle (glass or plastic), string, a couple of acorns or hazelnuts. And, of course, a glue gun or any other glue. We wrap the bottle with thread, periodically fixing the result with glue. We cling nuts or acorns to a small piece of twine with glue. We tie the result on a vase.
If you had a bottle big size, you can decorate it with an applique made from halves of a walnut shell or, in general, from any cereal. Instruct your toddler to figure out how to decorate the vase. Channel his imagination in the right direction.

Now you can form a beautiful bouquet of flowers and put it in a vase. It will be more convenient if the height of the leg of each flower is different. You will be able to fill the space in several tiers.
Such crafts made from autumn leaves can become not only an original decoration for any interior, but also help you win at any school exhibition.
Nature itself suggests thousands of ideas. You do not need to be an experienced craftsman to create a unique, warm and caring decoration for your home with your own hands. And kids are happy to participate in the creative process and make amazing crafts along with adults. Master class - how to make one - read here.


Why not make a hedgehog from a pine cone and plasticine with your child? Autumn colored leaves will add special colors to the work.


Encyclopedias say that hedgehogs live in forests and parks, but sometimes they can also be found in village yards. Thorny animals make their nests in woodpiles. At night, individual daredevils or a full-fledged family go out in search of food.
Dried greenery rustles quietly in the beds. At dusk, the direction of the hunters is clearly visible. Hedgehogs are not worried that the owners of the yard see their movement. As a rule, quiet and harmless neighbors are not chased away, sometimes they are even fed with milk.
What does a hedgehog eat? Insects, slugs, mice. This means that it is beneficial to keep such an animal for those who are engaged in gardening.
Such a cute hedgehog turned out from a cone. As a decor, you can decorate the thorns with plasticine or a real small apple, and put the hero himself on a carpet of autumn maple leaves. Detailed master class - how to do this - read here.


By the way, hedgehogs are considered fast animals. They are capable of speeds up to 3 m / s. At the same time, thorny animals jump and swim perfectly.
The resulting hedgehog, unlike the real one, can be safely handled. He will not hiss, and curl up into a ball, warning of danger. This hero will not run away from the little master, but will safely stand all autumn and even winter. The hedgehog from the cone does not hibernate. He is ready to meet winter and New Year's holidays with children.
How to make one - read here.


Such fun is done very quickly and easily. For a detailed master class, see here.


Autumn motives in the home interior
Seasonal flowers and herbs, autumn colorful leaves will become the best decoration houses.
How to make a toy goddess of autumn from fabric
Doing something with your own hands is so entertaining and interesting. Well, if it also turns out beautifully, then there is simply no price for such toys. You come to an exhibition of hand-made products - and your eyes simply run up. Let's try to reveal some of the secrets of the masters and consider the method of making the goddess of Autumn, which can be presented to children or hung on the wall in your home.

So, we need: acrylic paints for fabric (with gold and silver cans), a set of brushes, cotton fabric, filler, threads with a needle.
Step one. Making a layout
In the layout, we have to figure out how our toy will look. At this stage, we do the initial sketch, then the pattern, sew the details together.
Our autumn is made from a single piece of material. It is only necessary to separately make her legs and one hand (the hand is cut out of another piece of fabric and sewn on top of the product). When all this is ready, you need to fill the toy with cotton or other material and sew up all the holes.
Step two. Time for creativity
Now we have to draw our autumn goddess. You can completely repeat the drawing of the finished product, which will be given below. In any case, you should use orange, gold, yellow and red colors, because autumn is rich in these colors.

In the hands of our autumn, a large tambourine, it seems to convene the whole world, so that people, animals and animals will enjoy the last warm days. Next, you need to paint the toy (in order for the paint to hold better, you can apply PVA glue to the fabric).
Step three. We decorate our toy
You can decorate our beauty endlessly. After all, autumn is unique. You can glue a bead to it, add sparkles - whatever your heart desires. Look what a wonderful autumn we have turned out. It's expensive to watch.

DIY autumn goddess
Physalis in pumpkin
Autumn bouquets can be made not only from fresh flowers, but also from oak branches with acorns, sea buckthorn, barberry, rose hips, viburnum, elderberry, mountain ash, wild grapes, bright lanterns of physalis, ears of corn, etc.
Such compositions look great in a pumpkin vase, a wicker basket, a tin bucket, a clay jug. The vessel can be decorated with ears, decorated with a ribbon.
Wandering lights
Acorns, birch bark, physalis, hawthorn berries, small decorative pumpkins will help decorate candles in the autumn style. Plain thick candles can be wrapped in birch bark or inserted into small pumpkins where the top has been cut off and some of the pulp removed. Glass candlesticks will look original and festive if you paint them with stained glass paints.
If you drill holes in a thick branch according to the size of candles, decorate with small pumpkins, cones and berries, then the original candlestick for the house is ready.
September wreath
For mood, you can weave a wreath on the wall or front door... Flexible branches are suitable for its basis. Opt for vines, straw, or a wire hanger that is curved in a circle. Hook received. Decor elements are best represented by leaves, hop cones, grass panicles, tree branches, grapevines, acorns, mountain ash. In any case, it is convenient to fix it to the base with a thermal gun (alternative fixation - by means of a thin wire).
Decorate the wreath in the autumn, since there is plenty of natural material - bright leaves, thin branches, grapevine balls, etc. Or you can hang the leaves from the frame. An old lampshade or a wooden staircase will work for him.
Leaf fall on the sofa
What could be nicer than a cup of fragrant tea drunk on a sofa with soft pillows and a warm fleece blanket? In textiles, it is better to use soft velvety fabrics of the autumn range (brown-red, bright orange, burgundy, marsala, terracotta, muted green), prints in the form of leaves, vegetables, autumn colors.
The decor in the form of autumn leaves can be conveniently cut out of dense fabric and stitched to the background in a zigzag pattern. If the leaves are made of felt and the edges do not need additional processing, you can stitch them onto a pillowcase with an ordinary seam - this will give volume and help create a planned composition.
Acorn frame
Felt the mat out of thick cardboard, decorate it with a bunch of small decorative elements in the autumn style: apples, acorn caps, felt leaves, berries, etc. The bouquet can be made removable, attach a pin to it and use as a brooch.
Offer the children to glue the cardboard frame with acorn caps, insert a thick piece of plain cardboard or burlap background inside, glue beautiful leaf or any other gift from nature.
What about the festive table?
Use autumn motives in your table setting. Make napkin clips in the form of an oak bunch: felt leaves, acorn caps with a soft colored nut. Mossy twigs can be collected in a ring and decorated with half a walnut. Don't forget to make small bunches of oak leaves and berries.
The yellow and red leaves can be used as napkins under plates or to decorate dishes. Let autumn bring bright colors and comfort to your home!
Interesting ideas - how to make autumn crafts
Autumn crafts - these are works performed most often from natural materials. Acorns and chestnuts, cones and nuts, seeds and berries, and even colorful leaves - all these are universal ornamental materials that fall is so generous with. The section presents master classes and photographs from exhibitions from kindergartens and schools. If you were asked to make a craft with a child in kindergarten on the themes: "Gifts of Autumn", "Pantry of Autumn", "What Autumn Brought Us", "Golden Autumn", etc. - be sure to look at the materials from this section.
The change of seasons brings variety to our lives and serves as a source of creative inspiration. Autumn is a special time. The energy accumulated over the summer is looking for a positive way out, and nature pleases with an abundance of bright colors. Clear days alternate with monotonous rains, and fun walks with quiet homework. it the best time for making crafts from natural materials together with children.
Autumn inspires
Contained in sections:Includes sections:
- Autumn bouquet. DIY compositions from leaves, natural material
Showing publications 1-10 of 5838.
All sections | DIY autumn crafts for garden and school
"Abstract of the OOD for artistic and aesthetic development in the second younger group Topic: « Autumn tree» purpose: formation and consolidation of artistic and creative ideas and skills in children; introducing children to new technology unconventional applications. Dominant ...
 Exhibition of joint creativity of children and their parents « Autumn palette»
purpose: Creating an atmosphere of cooperation Our joint exhibitions are aimed at providing pedagogical support for families, interaction with parents, increasing their competence in development and ...
Exhibition of joint creativity of children and their parents « Autumn palette»
purpose: Creating an atmosphere of cooperation Our joint exhibitions are aimed at providing pedagogical support for families, interaction with parents, increasing their competence in development and ...
DIY autumn crafts for kindergarten and school - Exhibition of crafts from natural materials "Autumn Fantasy"
Publication "Exhibition of crafts from natural materials" Autumn ... "  There are many materials in nature that are suitable for the manufacture of original, beautiful and useful things. In addition, natural materials have a great advantage - they are safe, since they do not contain chemical and synthetic additives. Making such crafts develops ...
 Library of images "MAAM-pictures"
Summary of a lesson in plasticineography in the preparatory group "Autumn Landscape" Abstract of the lesson on artistic and aesthetic development (modeling) in preparatory group « Autumn landscape»Tasks: - To consolidate the ability to work in unconventional technique sculpting: drawing with plasticine (plasticineography) - To consolidate knowledge of mixing paints to obtain new ...
 Dear colleagues. I propose for you a master class on making a headdress for an Autumn costume from satin ribbons. Who likes to do kanzash is easy. But beginners will have to work hard. Take satin ribbons 5 centimeters wide (color ...
 Abstract of educational activities in plasticineography for older children preschool age "Autumn Trees". Purpose: to create conditions for children to create an image of an autumn tree using the plasticine technique. Tasks: Educational: to consolidate the basic techniques ...
DIY autumn crafts for kindergarten and school - Consultation "Autumn" in the work on the environmental education of children in the older group
Purpose: Formation in children of an idea of \u200b\u200ba person who is responsible for the preservation and development, augmentation of natural resources, the formation of ideas that a person is a part of nature and a person's duty is to take care of it. To form in children an ecological ...
 Master class on making paintings using the quilling technique "Autumn birch". Description: this master class designed for children from 5 years old, teachers of additional education, educators, caring and loving parents and just creative people. Purpose: decoration ...
 Photo report "Exhibition of children's and parenting works" Golden Autumn "Educator Olga Vladimirovna Nemchenko On October 4, 2019, pupils of my group, together with their parents, took part in the competition of creative children's and parent's works" Golden Autumn "The purpose of the exhibition: ...
 "Narodnensky kindergarten" October 2019 In order to prolong and preserve the beauty of autumn leaf fall without photo and video cameras, without a palette and paints, an exhibition of creative children's and parental works was organized on the basis of MKDOU "Narodnensky kindergarten" from October 24 to 28, 2019. ..
Collecting gifts of autumn with children is a fascinating activity. How much joy and benefit co-creation brings at this time of year. Searching for and selecting materials, sorting and preparing them, thinking over the idea you like, and the very embodiment of the author's intention - all these are opportunities not only for interesting communication, but also for expanding the child's horizons, getting to know the world around him and teaching elementary work skills. And the development of imagination and fine motor skills hands, the development of patience and the ability to bring what has been started to the end are the accompanying useful aspects of this creative activity. In addition, crafts made from natural materials are an excellent gift option for moms and dads, grandparents, which children can make with their own hands.
* For your material to be included in this section, add a couple of lines separated by commas and without quotes to your blog material in the "Categories" field: "children's crafts, autumn crafts"
Autumn! Gold autumn! How many colors and warmth are in it, which are about to be replaced by cold weather. Don't waste a moment, it's time for inspiration for new ideas for creating beauty. Create, create interesting gizmos from materials that nature has given. Let it be autumn that becomes a muse for inspiration, go for it!
The main thing in the article
Autumn crafts are a great leisure idea
With the onset of autumn, it is simply impossible to indifferently stroll through the parks and squares. Colorful landscapes enchant the eye with their bright notes. At this time, nature endows us with juicy fruits, as well as a variety of colors.
 These autumn gifts can be immortalized in time by decorating your home with a variety of handicrafts and hand maids. Such decorations will not only transform the interior, but also usefully allow to while away the cold autumn evenings... This lesson will allow you to plunge into the atmosphere of home warmth and comfort. So brew your favorite warming drink and lug a warm blanket.
So, autumn has come, it's time to stock up on all kinds of natural materials for creativity.

Crafts from natural materials for home and interior: paintings and panels
For the purpose of decorating walls in the interior, panels are widely used. Such paintings will look original if they are made of natural materials.
In general, a great option would be to attract children to perform handmade of a similar kind. This will provide an opportunity for children to show their creative skills and imagination, will also have a beneficial effect on the development of fine motor skills, which is important for the normal development of the child.
Panel of coffee beans
 This wall art works best for the kitchen. This place is often associated with coziness and home warmth. It has been scientifically proven that the smell of coffee has anti-stress properties. So such a panel will not only decorate the house, but also benefit the body.
 For this type of work you will need:
- Coffee beans that have different properties ranging from smell and color to size.
- The material that will serve as the frame (basis) of the panel. Usually any durable fabric, wood, paper, etc. is used for this.
- Glue, the most common PVA will also work, but it's best to consult a craft store.
- A drawing to be depicted using grains.
- Carbon copy.
- A simple pencil.
- The frame in which the finished product will be attached.
 This list necessary materials is the most basic. You can add various cereals and legumes to coffee beans, thus creating a whole picture filled with various shades.
 How to get the job done:
- Transfer the desired drawing to the base using a pencil and carbon paper.
- Then apply the glue to small areas and immediately glue the coffee beans on them, alternating the beans different colors, depending on the idea. An interesting idea will make applications from grains, gluing fringes, ribbons, rhinestones and so on.
- Frame the end result.
- The product can be decorated with colorful aromatic spices or dryers.
- To attach cereals, such as buckwheat or semolina, generously apply glue to the desired surface, cover it tightly with cereals and wait for it to dry, just shake off excess residues.

Panel of leaves
There are a lot of design options for such needlework, you just have to take a walk in the autumn alley and stock up on the necessary materials.
 With a special passion, children take up the implementation of such paintings.
 You can decorate the room not only with paintings, but also with works in the form of bouquets of leaves.


 Below are panel ideas from natural materials that will inspire you to be creative.
Panel from shells


Leather panel


Crafts for school and kindergarten
In almost all school and preschool institutions, contests for the autumn theme are held. It is at this time of the year that you can stock up on natural materials so that you can use them throughout the year.
 Sometimes children are so passionate about doing crafts in labor lessons, and even at home, that whole works of art are created.
The art kits available in stores are nothing like the variety of generous gifts from fall. The completed craft will be saturated not only with children's love, but also with the magical aromas of the forest.
 So what can be useful for creation?
- Fallen leaves. An abundance of dry foliage is rich in the brightest shades of colors. There is a place for fantasy to roam.
- Cones. If there is a park, a forest plantation or even a forest near the house, you can stock up on these fruits of conifers.
- Seashells, stones and sand. These materials, of course, can be found not only in the fall, but you can diversify the list of necessary materials with them.
- Acorns and chestnuts. It is with these finds that a lot of ideas for do-it-yourself work are associated.
- Coniferous and spruce branches are a real find for nature lovers.
- "Playful helicopters" - this is how maple seeds are sometimes called, and are used in their works.
- Nutshells, pumpkin and melon seeds, rowan clusters are not the whole arsenal of reserves.
- You also need tree bark, reeds, dried flowers.
- It happens that after visiting exhibitions and zoos with birds, you can get rich with a whole collection of feathers.


 If possible, try every walk to pay attention to the surrounding charms of nature and to pick up all of the above abundance. Be more attentive, because in the simplest and most commonplace, a whole treasure is often hidden.
In addition to outdoor activities, your child will have the opportunity to develop their creative thinking and exercise logic.
DIY children's crafts: funny applications
So, you have stocked up on the necessary natural gizmos, so you should apply them in practice. One of the many varieties of crafts is applique. Call the kids and sit down to create. Here are some creative ideas.


Autumn leaf crafts: ideas for creativity
Interesting leaf applications

 Autumn collages


 Paintings from leaf prints


 Leaf candlesticks


 Vase of leaves


Autumn paper crafts


Crafts from cones with your own hands


Photo exhibition of autumn crafts


Crafts on the autumn theme: original ideas
Unusual wreath

 Creative framing on the wall
 Crafts from vegetables and fruits


Video tutorials on making autumn crafts
Nature has endowed us with an incredible abundance of vibrant and colorful natural materials. Do not miss the opportunity to take advantage of these gifts, create coziness by decorating your home with your own handicrafts!