Summary of a modeling lesson on the theme "Mouse-beauty"
Purpose - Formation in children of skills in modeling the similarities and characteristic features of the mouse.
Tasks:
Improve the ability to roll plasticine straight and in a circular motion, flatten, roll out, fix the techniques of creating an oval shape;
Encourage children to enjoy a similar image;
To teach children to convey the similarities and characteristic features of the mouse in modeling;
Encourage children to enjoy the fact that a similar image is obtained, as well as the ability to admire their work and the work of comrades.
Equipment:
A toy mouse, a modeling board, napkins, gray plasticine, pumpkin seeds for the ears, bead eyes for each child, a string for a ponytail.
Preliminary work:
Examining the picture with the children where the mouse is drawn, talking about it. Children themselves determine what shape and color it is, remember where it lives, what it can eat. We recall what fairy tales children know about the mouse, leads them to highlight the characteristic properties of the animal: the mouse is small, fast, with sharp teeth and a long tail.
Course of the lesson:
Introductory part:
Remember guys who came to visit us in the last lesson? (cat)
That's right, cat. And what is the name of a cat's babies? (kittens)
That's right, kittens. Did you know that at night, when you go to bed, kittens do not sleep. Even about them poemse is. Here's a listen:
“What happened to the kittens?
Why are they awake?
Why was the buffet opened
you broke a new cup?
Dropped the drum
scratched the sofa?
Why did their paws fit into someone's slippers?
Have a bowl been poured with milk?
Did you wake up your cat mom?
Why did you break the book?
Because they catch the mouse! "
- You see how naughty these kittens are. Whom did they catch? (mouse).
- Right, mouse. But the mouse has its own house where it can hide from the cat.
-Let's play a game with you now, okay? (Yes)
Game "Hide the mouse"
- Now I will give everyone a mouse (circle) and a house (squares different color)
- All mice have different houses.
- Artem, what color is your house? That's right, red.
- And you Galya, what color is the house? That's right, green.
- And now we need to close the door (squares) in the house so that the cat does not eat our mouse. If the house is red, then the door is red.
- If the house is green, then the door is green. Look where the door is the same as the house (children should close the square “house” with the door of the same color, choosing it among others). The game is played 2 - 3 times with a change of houses for children.
- Well done, guys, you hid your mice so well that not a single cat found them.
- Guys, I also have a mouse. She is small, lives in a burrow. (I take out a toy and show it to the children.)
- Here she is! My mouse has a nice and clean burrow, but it has no mirror. And she really wants to know what she looks like. Will you help my mouse? (Children's answers)
Nursery
Naughty mice
The lids were gnawed on the jars,
Eaten all the sour cream
And they managed to escape.
The cat flew in great
That she had not seen!
Main part:
- Let's think about where to start sculpting. (From the torso).
- Correctly! What shape is it? (Oval).
- Yes, only where the mouse's head is a little sharper. Here's how to do it. I have a piece of plasticine, I will slightly separate the plasticine into ears and a tail. And from a large piece, I first roll a ball, and then slightly roll it out. Now I will slightly roll out one end with my palms. Like this. (Positions his palms at an angle to each other.) Now, with my fingers, I will make the tip not so sharp. It turned out the torso.
- Now we will make her a nose - we will slightly pull forward a piece of plasticine.
We put beads on the sides of the spout - these are the eyes.
- What else does the mouse have?
- Ears.
- What shape are they? (Round).
- How to make them? That's how. We will make ears from pumpkin seeds. Now they need to be attached to the body on the sides of the pointed end, where the mouse has a muzzle.
- And what is the tail of the mouse? (A long). Take the string for the tail.
- Is he all the same? (No, the torso is thicker).
Correctly. Guess for yourself how to attach the ponytail.
- Now sit down at the tables and get to work.
Physical education "Mouse came out"
The mouse came out once (walking in place or moving forward in a column).
Look at what time it is (turns left, right, fingers "like a tube" in front of your eyes).
One, two, three, four (hand claps overhead).
The mice pulled the weights (hands up and squatting with lower arms - "pulled the weights").
Suddenly there was a terrible ringing (clapping in front of him).
The mice ran away (running in place or to their place).
Final part:
The teacher invites everyone to get to work, as necessary, he helps the children, and at the end of the lesson he offers to leave their work on the boards and everyone go through to admire who blinded which mouse.
Children examine the figures.
The teacher pays attention to the expressiveness of the figures:
- “Anya has a very kind mouse.
- Matvey's mouse is a braggart.
- Eve smelled something tasty - lifted her muzzle up.
- Vania's mouse has a beautiful long tail ... etc. "
- Guys, my mouse is very happy with the way you blinded it. She's just beautiful.
He says thank you. Well done!
Summary of a modeling lesson in the middle group of a kindergarten "Let's treat the birds with grains»
Purpose - expanding understanding of birds
Tasks:
Strengthen in children knowledge about the characteristic features of birds (models).
Creation of a volumetric image of a bird.
Transfer in modeling characteristic signs birds, the ratio of parts in size, shape.
Use familiar sculpting techniques: rolling a circle, oval (trunk, head) in straight movements; pull-back (neck, tail); designate a stack of wings, eyes.
Arouse sympathy in children for wintering birds and a desire to treat them.
Materials: plasticine, stacks, feeder. Bird models. Illustration depicting a bird.
Vocabulary work: multi-colored birds, torso, wings, beak.
The course of the lesson.
Guys, I have a very interesting riddles... Look carefully here, what is it? (bird model).
That's right, a bird model. How did you guess? (there are wings, there is a beak, there are feathers).
You have guessed this riddle. Oh, I have another riddle for you. Look, and this, what? (bird model).
That's right, also a model of a bird. Now, how did you guess?
This means that birds have: a body, a neck, a head, a beak, a tail, wings, legs on the head.
So this is our model of birds. Look, here is the bird itself. What is she like? (the bird is beautiful).
And what color is this bird's wings? (Yellow).
And what color is the sparrow's wings? (Brown).
A bullfinch? (red and black).
So the birds can be what?
Multi-colored.
Ah, let's pretend that we are birds. What are the birds doing? They fly. Let's fly like birds. What else are the birds doing? The grains are pecking. Let's peck like birds. Where do the birds swim? In a puddle. Ah, let's clean the feathers like birds. All and now from birds, we turn into children.
Let's now sit down at the tables. Sit down comfortably, beautifully. And look carefully, I will show you how to sculpt birds correctly. First, we wet our hands in water so that the plasticine does not stick to our hands. Then we take a piece of plasticine and divide it into two parts. Divided, put one piece on the oilcloth, this will be the body. And we divide the second into two more identical halves, from one half we will make a head, and from the second as if legs. We put these two pieces of plasticine on the oilcloth too. We take a large piece of plasticine and start making the torso, roll it into a thick sausage. We rolled it out, now we pull the neck out of the body on one side, and on the other side the tail. Now we take a small piece of plasticine and roll out the head. And, from the head we pull the beak. Done. Now we attach the head to the neck, using the attachment method. And, now we take the last piece of plasticine and make it look like legs, we also roll it out, in a circular motion. We rolled it out, we got a small oval, and we put our bird on it, it's like we have legs. So we blinded the bird, but what is missing from our bird? Let's draw her wings and eyes with a stack. So my bird is ready. But she is alone she is bored, and let her blind a lot of girlfriends. Take plasticine for yourself and start sculpting, while sculpting, pay attention to the model.
Finger gymnastics:
Sing along, sing along: (clench and unclench fingers)
Ten birds are a flock.
This bird is a sparrow, (fingers are massaged one by one)
This bird is a nightingale
This bird is an owl
Sleepy head.
This bird is a waxwing
This bird is a corncrake
This bird is a starling
A gray feather.
This is a finch
This is a swift
This is a funny siskin.
Well, this one is an evil eagle
Birds, birds home! (hide their fingers in the cam)
In the course of work, observe the children, approach each child individually and provide assistance.
Oh, look I also have a feeder. Put your birds on it. See how many birds we got. But the birds are cold and hungry. Let's make our birds grains as small as millet. You can add real millet, seeds or bread crumbs.
These are the beautiful birds we got and they even peck at the grains.
Ask the children whose bird they liked the most and why?
Plasticinography lesson "White birch"
purpose - the formation of an idea of \u200b\u200b\\ u200b \\ u200bthe spring birch.
Tasks:
Teach children to create expressive stucco images in a constructive way;
To improve the use of the learned techniques (color stretching, molding) and skills in working with plasticine, waste and natural material;
Develop a sense of form and proportion, the eye;
Form an aesthetic taste;
To cultivate sensitivity to the artistic word, patriotism, ecological culture.
Preliminary work: observing the structure of a birch on a d / s site, examining reproductions of paintings by Russian artists, reading stories and poems, singing round dance songs, productive activities.
Materials and equipment:
reproductions of paintings, photographs, drawings, a model of a birch, a white sundress, a wreath of leaves, plasticine, stacks, rags, rectangular cardboard covered with a film of blue and blue colors.
Course of the lesson
The teacher invites the children to go to the art gallery of one image. Reminds of the rules of conduct in public places, in particular in the museum.
Children look at the displayed reproductions of paintings by Russian artists, photographs, drawings, illustrations.
Educator - Guys, do you remember the names of the paintings depicting nature in all its glory? (Children's answers)
- What genres of painting do you still know? (Children's answers)
Educator - Many famous Russian artists I. Shishkin,
I. Levitan, I. Grabar and many others loved to paint nature.
Look carefully and tell me, what one image are these canvases dedicated to? (Children's answers)
Birch riddle
Sticky buds
Green leaves,
With white bark
Stands under the mountain.
Educator - That's right, very often the artists depicted a birch on their canvases, admired this tree themselves and shared their joy and admiration with us. Now these paintings are exhibited in museums, and everyone can see them. But you can convey your feelings not only with paints, but also with words.
A child reads a poem by S. Yesenin "White Birch"
White birch under my window
She covered herself with snow, like silver.
On fluffy branches with a snowy border
The brushes have blossomed in a white fringe.
A child reads a poem by S. Yesenin "Good morning"
Sleepy birches smiled
Silk braids were tousled.
Rustling green earrings
And silver dew burns.
Educator - Children, did you like these poems? What kind beautiful words - the descriptions were picked up by Sergei Yesenin, because birch is the poet's favorite tree. And not only him, but the entire Russian people, we all consider her to be our symbol.
- Guys, let's remember what we know about the white-barrel beauty.
- Does birch always have a white trunk? (Birch begins to turn white at the age of 5 years)
- Does the birch blossom? (In mid-May, flowers bloom along with the leaves - catkins)
- Why does the tree trunk remain cool even on the hottest day?
(The bark of the tree - birch bark - is white, which reflects the sun's rays and the trunk does not heat up so much)
Educator - "I love the Russian birch, funny, sometimes sad ..." - wrote
S. Yesenin.
- Guys, when do you think a birch is funny? (Children's answers)
- And if he is sad, then why?
A child (a girl in a white sundress), on behalf of a birch, reads an excerpt from V. Bianchi's story "To whom laughter, and to whom tears."
“Everyone in the forest is having fun, but the birches are crying. Under the hot rays of the sun, the juice flows faster and faster over the entire white trunk. Through the pores of the bark, it protrudes outward. People consider birch sap a healthy and tasty drink. They prune the bark and collect it in bottles. Birches, which have released a lot of sap, dry up and die, because we have sap just like we have blood. "
Educator - This is very harmful to the plant! It is deprived of its reserves necessary for growth. Don't make cuts and don't let others do it.
The teacher demonstrates an illustration that shows the moment of collecting birch sap.
Educator - Why do people love a beautiful birch tree?
For beauty and benefit. Strong furniture and skis are made of birch wood; birch buds are used in medicine, and there is no better doctor than a birch broom. And how many melodious songs the people have composed about her! Let us sing one of them.
Physical minute. "Tree"
The wind blows in our face (hand movements towards you)
The tree swayed (swinging arms raised)
The breeze is getting quieter - quieter - ( gradual squat)
The tree is getting higher, higher, (get up, stretch on your toes)
Educator - Everyone likes the white-trunked beauty. Poets convey their attitude to it in words, artists - in paints.
The teacher and children notice empty picture frames.
Educator - Guys, visitors to the exhibition will come soon, they will be upset because of the loss of paintings. What do we do?
Children (at the suggestion of the teacher) decide to paint the landscapes themselves.
Educator - Come on - those and we will turn into landscape painters and with the help of plasticine we will draw a spring birch.
The teacher and children (relying on reproductions) recall the structure and characteristic features of the tree, discuss the colors of each season.
Direct execution of work.
The bottom line.
Educator - Admire, guys, your masterpieces. In spring, birch remains beautiful.
- At what time of the year did each of you depict a birch?
- How can this be determined?
- Whose landscape did you like the most?
- What names did you come up with for your paintings?
The teacher reads an excerpt from V. Nabokov's poem "Birches"
So tender, innocent, holy
That, touched, the sheets bow,
Shedding long sparkling tears -
And this is my life, and this is my native land.
Native beauty ... And it pours over me
Light, green glow - birch ...
Summary of a modeling lesson on the topic "Bagels, bagels, drying" modeling from salt dough
Purpose - Formation of skills of modeling from salt dough
Tasks:
Teach children the techniques of modeling, exercise in the ability to roll and flatten the dough (plasticine), create an image complementing her aesthetic feelings, the desire to convey beauty in her work with various details.
Form the ability to roll out dough, plasticine columns
(cylinders) of different thickness, (for bagels - long and wide, for bagels - short and narrow) and close them in a ring. Show options for decorating flour products (sprinkling with semolina, flour, poppy seeds), piercing holes with a plastic toothpick, fork or pencil.
Develop fine motor skills, form color perception, imagination, a sense of rhythm and composition;
To bring up aesthetic feelings, love for modeling, the desire to convey its beauty in your work
Vocabulary work: Bagels, bagels, drying, fair.
Equipment: Modeling material - plasticine, salted or butter dough, stacks, paper or cloth napkins, pencils, a plastic fork or toothpick, semolina, sprinkling poppy, mini-oven.
Preliminary work : The educator's story about baked goods. Demonstration material "Where did the bread come from?" Reading the fairy tale "Spikelet", a conversation about bread, riddles, free experimentation with dough, plasticine, examination and examination of pyramid rings of different sizes for tactile sensation, perception of form, size, color. Didactic game (Colored rings), nursery rhymes about bread.
Course of the lesson
Cheerful Russian folk music sounds. The teacher meets children in Russian folk costume. Children enter the group and sit on chairs in a semicircle.
Educator: Hello guys!
Children: Hello!
Educator: Guys, the postman "Pechkin" ran into our kindergarten today. He really wanted to see you. But could not. Apparently he was in a hurry. After all, other guys are waiting for him. But, on the other hand, he left a letter and a parcel for you. He even forgot to say who it was from. But we will not be offended by him. We will open it now and read it. The teacher reads the letter).
Hello dear guys! I hasten to write you a letter. I invite you all to my birthday. I invite all my best friends, and I have a lot of them, but I'm afraid I won't have time to get things done, so I beg you to help me bake my favorite bagels and bagels. I also send you a parcel with ready dough it is already ready and waiting for you. And when you prepare the treats, a surprise awaits you. Parsley, who loves you.
Educator: Guys, let's help Petrushka, he really expects help from you.
Children: Yes, we will help him.
Educator: Guys, let's not waste time and get to work. But before we get started, let's guess the riddle.
Small, butter, edible wheel
I will not eat you alone, I will share the guys with everyone. (Bagels)
Children: (Bagels)
Correctly. Well done!
Next riddle: I bubble and puff
I don't want to live in a dough,
I'm tired of the dough
Put me in the oven (Dough)
Children: Dough!
Educator: Quite right. You are great!
Now let's go to the table and see what's in the pan.
Educator: Children, what are they?
Children: This is dough!
Educator: Let's see what it is and touch with our hands.
Children watch and touch the dough with their hands.
Children note that the dough is soft, airy, fluffy, soft.
Educator: And what can be done from the test?
Children: You can sculpt various rolls, buns, pies, cheesecakes, bagels, bagels from the dough.
Educator: Right. Well done.
Physical education (on the coordination of movements and speech).
Children stand near their chairs and repeat after the teacher.
And now let's sit at our tables, put on aprons and remember how to cook bagels and bagels, drying.
The teacher shows the options for completing the assignment. Divides the dough in two. Shows two columns (cylinders) of rolled out pastry. He offers to compare them in size (one is long and wide, and the other is short and narrow) and guess which one will make a donut and which one will be a donut. Closes the posts into rings. The bagel is strung on a short string, and the steering wheel - on a long one.
Educator: Guys, in what way can you still mold bagels and bagels?
Children: (answer options) can be molded from plasticine, clay, salt dough.
Correctly. Well done.
Educator: Before starting independent work, let's play with you a little.
Fizminutka
Chi-chi-chi (3 claps on the thighs)
We dance by the stove (4 jumps on one leg)
Cho-cho-cho (3 claps over the head)
It's hot near the stove (4 jumps to the side)
Cha-cha-cha (3 above the head)
Gimme a pretzel stove (4 squats)
Chichi-chi (3 on the knees)
Our dryers are hot (4 jumps in one place)
Chu-chu-chu (4 jumps in one place)
I swing the steering wheel in the cold (walking in place and rotational movements with my hands.)
Educator: Well done guys!
After the game, children sit down at their workplaces and start independent work. Children divide their material (plasticine or butter dough) into pieces of different sizes, distribute them into two piles and roll out columns - long (thick) and short
(narrow). The teacher checks how the children understood the task, whether they managed to prepare shapes that were contrasting in size. The columns are closed in rings.
Educator: Guys, you worked for a long time and your hands are tired. Let's get some rest.
Finger gymnastics
For a long, long time we sculpted
Our fingers are tired
Let us rest a little
And we'll start sculpting again
Let's spread our hands together
And we'll start sculpting again.
Educator: Well done guys!
Educator: Guys, we have almost done everything, but in order for them to be beautiful, how can they be decorated?
Children: Can be dipped in semolina, poppy seeds, pierced with a toothpick, fork.
Children, together with the teacher, decorate their products (sprinkle with poppy seeds, pierce with a plastic fork and a toothpick).
Educator: Guys, let's look at our culinary products. Look at what beautiful and lush bagels and bagels we got. Let's compare them in size and lay them out on beautiful plates. Bagels for bagels, bagels for bagels. We put them to dry, and then bake them in a mini oven.
Educator: Guys, while our bagels are baked, let's all repeat the Russian folk nursery rhyme
"Ah, kachi-kachi-kachi".
Ah, swing - swing - swing!
Look at the bagels, rolls!
With the heat, with the heat from the oven.
All blush, hot.
Rooks flew here
Picked up the rolls
We are left
Lamb and dryers!
Well done boys!
Our bagels and lamb's are probably already baked. Let's take them out and see. Together with the teacher, the children take out the products from the oven and put them on trays, string them on ropes, to the fun of music.
Educator: Guys, look at how fluffy, airy and ruddy our bagels and bagels turned out. Parsley and his friends will be very happy with our treats.
Educator: Guys, do you know that our bagels and donuts are not simple, they are magical! For your wonderful work today, Petrushka has prepared a surprise for you! Do you remember what he promised at the end of the letter?
The postman "Pechkin" knocks on the door and comes in and hands out real bagels and dryers from the box. Tea drinking.
Summary of a modeling lesson on the theme "Easter Gift"
purpose – Formation of ideas about the holiday "Easter"
Tasks:
Teach children to draw oval-shaped objects with plasticine, conveying the characteristic shape of an egg.
Learn not to go beyond the contour of the drawing, smear plasticine with your finger throughout the drawing, use several colors of plasticine;
Develop
To acquaint with the traditions of celebrating Easter.
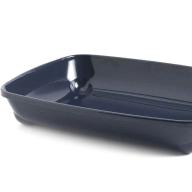
Material: several natural colored eggs. Halves of album sheets, plasticine, stacks, napkins.
Course of the lesson:
“I woke up and heard - spring is knocking on the window!
Drops are rushing from the roof, everywhere it is light - light!
And it seems - not birds, but angels are flying.
They are telling us that Easter is coming soon "
At the beginning of the lesson, the teacher tells the children about the Easter holiday: “This holiday was always celebrated very merrily: bells rang, swings and merry-go-rounds were installed on the squares, entertainment was organized. People painted for Easter, painted eggs. For example, you had to "clink glasses" with each other's testicles. The one whose egg didn’t crack won. ”
(During a walk, you can organize this game with the children.)
Then it is suggested that the children consider colored eggs. Ask them what color they are. Determine their shape (oval). Next, the teacher demonstrates to the children (on an easel) how to draw beautiful multi-colored Easter eggs on a piece of paper using plasticine.
Finger gymnastics:
"About the Ryaba chicken"
"Chicken Ryaba to Baba and Grandfather (arms bent at the elbows - showing the wings)
I took the golden egg for dinner (Show the egg from the palms of your hands)
Both the woman and the grandfather beat the testicle
But couldn't break for lunch (Hammers with fists)
The mouse ran past (Waves)
She brushed off the testicle, and it fell (rays)
Both the woman and the grandfather cried bitterly (shake your head)
The egg broke, their lunch was gone (spread your arms to the sides)
Since then, Ryaba, to the woman and grandfather (arms at the elbows are bent - showing the wings)
Carries only simple eggs for dinner "(palms together - show)
After that, he invites the children to paint over the contour of the egg on their own by smearing plasticine over the entire drawing with the tip (pad) of a finger.
Children choose the color of plasticine on their own. At the end of the lesson, you can arrange an exhibition of children's work. Having considered the work of children, it is necessary to note their diligence, accuracy. The educator suggests giving an “Easter gift” to parents or friends.
Reflection:
- Well done! You have beautiful eggs. Let's give them to grandparents. “Here are some painted eggs
Not simple gold.
Who gives eggs for Easter,
Happy, it happens for a whole year "
- What did we paint with you today?
- For what holiday do people paint eggs?
- Do you think we made grandparents happy?
- Did you like your painted testicles?
Summary of a modeling lesson on the topic "Rocket flight"
Purpose - formation of an idea of \u200b\u200bspace
tasks:
Continue to introduce children to the technique of drawing with plasticine;
To develop the ability of children to smear plasticine with a pressing movement of the index finger on a rocket shape circled in a pattern with a background prepared by the teacher;
To form in children an interest in working with plasticine, continue to acquaint children with various geometric shapes;
Develop color perception, fine motor skills of hands
Enriching the vocabulary of children on the topic "Space".
Materials:
- For the teacher: illustrations on the topic, a sample of work, a board for showing the technique of execution.
- For children: the basis for the composition (a sheet of cardboard with a dark blue or purple plasticine background), plastic boards, plasticine, stacks, paper napkins, plastic bottles with warm water.
Course of the lesson:
Educator: - Guys, I will ask you riddles, and you look at the board, there are hints for you, and so ... - The very first in Space
Flew at great speed
Brave Russian guy
Our cosmonaut ... (Yuri Gagarin)
Educator: - Yes, he was the first to fly into space and saw from there that ... guess:
- The planet is blue,
Beloved, dear,
She's yours, she's mine
And called ... (Earth)
our planet from space. Look how beautiful (white-green-blue) our planet Earth is.
Educator: And the last riddle ... Wonder bird, scarlet tail,
Flew into a flock of stars ... (Rocket)
Educator: Children, and what a holiday is coming soon (Cosmonautics Day).
Educator: That's right, guys, it is celebrated on April 12th.
Here we are for this holiday and we will make just such a flying rocket! (The teacher hangs a sample on the board). V.-Lilac space you already have, you need to make a rocket. It is better to choose white plasticine for the rocket, and it is better to make the porthole windows bright: red, pink. Plasticine should be pinched off in small pieces and smeared on the picture with the index finger. First, paint over the entire rocket body, then roll 2-3 brightly colored plasticine balls, flatten them between your palms to make a “pancake” and stick them on the rocket body one by one. These will be the windows. When the rocket with portholes is ready, then you can start sculpting the burning fuel ("rocket tail").
Educator: The painting lies on a plastic board, we work very carefully, at the end of the lesson we clean the stacks and the board paper napkin, washing hands with soap.
Children's work.
Physical minutes:
One or two, stop rocket
Three-four, take off soon
To fly to the sun
Astronauts need a year.
But dear, we are not afraid
After all, each of us is an athlete,
Flying over the earth
We say hello to her.
In the course of the work of children, the teacher gives children who have cold hands, plastic bottle with warm water. It also helps children who find it difficult to cope with the task.
At the end of the lesson, children gradually bring and lay out their work on the prepared table and put their places in order. The teacher praises children for bright and interesting work... And to children who did not have time to finish their work, he says that they will finish their work in another free time.
Educator: Flies in the cosmic distance
Steel ship around the Earth.
And even though its windows are small,
Everything is visible in them at a glance:
Steppe expanse, sea surf,
Or maybe you and me!
("The ship is flying" V. Orlov)
The first person to conquer space was the Soviet cosmonaut Yuri Gagarin.
Summary of a modeling lesson on the topic "Fish in an aquarium". Teamwork.
Purpose- Formation of ideas about marine life
Tasks:
Clarify and expand children's knowledge about the underwater world, about the diversity of their inhabitants.
Learn to create an expressive and interesting story using unconventional technique performance of work - drawing with plasticine.
To improve technical and visual skills, abilities. Use various natural material (watermelon, pumpkin seeds, stones, shells, etc.)
- Develop children's creativity.
Material for the lesson:
Blue or light blue cardboard, a set of plasticine, watermelon, pumpkin seeds, stones, shells, stacks, hand napkins
Course of the lesson:
The teacher proposes to approach the aquarium (artificial) and gives the opportunity to observe the inhabitants of the aquarium.
Educator: Tell me, children, what interesting things can you see in the aquarium?
Children: Different fish.
Educator: That's right, an aquarium is a whole underwater world. Just as we cannot live without air, fish cannot live without water, this is their home. At the bottom there are many multi-colored pebbles, shells, there are also underwater plants. Who knows what they are called?
Children: Algae.
Educator: Yes, it's algae. Some fish feed on them, and underwater plants also saturate the water with oxygen, which is so necessary for the fish. Listen to the poem about fish:
There is a transparent miracle - the house
Day and night fish in it
Instead of air - water
Fish cannot live without it.
There are shells and snails
And plants, like threads,
From the sand they grow
They are called algae.
The fish swim in a circle
They smile at each other.
Fish are looking through glass
They are comfortable and warm.
After all, the aquarium is marine
For small fish - home
Educator:Guys, where else can fish live?
Children: In the river…
Educator: Yes, fish also live in rivers, seas and oceans.
Educator: Let's play with our fingers, they will turn into fish.
Finger gymnastics.
The fish swam in the water
Back and forth
Up and down
Then close, open
They will bury themselves in the sand.
Educator: Let's draw some fish!
Children: Let's!
Children sit down at tables.
Educator: Guys, look, what does the fish have?
Children: Body, fins, tail.
Educator: Children, how are we going to draw fish?
Children: Plasticine.
Educator: Let's first draw with a simple pencil the outlines of the fish, an oval body, triangular fins and a tail, outline the bottom zone in the reservoir at the bottom of the cardboard with a line, draw algae.
Children's work.
Educator: Guys, what color will we draw the body of the fish?
Children: Yellow.
Educator: Let's get started, take the yellow plasticine and fill the entire body of the fish, smearing it with a thin layer up to the borders of the drawn outline.
Educator: What color will we draw the tail and fins?
Children: Red.
Children's work.
Educator: Guys, what else have we not drawn on the fish?
Children: Eyes, mouth.
Educator: Children, fish still have scales, let's lay them out with watermelon and pumpkin seeds. Did you know that the scales protect the soft body of the fish from damage: from sharp pebbles, shells, from the teeth of predators.
Children…
Children's work.
Educator: It remains to arrange the bottom of the reservoir. What do we need for this?
Children: Pebbles, shells ...
Educator: That's right, but first, let's take the brown plasticine and spread it with a thin layer on the bottom of the cardboard. It will be sand. And then put pebbles, shells (beans) on the sand
Children's work.
Educator: Guys, what did we forget to blind?
Children: Seaweed.
Educator: We take green plasticine and roll out thin sausages, lay out the seaweed. The thinner your sausages, the more beautiful the algae will be.
Educator: What wonderful fish we have. Tired, let's swim on the river ...
Phys. minute:
We are swimming along a warm river (swimming movements with handles)
Water is quietly splashing.
In the sky, clouds are like sheep, (stretching, hands up and to the sides)
Scattered in all directions.
We get out of the river, (walking in place)
To dry off, let's take a walk.
And now take a deep breath, and sit on the sand (sit down).
Educator: Guys, today you tried very hard, you got such wonderful drawings that you can give as a gift to your loved ones.
Lesson summary for sculpting on the theme "Crafts for Victory Day" in the technique of plasticinography.
Tasks:
Develop individual creative skills in the manufacture of crafts from plasticine;
Develop imagination and fantasy, fine motor skills of hands;
Develop the ability to work in groups;
To educate independence, accuracy in the manufacture of crafts using the plasticinography technique;
To instill in children a sense of pride in their people, respect for the veterans of the Great Patriotic War.
Materials and tools : disc, plasticine, plasticine board
Course of the lesson:
Educator: - What date, in May, will the whole country celebrate?
Children: - Victory Day over the Nazis.
Educator: - What date is this holiday?
Educator: - How is this holiday celebrated?
Children: - People go to the parade, with flowers and wreaths, to pay tribute to the fallen heroes.
Educator: What are the feelings of people on this day?
Children: - A sense of pride and joy, delight for our Motherland, sadness and sadness for those who laid down their heads in that terrible war, a sense of gratitude to veterans for their victory over the Nazis.
(Children read poetry.)
Educator: Here, guys, such a difficult war was for our people. Those who fought many years ago are still alive today. But they are already very old. They are called veterans. On Victory Day, they put on all their military awards, get together to remember the war years A, what do you think is customary to do on a holiday (Children's answers: congratulate, give gifts, flowers, cards, visit) I propose to make a postcard in honor of the holiday and decorate our group with it. (work at tables)
Physical education.
We got up straight, guys,
They walked like soldiers.
Lean to the left, to the right
Stretch on your toes.
One is a jump
Two is a jump
Have you rested, friend?
Wave your brushes together
We need to draw now.
But, before starting work, let's say these words:
"I will sit up straight, I will not bend, I will take up the work."
Well done boys!
Take a look at my postcard sample. What's on it? (children's answer). What do you think my card is painted with? (children's answer). What colors are used? (children's answer).
Before you are disks with a star pattern, we must fill all the contours with flagella for the star contour. Somewhere you can apply the technique of smearing and crushing.
We take plasticine of the desired color and knead it (heated plasticine fits better on paper). Laying out the star (layered application technique). To do this, roll out small balls of red plasticine.
Let's get down to St. George's ribbon. We take plasticine of black and orange colors and roll long strands (sausages) from them. Three plaits are black and two are orange. Now lay out in the form of a curved line (wave) and alternate the black and orange stripes.
We roll out the green “stems and leaves” of different thickness and length (using the sausage technique) and roll the balls.
We put them on the drawing in accordance with the contour.
Draw patterns on the petals in a stack.
And finally, the number nine. It must also be made from a long and thin black flagellum.
Educator: Guys, someone will spend the holiday with their family, remembering their relatives and friends who had a chance to meet with the War. Many of you and your parents will go to the parade, if you see a veteran on May 9, then go up and congratulate him on the holiday and say, “Thank you! "For the fact that he protected our country from enemies. Veterans will be pleased that we all remember that difficult victory.
The result of the lesson is an analysis of your work in a team.
Guys, I suggest you hang our big greeting card (poster) in the group. Did you like making a poster using plasticine? What elements did you like to stick around the most? Do you think this technique is still useful to you? Where? You are all great today!
Summary of a snow molding class on the street on the topic« Snow figures on the site "
Purpose - Consolidation in children of knowledge about the signs of winter; knowledge about snow, ideas about winter fun.
Tasks:
Provide children with a full-fledged active rest on a winter walk and improve the health of children;
Help children experience the joy of cooperation;
Learn to perform the necessary labor actions, getting the result;
Teach children to work collectively, the desire to provide mutual assistance to each other; respect for nature.
Preliminary work:
Watching snowfall, making figures from snow, and playing with snow for children. Viewing a filmstrip: "Snow Maiden". Memorizing poems about snow.
The teacher needs to explain to the children the benefits of labor, how much it is needed and important for the team (to clear the area of \u200b\u200bsnow, build snow figures so that it is convenient and joyful for children to play on a playground cleared of snow and decorated).
Dictionary activation: loose, sticky, moist, crumbly.
Observation: Snow properties in different conditions.
Reading poems: K.I. Chukovsky "About the Christmas tree", Sergei Mikhalkov "White Poems".
Inventory: Wooden shovels, brooms, sledges with a box for transporting snow.
The course of the lesson.
Educator . Look how beautiful it is today! How much snow has covered around, the whole earth is covered with a snow blanket. What is this snow like? (white, fluffy, soft, silvery) Here's a poem about winter.
Child. Cold beauty
Children really like
Teaches them how to make snowballs
Gives sledges and skates,
Friends with blizzards and snowstorms,
And it leaves only in the spring.
Educator. What can you do with snow? (children's answers) That's right, you can play snowballs, make a snowman, build a snow fort. But first, you and I must find out what kind of snow and whether it is possible to sculpt and build from it. To do this, take your shovels, collect snow in them and throw it up. What happened to the snow - did it fall in a lump or was it scattered in a light cloud? (children's answers) That's right, the snow flew into a light cloud. This means that it is free-flowing, you cannot mold and build from it.
Nursery:
Fall, fall
White snow!
Please, please
Everybody everywhere!
Fall fall
To the village,
Goose
Wing.
White field
Cover -
Will be in the summer
Loaf!
But we need to put things in order on the site. What do we need to do for this? (children's answers) That's right, we can shovel snow into large piles, and when it gets warmer, we can mold a snowman, a bunny or a snow fortress out of the snow. And in which area is it more convenient and pleasant to play, on a snowy or cleared area? (on cleared) Tell me, how can we clear the snow on the site, what do we need for this? (paddles, sledges with a box for transporting snow)
Quiet - quiet, it's snowing
White snow, shaggy,
We will clear the snow and ice
A shovel in the yard. (M. Poznanskaya)
In order for us to quickly cope with the work, it is necessary to divide into several groups. The first will shovel snow into small heaps; the second is to load snow on the sleds and transport them to the place where we will build, for example, a fortress.
Also, look, we need to fix our shafts and those buildings that we made earlier. What do we need to shake the snow off the figures? (brooms) That's right, Anya and Lera will sweep the snow off our snow figures with brooms, and the third group will fix the snow banks.
In order to quickly cope with work and play in the cleared area, we need to work quickly and in a coordinated manner (amicably). Everyone should do their job so that it doesn't have to be redone. (performance)
Outdoor games: "Two frosts", "Snow circles".
In the process of labor, the educator directs the efforts of each child to achieve the set goal. Pays special attention to children who find it difficult to complete the task. The teacher should teach the children to help each other with advice, show, but not do the work for another. The teacher coordinates the work between groups. If some group is late, then it is necessary to address the children who have completed their work: "You are great, you have already finished your work, I know you will not refuse to help your comrades." That is, in the process of joint work, the educator should carefully look at the relationships that develop between children, regulate the misunderstandings that arise, and encourage the manifestation of partnership and responsibility.
If the snow is wet during a walk, then children can be offered to mold decorations for shafts, for example, fungi, from the collected snow. This requires basins and buckets.
Educator . Well done, work done. Tell me, could one person do this job quickly? (children's answers) It's more interesting and faster for everyone to work together, everyone is trying, helping each other. We need to help each other, then there will be positive results of work. Look, we removed the site, decorated the ramparts, made snow structures, and now you can play.
Results: constructions "Well" for throwing lumps of snow, "Cave" for climbing through a tunnel in a cave.
In the next lesson, painting buildings with paints or sticking around with ready-made, pre-frozen colored ice figures.
Lecture notes on modeling for children of the middle group "Dishes for dolls"
Purpose - formation of ideas about the kitchen service.
Tasks:
Teach children to sculpt dishes;
Practice modeling techniques;
Arouse interest in teamwork to create a tea set for dolls. Activate the dictionary on the topic of dishes (sugar bowl, teapot, cups, saucers, candy bowl, vases for jam);
Develop fine motor skills, eye;
To foster activity, independence and accuracy in work.
Equipment. Doll dishes, plasticine, modeling board, stacks, felt-tip pen caps.
Preliminary work ... Examination of tea sets at home, illustration. D / And "Pick up a pair", "What's missing."
The course of the lesson.
Reading a poem by V. Shipunova "Tea Party".
Like our Dunechka
Cups and saucers
Like our Lyusenka
Babies are asking for tea:
- Welcome -
Come to visit.
Come to visit.
Come for cookies
It's just a gourmet -
Visit the dolls on their birthday!
Game situation.
Guys, look, a bunny came to us for help, he told me that the dolls and their friends want to arrange a holiday (a birthday, but they don't have enough dishes. Let's help the toys with you - we blind tea ware for them.
Let's go with you to our workshop. Guys, look, I have a service on my table. Tell me what utensils are included in the tea set. (Children call: teapot, sugar bowl, cups, saucers, vase, candy bowl, to remind that all items in the service are decorated in the same way - with polka dots, a flower, a box or something else. Children remember the tea sets they saw at home ...
Physical education.
We start exercising, standing in a circle,
We knead our hands, Jerks with our hands.
Stretch the back, shoulders Turns to the right, left.
To make it easier for us to sit.
We jump together, jump-jump! Jumping in place.
Who will get the ceiling?
Now walking is in place. Walking.
Clap loudly all together. Claps.
We sat down at the tables again,
We get down to business.
Then clarify the techniques for sculpting a saucer and a cup (roll out the ball, flatten it into a cake, smooth it out, level the sides, make a depression with your index finger or a stack, pull it out with your fingers, turning the products in a circle).
Divide the children into 2-3 groups to get 2-3 sets for six people (each group will sculpt items for one set). Explain that every child blinds a tea pair - (a cup and a saucer). At the same time, the children of each group agree among themselves what color the dishes will be and what pattern they will be decorated with.
And before work, we will stretch our fingers.
Finger gymnastics
"Knock-Knock".
Fingers came to visit
Knock, knock, knock, knocked on the door. Children are tapping on the table
Only the door was not opened for them: with the pads of all fingers
They thought there was a terrible beast. at the same time.
The guys start to work, they can embody any ideas. Offer to show the children some techniques for decorating tea cups, pronouncing all the actions ("with a strip" - we roll out a long flagellum and spread it along the rim - straight or in a wave).
Poem:
Here, with PLATES patterns,
A CUP with a SAUER on a napkin.
And of course it is no coincidence
A KETTLE is smoking on the stove -
I will drink tea for the dolls,
I'll tell you about the DISHES.
Final part.
At the end of the sculpting, put all the work on the table and, together with the bunny, carefully examine them, draw the attention of the children to a more accurate reproduction of the shape of the dishes, to the accuracy of work. Emphasize the variety of products, and present them to dolls for their birthday.
Lesson in the middle group. Modeling "Duck"
Purpose: teach children to sculpt an object consisting of several parts.Tasks:
1. To consolidate the sculpting techniques: separate parts from a whole piece and observe their size when sculpting, roll the dough between the palms, connect the parts, pressing them tightly to each other, exercise in using the technique of pinching, pulling;
2. Develop fine motor skills of the fingers.
3. To cultivate the ability to work in a team causing a positive emotional response to the overall result.
Materials and equipment: salty dough; boards; napkins; for each child); lake is a mirror; duck caps for each child; toys - poultry; musical accompaniment; for the encouragement of children marmalade "Worms".
The course of the lesson.
Educator: Hello guys!Children: Hello!
(The voices of domestic birds are heard).
Educator: I was just about to feed my poultry. Will you help me?
Children: Yes
Riddles
Coughs, cries, calls the children,
Gathers everyone under the wing.
Children: Chicken
Educator: well done, guess another riddle:
Red paws, pinching the heels,
Run without looking back!
Children: goose!
Educator: and you guessed this riddle! Well, now you just can't guess:
She walks in the rain
She loves to pinch weed!
“Quack! "Shouts,
This is all a joke
Well, of course it is ...
Children: Duck!
Educator: Well done guys, and here's another riddle.
Amazing baby!
Just got out of the diaper
Can swim and dive
Like his own mother.
Children: Duckling!
Educator: Well done! So you guessed it. This is a duck and ducklings. They are not in the yard, they must have gone to the lake. Let's go and look for them.
The teacher and the children come to the table on which the lake is decorated. They surround him from all sides. One duck swims on the lake).
Educator: Look, guys, the duck is swimming alone, apparently the kids are hiding in the grass. Mom's duck became lonely, she began to call them. “Quack-quack-quack! ", And the ducklings do not respond. Mom duck asks you to help find the ducklings. Let's help her! How can we help her, guys?
Children: ... you can blind ...
Educator: of course, you can blind ducklings! But first, let's play a little with you.
The ducks went out to the meadow, (we walk like ducklings) -
Quack-Quack-Quack!
A cheerful beetle flew by -
Zhzhzhzhzhzhzh! (we wave our arms - wings).
Geese arch their necks -
Ga-Ga-Ga (circular rotation of the neck).
The feathers are straightened by their beak (turns of the body to the right and left).
The wind shook the branches (we swing our hands up,
The ball also growled -
Rrrrr (hands on the belt, bending forward, looking in front of you).
Reeds whispered in the water -
Shhhhhhhh (put your hands up and reach out,
And again the silence came -
Shshshshshshh ... (sat down).
Educator: Well done! And now sit down at the tables, we have to help the duck mom.
Educator: Look, children, what parts does the duck consist of?
Children: Head, torso. The head is smaller, the body is larger. The head is round and the body is oval.
Educator: What do you think, what is it?
Children: Beak, tail.
Educator: Well done! First, you need to divide the dough into two parts. One piece of dough, which is larger, will be the torso; a smaller piece is a head. In order for us to sculpt the body of a duck, we need to take a piece of plasticine, which is larger, and roll it into an oval in our palms. Then we also sculpt the head, only with a ball. Next, we connect these two parts, pressing them tightly against each other. But very carefully so that the shape does not break. Then we, guys, pinch a beak on the duck's head and pull it a little, and on the body, where the tail should be, we pull it out. See how I do it.
Our duck is almost ready. He's missing a peephole and what?
Children: Wings.
Educator: look, you have cereals in your plate (what kind of cereal) - buckwheat, make duck eyes out of it. Carefully! Where the eyes should be, press in the rump.
(Music sounds, children start to class).
Educator: Our duck in the pond is looking forward to its ducklings!
(Providing individual assistance to children)
(The children have finished their work).
Educator: Now, guys, let's go and put all the ducklings on the lake.
Our duck is one, but there are many ducklings! Come on guys, let's count them whether they all returned to mom!
Children count: 1; 2; 3; 4; 5; 6; 7; 8; 9; 10.
What fellows you are, you did a great job! Look how happy the mother duck was! And the ducklings are also happy, they returned to their mother! Everyone is having fun, and so are we!
Educator: So that our guests also have good mood, let's dance for them with our duck and ducklings. Everyone, please, stand around the lake, and I will put on you duckling caps. Now listen to music and repeat all movements behind me.
(Music sounds. Children dance the dance of little ducklings)
Educator: What good fellows you are! I and the duck thank you for a wonderful dance. And the duck also wants to thank you for returning the kids to her! She gave you a treat. Now let's not bother our duck with the ducklings, let's go play.
It is difficult to overestimate the importance of modeling in development fine motor skills children. it best tool for the development of fingers, which in turn contributes to the development of the child's speech. As for modeling lessons in the middle group, compared with more early age they are already beginning to be more cognitive in nature, are closely related to the study of the surrounding world and other species artistic activities (drawing, applique). In addition, children develop an aesthetic perception of the image, a sense of proportion and symmetry.
Features of the organization of modeling lessons in the middle group of a preschool educational institution
Actual varieties of modeling
Children 4–5 years old find it easier to work with plasticine, their strengthened muscles allow them to easily tear off and knead the material. Although difficulties remain with sculpting small parts, connecting parts of an object to each other (without flattening), the crafts are already quite similar to real objects, have certain proportions. With each lesson, the skills of preschoolers improve.
The creation of a fish refers to object sculpting. Preschoolers generally love to sculpt animals and people - objects with which they can later play (and not just admire). Although, it should be noted, the image of objects of plant form is easier for them.
Since the pupils of the middle group do not yet have a clear idea of \u200b\u200bthe structure of the body of a living being, the task of the educator is to teach children to display key features the object and its vivid signs, for example, in a fish it is an elongated body, a pointed head, a curly tail and fins.
In addition to traditional modeling with its volumetric forms, in the middle group it is already possible to acquaint children with a bas-relief - modeling on a plane. This is especially true if the teacher organizes teamwork "Aquarium" (a lid from a cardboard box can play the role of an aquarium). In this case, the embossed figures of fish will be attached to the surface, protruding by half or more (recall that the bas-relief has varieties - the bas-relief itself and the high-relief).
In addition, children 4–5 years old can already be introduced to counter-relief modeling, when the drawing is cut through in plasticine, occasionally including its elements in a traditional lesson.
Modeling methods
When modeling such an object of wildlife as a fish, preschoolers of the middle group can use different ways sculpting. Of course, babies are most easily given a constructive method, when an object is formed from separate parts (head, body, tail, fins, eyes, mouth). The child mentally thinks over the image, determines what parts it consists of, and starts work. Typically, the process begins by creating the largest part (torso). It should be noted that with a constructive method of sculpting, pupils of the middle group do not very well convey proportions and difficulties arise with the connection of elements with each other. By the end of the year, these skills are being improved: the number of details increases, their elaboration and connection becomes more thorough.
More difficult for children given age group sculptural method (it is also called plastic). This is sculpting an object from a single piece of plasticine. This requires more precise movements, a good eye and a clear idea of \u200b\u200bthe desired shape. If the guys have to sculpt a fish in this way, it would be good to first draw it - this will clarify the shape, proportions, and features of the transition from one part of the body to another.
A piece of plasticine is initially given a certain shape. If it is a fish, then you need to make an oval. Having outlined the key shape of the animal, it is necessary to form its parts by pulling and flattening (head, tail, fins). After the main shapes have been sculpted, you can proceed to working out more apt details.
It is good to show to preschoolers two fish, fashioned in a constructive and plastic way, and show their differences. The teacher must demonstrate modeling techniques in front of children, constantly commenting on their actions.
It should be noted that in the classroom in the middle group, one of the indicated methods of sculpting in its pure form is rarely used. It is much more common to add one method to another - the so-called combined method. As a rule, the largest parts are sculpted, while the small ones are molded separately and attached to the main form. With normal development, children to preparatory group they themselves come to this method as the most accessible and universal.
Techniques
As you know, there are many sculpting techniques. However, in the middle group, when creating an image of a fish, the following will be relevant:
Rolling - a technique due to which spherical objects are created different shapes... At the same time, the child's hands make a circular sequential clockwise movement, with the left hand in a slightly slower pace.
Then the shape of the ball is transformed into an oval: for this you need it slightly stretch out on both sides.
Since the body of the fish is slightly flattened, the oval is slightly flattens... This technique is carried out by slightly squeezing the oval with your hands on both sides. At the same time, efforts should be minimal, otherwise we will get a cake as a result.
To shape the mouth of the fish, we use the technique pinching - a small part of the plasticine is squeezed with three fingers.
Through procrastination and flattening the fish has a beautiful tail. To make it look especially impressive, you need to cut it in half a little with a stack. In the same way, we form the fins.
If children mold a fish in a constructive way, then when attaching parts to each other, they use the technique anchoring, in which two pieces of plasticine move towards each other with pressing and aligning the bonding points.
The independence of children 4-5 years old when choosing the color of plasticine, using a stack
Pupils of the middle group can already show a certain independence in modeling lessons. So, according to the concept of the lesson, they choose the color of the plasticine. If the modeling of the "gold" fish is supposed, then it will, of course, be yellow, which can be decorated with elements of a different shade. If the children collectively design an aquarium, the teacher advises the children to make colorful fish - and then they choose a variety of colors.
With preliminary training and guidance of the teacher, preschoolers 4-5 years old in the process of modeling actively use the stack during productive activity. Applied to the Fish theme, this tool can be used to beautifully draw scales or shape the tail and fins. With a stack you can "draw" the mouth and eyes of the fish.
Theme variations: individual and collective compositions
Traditionally, the modeling of a fish in the middle group is carried out in the first half of the year (November), later the guys draw an aquarium composition. In general, the task of such a lesson ("Different fish") is to teach preschoolers to sculpt fish of the same shape, but differing in proportions. In the course of such activities, children are reinforced with modeling techniques that they have learned earlier.
However, different interpretations of this lesson are possible. You can designate its theme as “ gold fish”, Having previously told the children, for example, the well-known fairy tale of A.S. Pushkin. Such a craft will be slightly different from traditional fish: firstly, its unusual colors, and secondly, fabulous magical details (crown on the head, magic wand, etc.).
Children of middle school age are already able to understand the relationship between objects and objects, it is quite possible to introduce plot modeling. For example, to offer a collective composition "Aquarium". Such an occupation, of course, will require preliminary preparation... The teacher prepares the base in advance - it can be a real empty aquarium or some other glass or plastic container of the required size. You can suggest 2-3 small aquariums, dividing the children into subgroups.
There is a possibility of such a modeling lesson as "House for a Fish", where each child makes his own aquarium. In such a lesson, in addition to plasticine, children can be offered cardboard (cut by the teacher into squares or rectangles of the required size - the walls of the aquarium), which the children will fasten with plasticine. One side of such a house should be made transparent by offering pieces of plastic to preschoolers. Subsequently, the guys "populate" such an aquarium with plasticine fish.
Appropriateness of using additional materials
Modeling fish opens up great opportunities for the use of additional, natural or waste material. For effective designation of scales, you can use cereals (rice, buckwheat, pearl barley) or seeds. If the guys create a fabulous fish, foil or finely chopped bright candy wrappers will be useful to decorate its body.
In addition, modeling in class can be successfully combined with applique: a plasticine fish can have a tail or fins made of colored cardboard.
Implementation of an individual approach within the theme
In the middle group, many children show an increased interest in modeling. Of course, such pupils should be encouraged by offering them more complex individual tasks. For example, if the child quickly and efficiently completed the task, the teacher may offer him to sculpt another fish, but only of a different shape, color and size. Another option is to decorate your fish, for example, using a cap from a felt-tip pen to make beautiful drawing scales or make it brighter with waste material.
Motivating start options
Like any productive activity, sculpting should begin with a motivating moment. Most often, a fairy-tale character or just a toy-fish comes to visit the children, who talks to them and asks to solve her problem. For example, a goldfish is bored to swim in the sea, because she is one so unusual, and she so wants to have friends and girlfriends. Some other sea creature may also appear in front of the guys - it may even be the Little Mermaid doll, popular among girls, who has no one to play with. There are many options here, it all depends on the teacher's imagination.
The rubber fish that "comes to visit" preschoolers
A fairy-tale character can be played at a lesson on modeling a fish
To lead preschoolers to create a vivid image, an exhibition of toy fish can be organized before class. Ideal if in a group or in a living corner in kindergarten there is a real aquarium with fish.
The best option is your own aquarium in a group room
An alternative to a real aquarium - a layout created by the educator
In the developing environment of the group, there should be an album with illustrations of river and sea fish, which children can take for viewing at any time.
The modeling of fish should be preceded by reading fairy tales, stories and poems on this topic. These may be fragments of the work of A.S. Pushkin's "The Tale of the Fisherman and the Fish". Their poems include the following:
E. Chepovetsky
In a quiet river
In a quiet river at the pier
The fish met the fish:
- Hello!
- Hello!
- How are you?
- I was fishing,
I took the fisherman's bit
Uncle Petya is an eccentric.
- Where is your fisherman?
Got you?
- No, he's gone, sly!
Lost!Y. Mogutin
Ruffs
Over the rivulet
In silence
The reeds rustle.
And in the water
Near the reeds
Six cocky ruffs.
Do not ruffle, you ruffs,
Better hide in the reeds.
You ruff babies
The pike is waiting by the reeds.V. Orlov
Goldfish
Fish in a jar
Pour semolina.
The fish burn like gold.
Me from the semolina early
They cook porridge and insist
That I am from that porridge
I will also be gold.E. Stewart
Pond
The pond slumbers at sunset.
Circles float on the water -
These are small fish
Played out here and there.
Anything to splash them with water,
Scales for a moment flash, -
Fish jump into the air
It's all the same that we dive.L. Rashkovsky
Fish
The fins are led by fish
Clean water is muddied.
Have lunch -
thank
They never say.
So they live for centuries.
And wherever you look, -
Fish with only fins
Stir gratefully.
Why are these fish?
They have water in their mouth!
And they say thank you
They will never be able to.http://deti.ledibashkirii.ru/stixi-pro-rybok
On the eve of modeling, you can show the children cartoons on a marine theme. This is "In the blue sea, in white foam" (1984) or "Wow, a talking fish" (1983). They will surely interest the kids, and they will want to create marine life with their own hands.
Outdoor games also need to be brought to the marine theme - this is "Fisherman and fish", "The sea is worried once ...".
Summary of a lesson in modeling fish in the middle group
| Name of the author | Abstract title |
| Temereva L.M. | "Gold fish" Educational tasks: to learn to sculpt a fish from plasticine, to convey its characteristic features, to improve the techniques of pulling, flattening, to mark fish scales with the help of a stack and a felt-tip pen cap, to teach to observe the proportions between the parts. Developmental tasks: to clarify ideas about appearance, lifestyle, fish habits, develop imagination. Educational tasks: to cultivate perseverance, patience, the desire to discuss the results of their work. Integration educational areas : "Artistic creation", "Cognition", "Communication", "Socialization", "Health". Demo material: pictures of fish, seascapes, audio recording of the noise of the sea. Handout:plasticine, stacks, modeling boards. Course of the lesson: Relaxation moment: pleasant calm music sounds at the beginning of the lesson. Children stand holding hands in a circle. The teacher wishes everyone good morning and offers to transfer a particle of his warmth to each other. The teacher invites preschoolers to go to the land of Fantasy, where they can learn a lot of new and unusual things. The sound of the sea surf sounds - the children "find themselves" on the seashore. The teacher reports that a good sand prince lives in the land of Fantasy, who protects her from evil. He knows a lot of fairy tales, games, but will only play with those who follow his rules. Surprising moment - the Sand Prince doll appears, which informs the children that in his country one cannot fight, bite, or offend others. The character makes a riddle about the fish. I have wings, but I don't fly. I have eyes, but I don't look at the sky. There is a mouth, but I do not speak. I shine in a clean river, The back is silver. Who am I? (Children's answers) The teacher demonstrates to the children a toy fish (a fish is also offered to each child)., They examine it, specify the properties: color, size, body shape. Children with a teacher find out that it is a goldfish. In addition, they name other fish known to them (pike, perch, crucian carp, catfish, etc.). There is a conversation, why do fish need a tail, fins, do they have eyes, what is their body covered with, can a fish speak. Physical education "The sea is worried." The sand prince informs the children that there are fish that are edible for humans, and there are dangerous ones that can prick or shock. Independent work of children to calm music. The teacher guides preschoolers, gives advice. |
| Gorbenko N. | "Different fish" The lesson begins with a riddle about a fish. The teacher tells children about fish and dwells separately on those that live in the aquarium (goldfish, scalar fish, parrot fish, etc.). An aquarium is a whole world, there are pebbles, shells, underwater plants. Then there is a physical training session "Clouds in the blue sky ...". Preschoolers sit at tables, each has a picture of a fish, they examine them and discuss with the teacher the color, structure, purpose of body parts. |
| Markova N.V. | "Fish and algae in the underwater world" (collective composition) One of the tasks of the lesson is to decorate fish figurines with moldings and cut-out patterns (counter-relief). A feature of the lesson is that the teacher prepares in advance the basis for the composition - an aquarium (as an alternative - 3-4 transparent jars or glasses). In addition, to create crafts, you will need cocktail straws, toothpicks, caps from pens or felt-tip pens. At the beginning of the lesson, the teacher conducts didactic game "What has changed": on the board, he puts several fish from geometric shapes, then asks the guys to close their eyes and changes some details. Preschoolers should guess what has changed. Another game "Make up a fish": an oval (the body of a fish) is placed on the board, tails and fins of different shapes can be applied to it. Then the teacher switches the children from a conventionally schematic image to an artistic one and demonstrates 2-3 fish that he sculpted in advance. The teacher explains the modeling techniques and invites the children to sculpt beautiful fish to fill the aquarium with them. Preschoolers sculpt fish in any way (constructive, plastic, or combined), and then decorate them to their liking: spots of flattened balls of plasticine of a different color, plasticine flagella, sparkles, seeds, cereals. The teacher also shows how you can decorate the craft with a stack or a cap of a felt-tip pen. For children who quickly coped with the task, the teacher advises to mold algae and pebbles for the aquarium, so that the fish can live comfortably. At the end of the lesson, the fish are placed in a common aquarium. Some of them are attached to the walls (slightly pressed), others are strung on cocktail tubes or toothpicks fixed to the bottom). |
Various options for crafts with comments and a description of the execution technique
Most of the fish (photos 1–6, 8) are made in a combined way: the head and body are molded from one large piece of plasticine, the rest of the elements (tail, fins, eyes) are attached separately.
The fish looks very impressive n photo 4 "Goldfish" - a beautiful long red tail, traced scale scales and bulging beady eyes.
Photo 5 "Aquarium with fishes" shows a bas-relief molding - the fishes are fixed to the surface, protruding about half. The original composition is complemented by pebbles, shells and algae.
Of interest is the "Magic Fish" craft (photo 7): the body is made of a twisted flagellum. The gradient coloring (transition of pink to lilac color) is interesting.
Photos 9 and 10 show volumetric aquariums... Marine inhabitants are attached to the walls of the cans or fixed in the center on special fasteners.
"Pretty little mouse"
Summary of a modeling lesson in the middle group
Educator: Saurskaya E.D.
Program tasks:
Develop children's interest in modeling
Improve the ability to fold plasticine in straight and circular movements, flatten, roll out
Learn to sculpt objects from several parts, placing the parts correctly, observing the proportions.
Learn to use the stack in work
Develop the ability to correlate objects by color
Encourage children to enjoy a similar image
Software content:
To teach children to convey the similarities and characteristic features of the mouse in modeling;
to consolidate the methods of creating an oval shape: rolling small balls and flattening them, rolling and attaching parts; cause children to enjoy the fact that a similar image is obtained, as well as the ability to admire their work and the work of comrades.
Equipment:
- A toy mouse, a modeling board, napkins, gray plasticine, bead eyes - for each child;
Preliminary work:
On the eve of the lesson, the teacher examines the pictures with the children where the mouse is drawn, talks about it. Children themselves determine what shape, color it is, remember where it lives, what it can eat. The teacher asks what fairy tales about the mouse the children know, leads them to highlight the characteristic properties of the animal: the mouse is small, fast, with sharp
Teeth and a long tail. Consideration of the drawings of mice obtained in the last lesson, examination of illustrations.
Course of the lesson:
Introductory part:
Remember guys who came to visit us in the last lesson? (cat)
That's right, cat. And what is the name of a cat's babies? (kittens)
That's right, kittens. Did you know that at night, when you go to bed, kittens do not sleep. There is even a poem about them. Here's a listen:
“What happened to the kittens?
Why are they awake?
Why was the buffet opened
you broke a new cup?
Dropped the drum
scratched the sofa?
Why did their paws fit into someone's slippers?
Have a bowl been poured with milk?
Did you wake up your cat mom?
Why did you break the book?
Because they catch the mouse! "
- You see how naughty these kittens are. Whom did they catch? (mouse).
- Right, mouse. But the mouse has its own house where it can hide from the cat.
-Let's play a game with you now, okay? (Yes)
(Game "Hide the mouse")
- Now I will give everyone a mouse (circle) and a house (squares of different colors)
- All mice have different houses.
- Artem, what color is your house? That's right, red.
- And you Galya, what color is the house? That's right, green.
- And now we need to close the door (squares) in the house so that the cat does not eat our mouse. If the house is red, then the door is red.
- If the house is green, then the door is green. Look where the door is the same as the house (children should close the square “house” with the door of the same color, choosing it among others). The game is played 2 - 3 times with a change of houses for children.
- Well done, guys, you hid your mice so well that not a single cat found them.
- Guys, I also have a mouse. She is small, lives in a burrow. (I take out a toy and show it to the children.)
- Here she is! My mouse has a nice and clean burrow, but it doesn't have a mirror. And she really wants to know what she looks like. Will you help my mouse? (Children's answers)
Main part:
{!LANG-946415f42e0860debc8ecc5ebb5d50aa!}
{!LANG-189b05d5774c3cafa83402ad0c7bcfdc!}
{!LANG-043f20dacccd052e24e23bc8ecfe3ef4!}
{!LANG-8e8001cda93a3c392f764fb761465c6e!}
{!LANG-8f30cb17c7b0805b974b9e1409a872a3!}
{!LANG-b99cb7a114f143f25a9574a65a7fbab8!}
{!LANG-962f774d76149aab59ac65fb92a8b0d0!}
{!LANG-6e4745515d1573c0ea33d663eb3704fa!}
{!LANG-6055b123db31745479d2f5b33b9a0914!}
{!LANG-013308ee2d9a710e86120f45ed93418a!}
{!LANG-bf6f76a3de46b89fd8b62c191474100a!}
{!LANG-b8fdd022543edd77f736c8c7a6fd0042!}
{!LANG-e1f39045cc0f6f3cdbaa8e574ad62279!}
{!LANG-09ac8daaba6ec88f23a728fc4eb54a1c!}
{!LANG-4020a63c6fd15f28123f4ddf4618982d!}
{!LANG-023290fc8b7c9b7591d28ab0838e0691!}
{!LANG-069010998ca547c5007491654beee11d!}
{!LANG-6df9ba8c61f10868727b8ea0dafb96d5!}
{!LANG-f19c91c3b073b9bf324b955e42dc5dea!}
{!LANG-6535a65750ac11fc9880fdd054bab835!}
{!LANG-8733c7b108c3f1d7cc54e3c40321970d!}
{!LANG-e0e034aa950f31167d5549ff9cb17b0f!}
{!LANG-b591a6db94df49c8a728ff6e1e561f93!}
{!LANG-73c530f2265fd22f444357b81ae8a622!}
{!LANG-a7ff5ac52f918c7480586d617d007fff!}
{!LANG-3a3cc6f625a686cf445e66f3c9deecca!}{!LANG-0b9a77c7815570d15859c0a56b5eecad!} ({!LANG-407903ba1a9016abe5cc026f209945ab!}) {!LANG-7d38d3270430ee255595ff91ff1a7d91!} {!LANG-dc2fc3bd291a5cce3b636ea80e17827e!}« {!LANG-be2cc39dc9aa2ffda9f0961b89ad64cb!}» . {!LANG-b5cfa1820ff53623f5ed7639658dd484!}.
{!LANG-c6c9758cf78df6ed61667439709d570b!}
purpose{!LANG-e7b45b197cdf9e3e4d885572cca9c176!}
{!LANG-85179979d0ed7f3c555cfb1a7172e8a6!}{!LANG-e8b3eca82b867ed22aaa5c12f5fa75cd!} {!LANG-118c3174e2fa720d1fde7781f1ea02c4!}{!LANG-ce45565736ad309ecc230b89b84b8965!} {!LANG-1673a336048306e5b09dbc63ce3216a5!}{!LANG-89555c79bbdc1a910cb6bdca6132757f!} {!LANG-93951788e7683c24805cdba56ab70541!}.
{!LANG-36dc648da3e23411bb29bc13babd8a87!} {!LANG-6f10f5029bc7f4db1a8fafc73e200afa!}{!LANG-5f3e212c2f53db16639f48d7a8a10a52!} {!LANG-14b53fe9f7fc3ebebe554b272023306c!}{!LANG-019a96bd82af866240d91e129276d06c!} {!LANG-9df46cd25501f03423b6e0c41dc832d0!}{!LANG-fcd82734a87c64a4bbc48b554e337ad7!}
{!LANG-912dea7076b2d2b096414a0a5bcc208d!}{!LANG-883b1b1a0ee115001a743092e7715b60!} {!LANG-1673a336048306e5b09dbc63ce3216a5!}{!LANG-4882e1d4cc94c5e14d9fcd11eab943fb!} {!LANG-57f53d8d4b63c146fbaf093f89aad9f1!}{!LANG-e4bba0d8e2fbe6799745672beb0d7195!} « {!LANG-be2cc39dc9aa2ffda9f0961b89ad64cb!}» .
Preliminary work:
{!LANG-8c213e09a2b2246fb74403a1cec27838!} {!LANG-f0ce2e6ec060040922884010b0bc4e60!}, {!LANG-99ad9846711140aef237e6e538558567!} {!LANG-57f53d8d4b63c146fbaf093f89aad9f1!}» ; {!LANG-0868f8151e21f56e42c08a2f82dc2dae!} {!LANG-4feaba22998a5a3f456cb36e43a5a305!}» {!LANG-d8618e125ff6143ad68d39cd287e686e!} {!LANG-57f53d8d4b63c146fbaf093f89aad9f1!}{!LANG-9d68f6349a2dbfd87ee451a7cedd294a!} {!LANG-57f53d8d4b63c146fbaf093f89aad9f1!}{!LANG-39729d21e9c57d1c138fd7461500c462!} {!LANG-1894907c3c22023e0349f7f623a21574!}.
{!LANG-8b4e941a290b05df221c2077f2404af5!}
Educator{!LANG-f62573dc4e284521861bc9e14fb40f7c!}
{!LANG-6a46a9af1680ace3bf01b0638115c43a!}
{!LANG-e6333731d98e67ca6ea552542085c681!}
{!LANG-41aafef015fc2f1bc851d2763acc883d!}
{!LANG-03f03c3cae901d78a75296424a862ab1!}
Children: {!LANG-be2cc39dc9aa2ffda9f0961b89ad64cb!}.
Educator{!LANG-51f052315671ed478afdfe82e8d16345!} {!LANG-299ca02061225e142f1c269a88fac0bd!}{!LANG-ac4dc716ca19fa095acac0c8436ff908!} {!LANG-57f53d8d4b63c146fbaf093f89aad9f1!}{!LANG-0724106d9fcb7e9c04752b3b5915872b!} {!LANG-5d1fde0b0bdff6edcb1cb7d48724a67c!}{!LANG-5d2d00018dbceeb3ce5570aedfad6b10!} {!LANG-be2cc39dc9aa2ffda9f0961b89ad64cb!}{!LANG-a0c60a6b614936a55be1af8e7ced427c!} {!LANG-89d7371a80f5da2db0cbe6296915142b!}. {!LANG-be2cc39dc9aa2ffda9f0961b89ad64cb!}{!LANG-5b00f4fd1b12177e837878b92c0a194b!} {!LANG-f8d2220a12f9c8f8fd1c79ac8fc8f600!}{!LANG-f89ae3e2de63bc3c123ae1d8b58d5216!} {!LANG-4feaba22998a5a3f456cb36e43a5a305!}{!LANG-fb5f9f2f6ba13eac17be0172ce5a8315!} {!LANG-d7ea5f5287d0ef44f4fd9acabeb4bff2!}{!LANG-f6ff690d00f52c51e60c76f1a639e54d!}
{!LANG-cfc5f0f8144105d68a4669062631f5cd!}{!LANG-872f763275adc26df7a8ca90048ae193!}
Children{!LANG-446c7694bbbfd001e51e61f5c7674c57!}
Educator{!LANG-c5fc7d669c2511d13095701b4c2d81f3!}
Children{!LANG-89138d0962146037006eecc35ca71a01!} {!LANG-dedd6c64168372ddd5348094519c0ed5!}.
Educator{!LANG-088eb98aa5e9210ba96cc5a0f0e87101!} {!LANG-335b99fabac79f6d48caeac034952d13!}{!LANG-80adfe3985f52414643127ac09da9bc8!}
{!LANG-ad87a623cd21010f6bf957d322a60853!}
{!LANG-99d7b928aa86a63a81499f022d07ba5b!}
{!LANG-b4bf0c45e856568d6844dc60331f2044!}
{!LANG-dfd43d65fc1e56ff41ed478ea2aca784!}
{!LANG-70ab42634efa4ad3f43a3bb705b80294!}
{!LANG-aed1cd1f4f061ec6c2a7f6073c39b1a6!}
Educator{!LANG-9a91adbca0c3da8f9d6fe4e3f8ce9fe2!} {!LANG-dedd6c64168372ddd5348094519c0ed5!}.
Children{!LANG-aac2e66fdbf4416c4261397bba061ca9!}
Educator{!LANG-84608ed4b7ef2bd268efc5b514e55042!}
Children{!LANG-aa5363db29728e5980546cb3c4115596!}
Educator{!LANG-fb2e4b9bdd678783a43fb36b742daa17!}
Children{!LANG-63e0c8e3d877a9427627e22ab80fda77!}
Educator{!LANG-a5ceff5118e45290e0213f9845c0854e!}
Children{!LANG-7f27f46ef6c3700a6b3ac878f37e9e62!}
Educator{!LANG-db783616b2ad019ba754485b57b1d514!} {!LANG-90249bb0a34eec9444c5c49d361434be!}{!LANG-a667164e6973a645a3717b5d4cdf86b3!} {!LANG-57f53d8d4b63c146fbaf093f89aad9f1!}{!LANG-53da283597440e96b90e2e49b14a6b88!}
Children{!LANG-fbf06690f992772ecd054305b3bf8e9c!}
Educator{!LANG-3761b448e5faa8b05ad22a46cddeaecc!}
Children{!LANG-da17d6fc879f35e439cae26954054b91!}
Educator{!LANG-db23a51c66fa75bc8478d692da02064b!}
Children{!LANG-18a964edaf17ff0bfd7c10b444a9c3e6!}
Educator{!LANG-59aab08ff37bf6b4292f1c12419e3939!}
Children{!LANG-08c32a11b98003a5a4c33cd23736bf7d!}
Educator{!LANG-216fabeb6640df9878e7342c64b62f19!}
Children{!LANG-902c4706008d444ed7a1fdc723ae55fa!}
Educator{!LANG-3f8a24dfdb808c8cdef72c4eec30e527!}
Children{!LANG-ebad6d83d856ba305fe6c8ca94156a40!}
Educator{!LANG-279af59ac525f7928fde1f063af4ab3c!} {!LANG-57f53d8d4b63c146fbaf093f89aad9f1!}{!LANG-62545435e0816c8396979c2786d437c4!}
Children{!LANG-fa4f5a0a218908a3fd949d43ff18ce65!}
Educator{!LANG-be053ef90e91bffbe497d9a58a503593!}
Children{!LANG-784d1d2069a51f77c41bb81a6c702536!}
Educator{!LANG-689eb48a2c402bca29a7aef3b740b6ec!} {!LANG-c7a532fbb108eeee134a567f342565ea!}
{!LANG-7cc41fa0c20da234d93c8979acaabf5b!}
{!LANG-cff77a7bec1212840b22136ddf6324ae!}:
{!LANG-4c78d6e97e0cadb198a04d9389f05fa4!} {!LANG-c714d1c7c1e59f9562884c7ab11404f2!}.
{!LANG-ade8ffb8396cc1e697fea8db125e3872!}
{!LANG-3625b97068a92ffdb6a56e8ab4fa6b4b!} {!LANG-f76c85408adae27de6b58184e6d50f7c!}{!LANG-a04bfcac3f4659ce9cecb84fd4d039b0!}
{!LANG-f76c85408adae27de6b58184e6d50f7c!}{!LANG-7718ad78c29c67ddc21d96e5efd2a2d5!}